Fuel Lid Lock Control Cable Assembly (For Rhd) -- Installation |
| 1. INSTALL FUEL LID LOCK CONTROL CABLE SUB-ASSEMBLY |
Connect the cable to the clamps shown in the illustration to install the cable.

| 2. INSTALL FUEL FILLER OPENING LID LOCK RETAINER |
Install the lock retainer and turn it clockwise as shown in the illustration.
 |
Install the cable and turn it clockwise as shown in the illustration.
 |
| 3. INSTALL FUEL LID LOCK OPEN LEVER SUB-ASSEMBLY |
Connect the fuel lid lock control cable to the fuel lid lock open lever.
 |
Attach the 2 claws to install the fuel lid lock open lever.
| 4. INSTALL FRONT QUARTER TRIM PANEL ASSEMBLY RH |
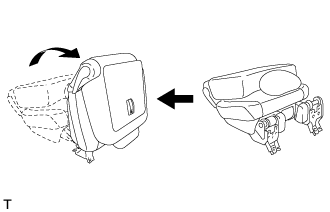 |
- HINT:
- When installing the front quarter trim panel, operate the reclining adjuster release handle and move the No. 1 rear seat to the position shown in the illustration.
w/ Rear No. 2 Seat, except Face to Face Seat Type:
w/o Rear Air Conditioning System:
Connect the rear seat lock control lever cable.w/ Rear Air Conditioning System:
Connect the thermistor connector and rear seat lock control lever cable.Attach the 16 clips and 2 claws to install the quarter trim panel.
Install the clip and bolt.
- Torque:
- 12 N*m{122 kgf*cm, 9 ft.*lbf}
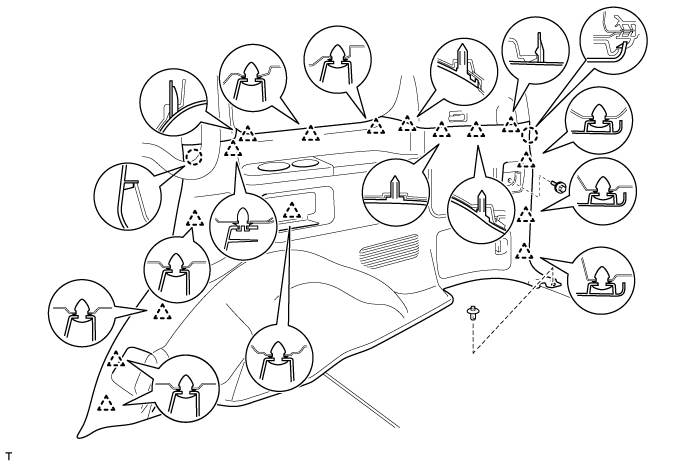
w/o Rear No. 2 Seat or w/ Rear No. 2 Seat, for Face to Face Seat Type:
Attach the 16 clips and 2 claws to install the quarter trim panel.
Install the clip.
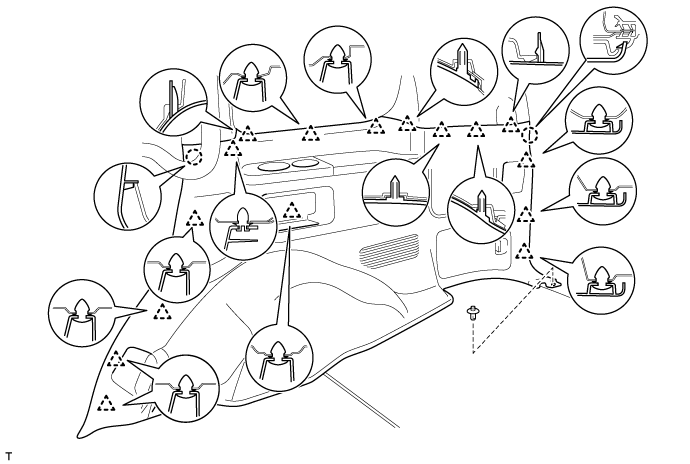
w/ Tonneau Cover:
Attach the 16 clips and 2 claws to install the quarter trim panel.
Install the screw and clip.
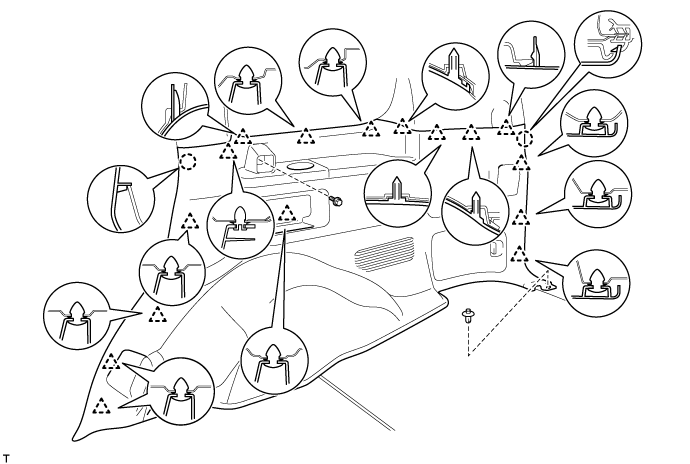
w/ Rear No. 2 Seat, except Face to Face Seat Type:
Install the rear No. 2 seat belt anchor with the bolt.
- Torque:
- 42 N*m{428 kgf*cm, 31 ft.*lbf}
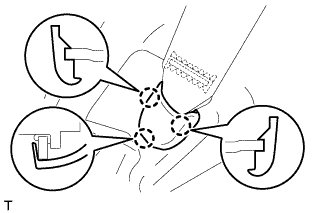
Attach the 3 claws to install the cover.

 |
Install the rear No. 1 seat belt anchor with the bolt.
- Torque:
- 42 N*m{428 kgf*cm, 31 ft.*lbf}
 |
Attach the 3 claws to install the cover.
 |
| 5. INSTALL NO. 1 REAR SEAT COVER BEZEL (w/ Rear No. 2 Seat) |
- HINT:
- Use the same procedures described for the rear No. 2 seat cover bezel.
| 6. INSTALL NO. 1 TONNEAU COVER HOLDER CAP (w/ Tonneau Cover) |
 |
- HINT:
- Use the same procedure to install the tonneau cover holder cap on the other side.
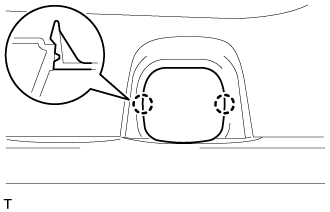
Attach the 2 claws to install the tonneau cover holder cap.
| 7. INSTALL REAR FLOOR MAT REAR SUPPORT PLATE |
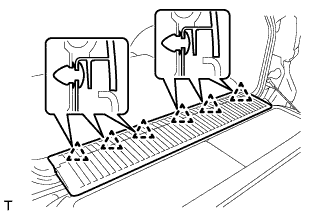 |
Attach the 6 clips to install the support plate.
| 8. INSTALL REAR DOOR SCUFF PLATE RH |
- HINT:
- Use the same procedures described for the LH side.
| 9. INSTALL REAR STEP COVER |
 |
- HINT:
- Use the same procedure to install the step cover on the other side.
Attach the 2 claws to install the step cover.
| 10. INSTALL FRONT DOOR SCUFF PLATE RH |
- HINT:
- Use the same procedures described for the LH side.
| 11. INSTALL COWL SIDE TRIM BOARD RH |
 |
Attach the 2 clips to install the cowl side trim board.
Install the cap nut.
| 12. INSTALL INSTRUMENT SIDE PANEL RH (w/o Airbag Cut Off Switch) |
 |
Attach the 6 claws to install the instrument side panel.
| 13. INSTALL INSTRUMENT SIDE PANEL RH (w/ Airbag Cut Off Switch) |
 |
Connect the connector.
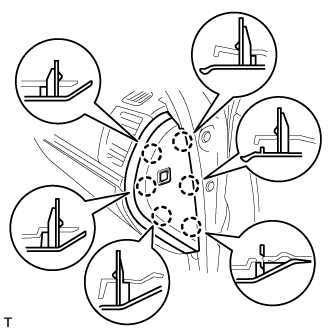
Attach the 6 claws to install the instrument side panel.
| 14. INSTALL TONNEAU COVER ASSEMBLY (w/ Tonneau Cover) |
Install the tonneau cover assembly.
| 15. CONNECT CABLE TO NEGATIVE BATTERY TERMINAL |
- NOTICE:
- When disconnecting the cable, some systems need to be initialized after the cable is reconnected (Click here).