Hood Lock Control Cable Assembly -- Removal |
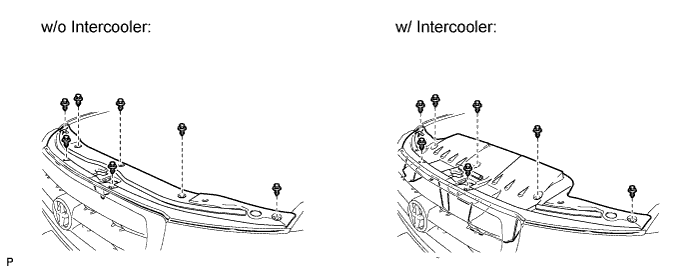
| 1. REMOVE UPPER RADIATOR SUPPORT SEAL |
Remove the 7 clips and radiator support seal.
| 2. REMOVE FRONT FENDER MAIN SEAL LH (for LHD) |
Using a screwdriver, detach the 3 clips and remove the fender main seal.
- HINT:
- Tape the screwdriver tip before use.
 |
| 3. REMOVE FRONT FENDER MAIN SEAL RH (for RHD) |
Using a screwdriver, detach the 3 clips and remove the fender main seal.
- HINT:
- Tape the screwdriver tip before use.
 |
| 4. REMOVE FRONT BUMPER WINCH COVER SUB-ASSEMBLY (w/ Winch) |
Detach the 2 claws.
 |
Detach the 3 guides and remove front bumper winch cover sub-assembly.
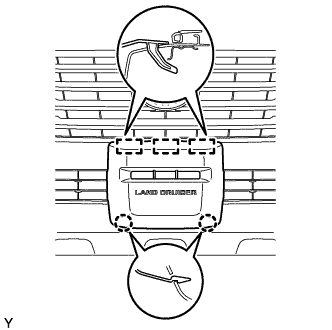
| 5. REMOVE RADIATOR GRILLE ASSEMBLY |
Put protective tape around the radiator grille assembly.
Text in Illustration *1 Protective Tape
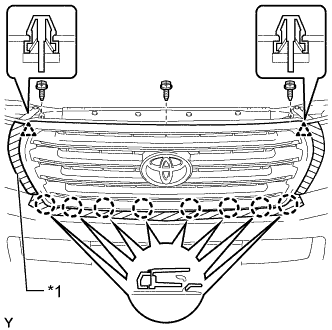 |
Remove the 3 screws.
Detach the 2 clips and 8 claws, and remove the radiator grille assembly.
w/ Wide View Front Monitor System:
Disconnect the connector.
| 6. REMOVE MILLIMETER WAVE RADAR SENSOR ASSEMBLY (w/ Dynamic Radar Cruise Control System) |
Disconnect the sensor connector.
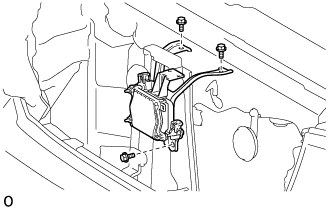 |
Remove the 3 bolts and sensor.
| 7. REMOVE HOOD LOCK CONTROL CABLE COVER |
Remove the 3 screws.
 |
Detach the claw and remove the cable cover.
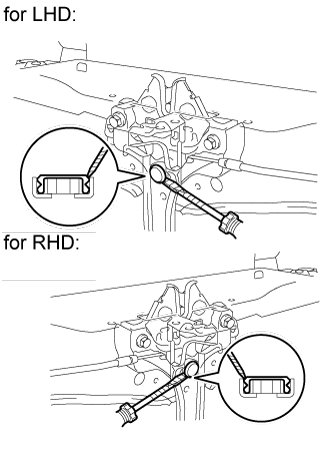
| 8. REMOVE HOOD LOCK NUT CAP |
Using a screwdriver, remove the hood lock nut cap as shown in the illustration.
- HINT:
- Tape the screwdriver tip before use.
 |
| 9. REMOVE HOOD LOCK ASSEMBLY |
Remove the 2 bolts and nut.
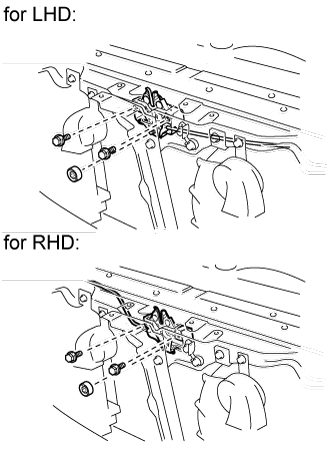 |
Remove the hood lock.
Disconnect the connector.
Disconnect the hood lock control cable.
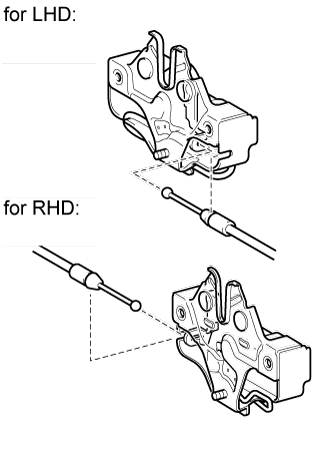 |
| 10. REMOVE HOOD LOCK CONTROL LEVER SUB-ASSEMBLY |
Detach the 2 claws.
 |
Disconnect the hood lock control cable and remove the hood lock lever.
| 11. REMOVE HOOD LOCK CONTROL CABLE ASSEMBLY (for LHD) |
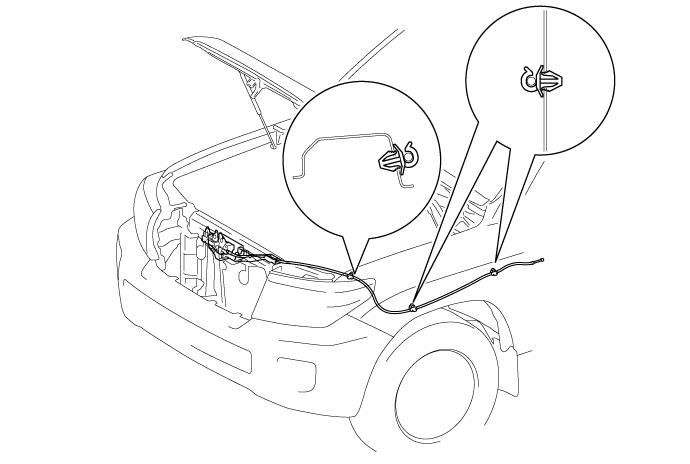
Using a screwdriver, disconnect the clamps shown in the illustration.
- HINT:
- Tape the screwdriver tip before use.
Pull the cable from the engine room and remove it.
| 12. REMOVE HOOD LOCK CONTROL CABLE ASSEMBLY (for RHD) |

Using a screwdriver, disconnect the clamps shown in the illustration.
- HINT:
- Tape the screwdriver tip before use.
Pull the cable from the engine room and remove it.