Front Console Box (W/ Cool Box) -- Reassembly |
- HINT:
- Use the same procedures for LHD and RHD vehicles.
- The procedures listed below are for LHD vehicles.
| 1. INSTALL NO. 2 COOLER EVAPORATOR SUB-ASSEMBLY |
Install the evaporator.
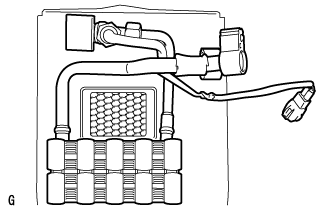 |
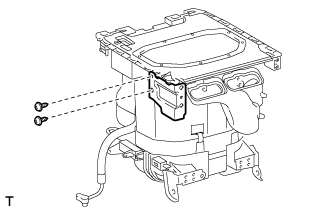
| 2. INSTALL NO. 1 COOLER BLOWER MOTOR SUB-ASSEMBLY |
Attach the 4 claws to install the blower motor.
 |
Install the 2 screws.
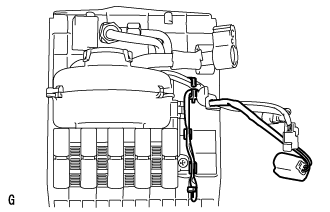
| 3. INSTALL NO. 3 COOLER THERMISTOR |
Install the thermistor.
 |
Install a new cool box insulator, as shown in the illustration.
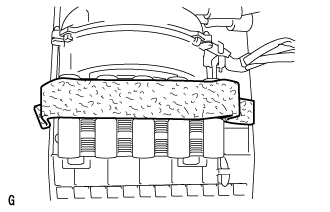 |
| 4. INSTALL UPPER COOLING UNIT CASE |
Attach the 2 hooks and close the case, as shown in the illustration.
 |
Install the cooling unit case.
 |
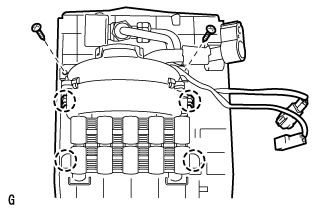
| 5. INSTALL LOWER COOLING UNIT CASE SUB-ASSEMBLY |
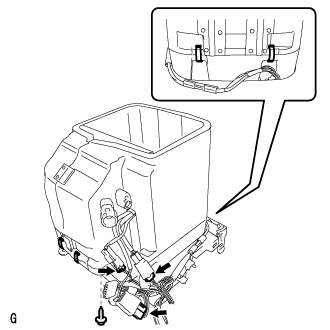 |
Install the lower cooling unit case with the 4 holding springs.
Connect the 3 connectors.
Install the screw.
| 6. INSTALL LIQUID HOSE |
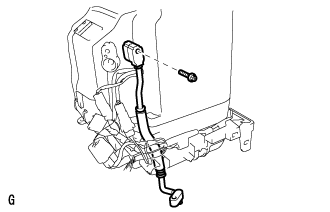 |
Sufficiently apply compressor oil to a new O-ring and the fitting surface of the cooler evaporator.
- Compressor oil:
- ND-OIL 8 or equivalent
Install the O-ring on the liquid hose.
Install the liquid hose to the evaporator with the bolt.
- Torque:
- 5.4 N*m{55 kgf*cm, 48 in.*lbf}
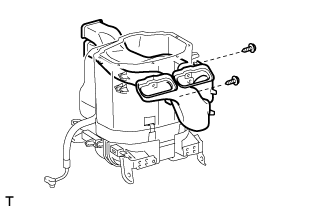
| 7. INSTALL COOLING UNIT CASE SUB-ASSEMBLY |
Install the air duct to the case with the 2 screws.
 |
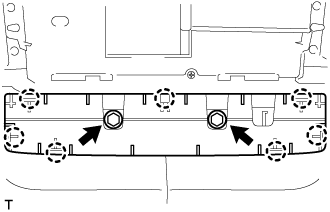
| 8. INSTALL COOLING BOX BASE |
Install the cooling box base with the 10 screws.
 |
| 9. INSTALL COOLING BOX BRACKET |
Install the bracket with the 2 screws.
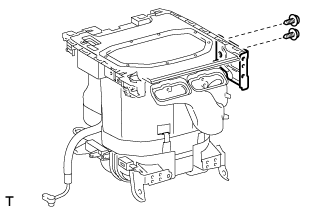 |
Install the mounting bracket with the 2 screws.
 |
| 10. INSTALL NO. 2 COOLING BOX BRACKET |
Install the bracket with the 2 screws.
 |
Install the mounting bracket with the 2 screws.
 |
| 11. INSTALL COOLER CONTROL SWITCH SUB-ASSEMBLY |
Connect the connector.
 |
Attach the 2 claws to install the switch.
| 12. INSTALL AIR CONDITIONING AMPLIFIER ASSEMBLY |
Install the amplifier with the screw.
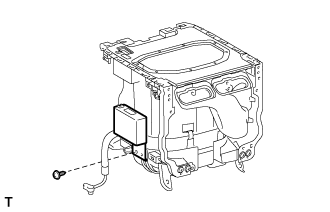 |
Connect the connector.
| 13. INSTALL COOLING BOX ASSEMBLY |
Attach the 10 claws to install the cooling box.
 |
Install the 4 screws.
| 14. INSTALL CONSOLE COMPARTMENT DOOR LOCK |
Install the door lock with the 2 screws.
 |
| 15. INSTALL CONSOLE COMPARTMENT DOOR HINGE SUB-ASSEMBLY |
Install the door hinge with the 4 screws.
 |
Attach the 12 claws to install the inner door.
 |
| 16. INSTALL CONSOLE COMPARTMENT DOOR LOCK SUB-ASSEMBLY |
Install the door lock. Then install the lower box with the 12 screws.
 |
| 17. INSTALL CONSOLE COMPARTMENT DOOR SUB-ASSEMBLY |
Install the door with the 6 screws.
 |
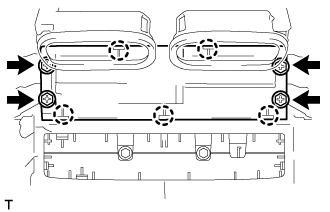
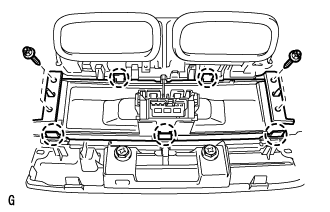
| 18. INSTALL REAR CONSOLE BOX MOUNTING BRACKET |
Install the bracket with the 4 bolts.
- Torque:
- 8.5 N*m{87 kgf*cm, 75 in.*lbf}
 |
| 19. INSTALL INSTRUMENT PANEL HOLE COVER |
Attach the 7 claws to install the hole cover.
 |
Install the 2 screws.
| 20. INSTALL REAR COOLER SWITCH HOLE COVER (w/o Rear Cooler) |
Attach the 5 claws.
 |
Install the hole cover with the 4 screws.
| 21. INSTALL AIR CONDITIONING CONTROL ASSEMBLY (w/ Rear Cooler) |
 |
Attach the 5 claws to install the air conditioning control.
Install the 4 screws.
| 22. INSTALL NO. 2 AIR CONDITIONING CONTROL ASSEMBLY (w/ Rear Air Conditioning System) |
 |
Attach the 5 claws to install the air conditioning control.
Install the 4 screws.