Clock -- Removal |
- HINT:
- Use the same procedures for LHD and RHD vehicles.
- The procedures listed below are for LHD vehicles.
| 1. REMOVE NO. 1 SPEAKER OPENING COVER ASSEMBLY |
 |
Detach the 8 claws and remove the opening cover.
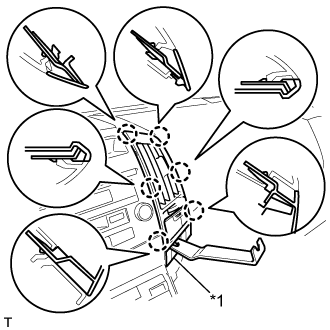
| 2. REMOVE NO. 3 INSTRUMENT PANEL REGISTER ASSEMBLY |
 |
Place protective tape as shown in the illustration.
Text in Illustration *1 Protective Tape
Using a moulding remover, detach the 6 claws.
Disconnect the connector and remove the No. 3 instrument panel register.
| 3. REMOVE NO. 4 INSTRUMENT PANEL REGISTER ASSEMBLY |
 |
Place protective tape as shown in the illustration.
Text in Illustration *1 Protective Tape
Using a moulding remover, detach the 6 claws.
Disconnect the connector and remove the No. 4 instrument panel register.
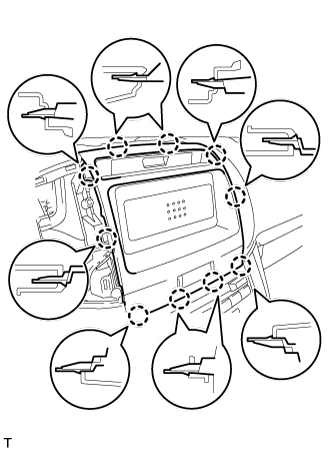
| 4. REMOVE NO. 1 CENTER INSTRUMENT CLUSTER FINISH PANEL |
 |
Detach the 10 claws.
Disconnect the connector and remove the No. 1 center instrument cluster finish panel.
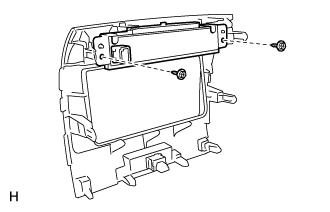
| 5. REMOVE CLOCK ASSEMBLY |
Remove the 2 screws and clock.
 |
| 6. REMOVE RADIO RECEIVER ASSEMBLY (w/o Multi-display) |
Remove the 2 screws and 2 bolts.
 |
Pull the radio receiver to detach the 10 claws on the backside of the radio receiver.
 |
Disconnect the connectors and remove the radio receiver.
| 7. REMOVE NO. 2 RADIO BRACKET (w/o Multi-display) |
Remove the 3 bolts and bracket.
 |
| 8. REMOVE NO. 1 RADIO BRACKET (w/o Multi-display) |
Remove the 3 bolts and bracket.
 |
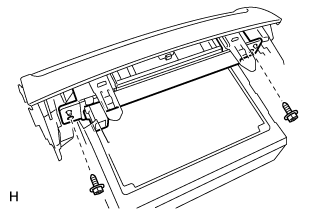
| 9. REMOVE CLOCK ASSEMBLY (w/o Multi-display) |
Remove the 2 screws and clock.
 |