Navigation Antenna (For Roof Side) Removal
PRECAUTION
DISCONNECT CABLE FROM NEGATIVE BATTERY TERMINAL
REMOVE ROOF HEADLINING ASSEMBLY
REMOVE REAR NO. 5 ROOF AIR DUCT
REMOVE REAR NO. 4 ROOF AIR DUCT
REMOVE REAR NO. 3 ROOF AIR DUCT
REMOVE TELEPHONE ANTENNA ASSEMBLY
Navigation Antenna (For Roof Side) -- Removal |
- NOTICE:
- After turning the ignition switch off, waiting time may be required before disconnecting the cable from the battery terminal. Therefore, make sure to read the disconnecting the cable from the battery terminal notice before proceeding with work (Click here).
| 2. DISCONNECT CABLE FROM NEGATIVE BATTERY TERMINAL |
- NOTICE:
- When disconnecting the cable, some systems need to be initialized after the cable is reconnected (Click here).
| 3. REMOVE ROOF HEADLINING ASSEMBLY |
w/ Sliding Roof (Click here).w/o Sliding Roof (Click here).
| 4. REMOVE REAR NO. 5 ROOF AIR DUCT |
w/o Sliding Roof:
Remove the 2 clips and duct.
w/ Sliding Roof:
Remove the 2 clips and duct.
| 5. REMOVE REAR NO. 4 ROOF AIR DUCT |
Remove the 2 clips and duct.
| 6. REMOVE REAR NO. 3 ROOF AIR DUCT |
Remove the clip and duct.
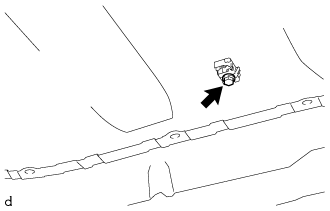
| 7. REMOVE TELEPHONE ANTENNA ASSEMBLY |
Disconnect the connector.
Remove the bolt and then remove the washer and holder.
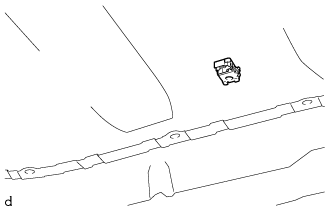
Remove the telephone antenna assembly of the vehicle outside.
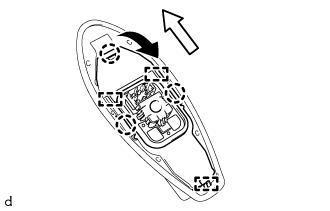
Detach the claws and guides and remove the telephone antenna assembly as indicated by the arrows in the order shown in the illustration.
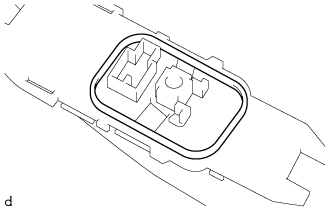
When reusing the telephone antenna assembly:
Remove the seal.