Digital Audio Broadcasting Antenna Installation
INSTALL DIGITAL AUDIO BROADCASTING ANTENNA ASSEMBLY
INSTALL NO. 1 REAR ROOF AIR DUCT
INSTALL NO. 3 REAR ROOF AIR DUCT
INSTALL NO. 4 REAR ROOF AIR DUCT
INSTALL NO. 5 REAR ROOF AIR DUCT
INSTALL NO. 2 REAR ROOF AIR DUCT
INSTALL ROOF HEADLINING ASSEMBLY
CONNECT CABLE TO NEGATIVE BATTERY TERMINAL
Digital Audio Broadcasting Antenna -- Installation |
| 1. INSTALL DIGITAL AUDIO BROADCASTING ANTENNA ASSEMBLY |
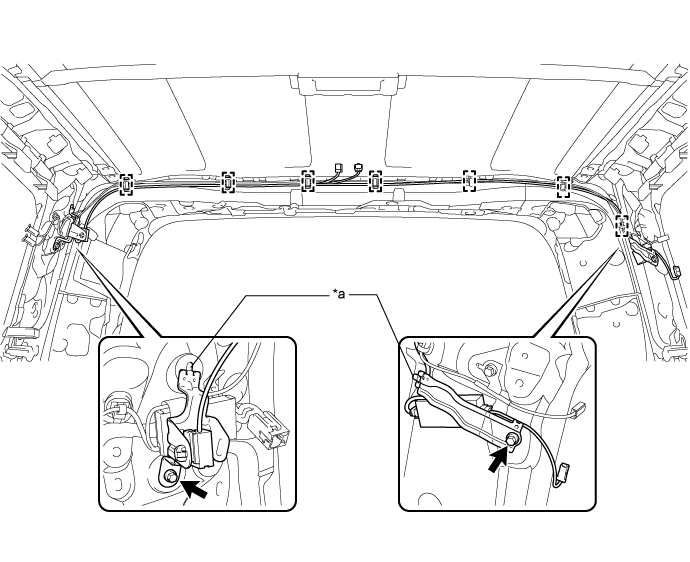
w/ Roof Antenna:
Text in Illustration*a
| Guide
| -
| -
|
- Attach the 7 clamps.
- Connect each connector and attach the 2 guides.
- Install the digital audio broadcasting antenna assembly with the 2 bolts.
- Torque:
- 8.5 N*m{87 kgf*cm, 75 in.*lbf}
w/o Roof Antenna:
Text in Illustration*a
| Guide
| -
| -
|
- Attach the 7 clamps.
- Connect the connector and attach the 2 guides.
- Install the digital audio broadcasting antenna assembly with the 2 bolts.
- Torque:
- 8.5 N*m{87 kgf*cm, 75 in.*lbf}
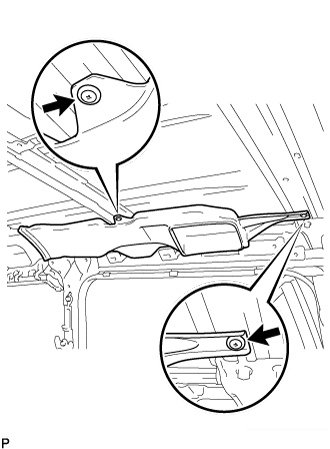
| 2. INSTALL NO. 1 REAR ROOF AIR DUCT |
Install the duct with the 3 clips.
| 3. INSTALL NO. 3 REAR ROOF AIR DUCT |
Install the duct with the clip.
| 4. INSTALL NO. 4 REAR ROOF AIR DUCT |
Install the duct with the 2 clips.
| 5. INSTALL NO. 5 REAR ROOF AIR DUCT |
w/o Sliding Roof:
Install the duct with the 2 clips.
w/ Sliding Roof:
Install the duct with the 2 clips.
| 6. INSTALL NO. 2 REAR ROOF AIR DUCT |
w/o Sliding Roof:
Install the duct with the 2 clips.
w/ Sliding Roof:
Install the duct with the 2 clips.
| 7. INSTALL ROOF HEADLINING ASSEMBLY |
w/ Sliding Roof:
(Click here)
w/o Sliding Roof:
(Click here)
| 8. CONNECT CABLE TO NEGATIVE BATTERY TERMINAL |
- NOTICE:
- When disconnecting the cable, some systems need to be initialized after the cable is reconnected (Click here).