Oil Level Sensor -- Removal |
| 1. REMOVE FRONT FENDER SPLASH SHIELD SUB-ASSEMBLY LH |
Remove the 3 bolts and screw.
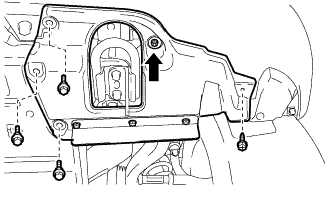 |
Turn the clip indicated by the arrow in the illustration to remove the front fender splash shield sub-assembly LH.
| 2. REMOVE FRONT FENDER SPLASH SHIELD SUB-ASSEMBLY RH |
Remove the 3 bolts and 2 screws.
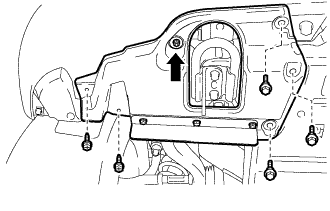 |
Turn the clip indicated by the arrow in the illustration to remove the front fender splash shield sub-assembly RH.
| 3. REMOVE NO. 1 ENGINE UNDER COVER SUB-ASSEMBLY |
Remove the 10 bolts and No. 1 engine under cover.
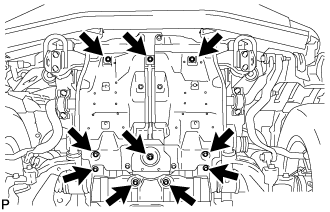 |
| 4. REMOVE NO. 2 ENGINE UNDER COVER |
Remove the 2 bolts and No. 2 engine under cover.
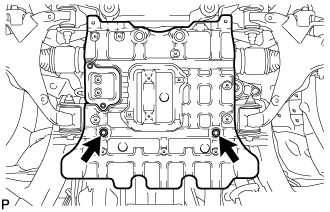 |
| 5. DRAIN ENGINE OIL |
Remove the oil filler cap.
Remove the 2 bolts and No. 2 engine under cover seal.
Remove the oil pan drain plug and gasket, and drain the engine oil into a container.
Install a new gasket and the oil pan drain plug.
- Torque:
- 40 N*m{408 kgf*cm, 30 ft.*lbf}
Install the No. 2 engine under cover seal with the 2 bolts.
- Torque:
- 10 N*m{102 kgf*cm, 7 ft.*lbf}
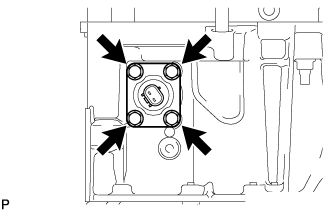
| 6. REMOVE ENGINE OIL LEVEL SENSOR |
Disconnect the connector.
Remove the 4 bolts and sensor.
 |
Cut away part of the gasket and remove the gasket from the engine oil level sensor.
Text in Illustration *1 Cutting Position *2 Supply Part - HINT:
- Remove only the outer part of the gasket.
 |