Блок Механической Трансмиссии Проверка
INSPECT COUNTER SHAFT 5TH GEAR RADIAL CLEARANCE
INSPECT REVERSE IDLER GEAR RADIAL CLEARANCE
INSPECT REVERSE IDLER GEAR SUB-ASSEMBLY
INSPECT NO. 1 SYNCHRONIZER RING
INSPECT NO. 3 TRANSMISSION HUB SLEEVE
INSPECT COUNTER SHAFT 5TH GEAR
Блок Механической Трансмиссии -- Проверка |
| 1. INSPECT COUNTER SHAFT 5TH GEAR RADIAL CLEARANCE |
Install the 5th gear thrust washer lock ball, 5th gear thrust washer and 5th gear to the counter gear.
Using a dial indicator, measure the 5th gear radial clearance.
- Standard clearance:
- 0.008 to 0.034 mm (0.000315 to 0.00133 in.)
- If the result is not as specified, replace the 5th gear bearing.
| 2. INSPECT REVERSE IDLER GEAR RADIAL CLEARANCE |
Using a dial indicator, measure the radial clearance.
- Standard clearance:
- 0.04 to 0.08 mm (0.00158 to 0.00314 in.)
- Maximum clearance:
- 0.08 mm (0.00314 in.)
- If the clearance is more than the maximum, replace the reverse idler gear.
| 3. INSPECT REVERSE IDLER GEAR SUB-ASSEMBLY |
Using a feeler gauge, measure the clearance between the reverse idler gear and reverse shift arm.
- Standard clearance:
- 0.05 to 0.35 mm (0.00197 to 0.0137 in.)
- Maximum clearance:
- 0.35 mm (0.0137 in.)
- If the clearance is more than the maximum, replace the reverse idler gear and reverse shift arm.
| 4. INSPECT NO. 1 SYNCHRONIZER RING |
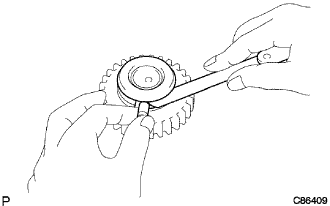
Apply gear oil to the cone part of the No. 5 gear spline piece, and check that the No. 1 synchronizer ring does not turn in either direction while pushing it against the No. 5 gear spline piece. If the No. 1 synchronizer ring turns, replace it.
Push the No. 1 synchronizer ring outer against the cone part of the No. 5 gear spline piece. Measure the clearance between the No. 1 synchronizer ring outer and No. 5 gear spline piece.
- Standard clearance:
- 0.85 to 1.55 mm (0.0335 to 0.0610 in.)
- If the clearance is not as specified, replace the outer No. 1 synchronizer ring with a new one.
| 5. INSPECT NO. 3 TRANSMISSION HUB SLEEVE |
Check the sliding condition between the counter shaft 5th gear and No. 3 transmission hub sleeve.
Check the spline of the No. 3 transmission hub sleeve for wear.
- If there are any defects, replace the No. 3 transmission hub sleeve.
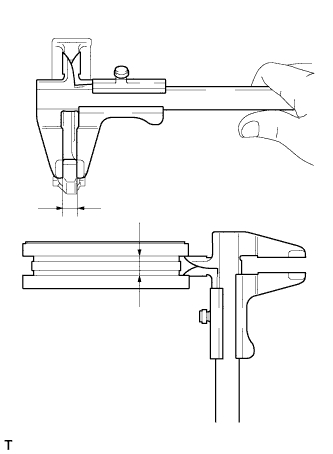
Using a vernier caliper, measure the No. 3 transmission hub sleeve groove and the thickness of the claw part of the No. 3 shift fork and calculate the clearance.
- Standard clearance:
- 0.25 to 0.45 mm (0.00985 to 0.0177 in.)
- If the clearance is not as specified, replace the No. 3 transmission hub sleeve and No. 3 shift fork with new ones.
| 6. INSPECT COUNTER SHAFT 5TH GEAR |
Using a cylinder gauge, measure the inside diameter of the counter 5th gear.
- Standard inside diameter:
- 33.015 to 33.040 mm (1.2990 to 1.3007 in.)
- Maximum inside diameter:
- 33.040 mm (1.3007 in.)
- If the inside diameter is more than the maximum, replace the counter shaft 5th gear with a new one.


