Name Plate -- Removal |
| 1. REMOVE NO. 2 TAIL GATE MARK |
- HINT:
- When removing the No. 2 tail gate mark, heat the vehicle body and No. 2 tail gate mark using a heat light.
- Standard:
Item Temperature Vehicle Body 40 to 60°C (104 to 140°F) No. 2 Tail Gate Mark 20 to 30°C (68 to 86°F)
- NOTICE:
- Do not heat the vehicle body or No. 2 tail gate mark excessively.
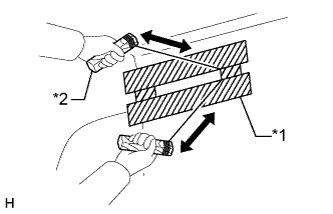
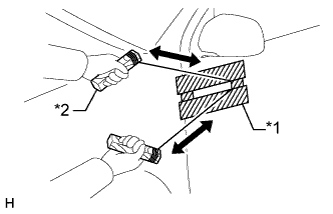
Put protective tape around the No. 2 tail gate mark.
Insert piano wire between the vehicle body and No. 2 tail gate mark.
Tie objects that can serve as handles (for example, wooden blocks) to the piano wire ends.
Pull the piano wire and scrape off the double-sided tape that holds the No. 2 tail gate mark to the vehicle body.
- NOTICE:
- Be careful not to damage the vehicle body.
Remove the No. 2 tail gate mark.
Text in Illustration *1 Protective Tape *2 Wooden Block
 |
| 2. REMOVE TAIL GATE MARK |
- HINT:
- When removing the tail gate mark, heat the vehicle body and tail gate mark using a heat light.
- Standard:
Item Temperature Vehicle Body 40 to 60°C (104 to 140°F) Tail Gate Mark 20 to 30°C (68 to 86°F)
- NOTICE:
- Do not heat the vehicle body or tail gate mark excessively.
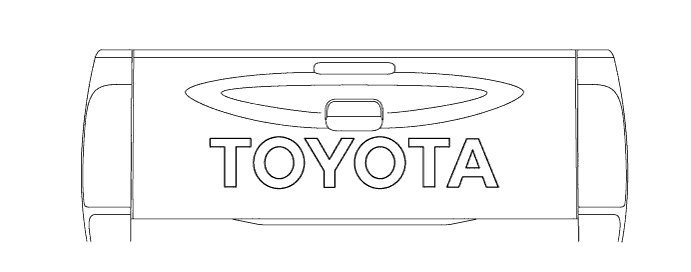
Pull back an edge of the tail gate mark and pull it parallel to the vehicle body to remove it.
| 3. REMOVE REAR NAME PLATE |
- HINT:
- When removing the rear name plate, heat the vehicle body and rear name plate using a heat light.
- Standard:
Item Temperature Vehicle Body 40 to 60°C (104 to 140°F) Rear Name Plate 20 to 30°C (68 to 86°F)
- NOTICE:
- Do not heat the vehicle body or rear name plate excessively.
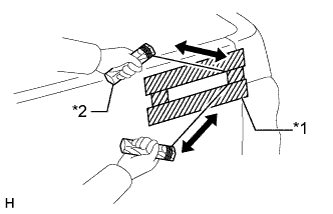
Put protective tape around the rear name plate.
Insert piano wire between the vehicle body and rear name plate.
Tie objects that can serve as handles (for example, wooden blocks) to the piano wire ends.
Pull the piano wire and scrape off the double-sided tape that holds the rear name plate to the vehicle body.
- NOTICE:
- Be careful not to damage the vehicle body.
Remove the rear name plate.
Text in Illustration *1 Protective Tape *2 Wooden Block
 |
| 4. REMOVE BACK DOOR MARK (w/ Grade Mark) |
- HINT:
- When removing the back door mark, heat the vehicle body and back door mark using a heat light.
- Standard:
Item Temperature Vehicle Body 40 to 60°C (104 to 140°F) Back Door Mark 20 to 30°C (68 to 86°F)
- NOTICE:
- Do not heat the vehicle body or back door mark excessively.
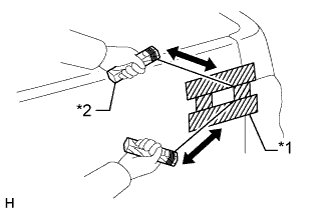
Put protective tape around the back door mark.
Insert piano wire between the vehicle body and back door mark.
Tie objects that can serve as handles (for example, wooden blocks) to the piano wire ends.
Pull the piano wire and scrape off the double-sided tape that holds the back door mark to the vehicle body.
- NOTICE:
- Be careful not to damage the vehicle body.
Remove the back door mark.
Text in Illustration *1 Protective Tape *2 Wooden Block
 |
| 5. REMOVE FRONT DOOR NAME PLATE |
- HINT:
- Use the same procedure for the RH and LH sides.
- The procedure listed below is for the LH side.
- When removing the front door name plate, heat the vehicle body and front door name plate using a heat light.
- Standard:
Item Temperature Vehicle Body 40 to 60°C (104 to 140°F) Front Door Name Plate 20 to 30°C (68 to 86°F)
- NOTICE:
- Do not heat the vehicle body or front door name plate excessively.
Put protective tape around the front door name plate.
Insert piano wire between the vehicle body and front door name plate.
Tie objects that can serve as handles (for example, wooden blocks) to the piano wire ends.
Pull the piano wire and scrape off the double-sided tape that holds the front door name plate to the vehicle body.
- NOTICE:
- Be careful not to damage the vehicle body.
Remove the front door name plate.
Text in Illustration *1 Protective Tape *2 Wooden Block
 |
| 6. REMOVE NO. 1 FRONT DOOR NAME PLATE |
- HINT:
- Use the same procedure for the RH and LH sides.
- The procedure listed below is for the LH side.
- When removing the No. 1 front door name plate, heat the vehicle body and No. 1 front door name plate using a heat light.
- Standard:
Item Temperature Vehicle Body 40 to 60°C (104 to 140°F) No. 1 Front Door Name Plate 20 to 30°C (68 to 86°F)
- NOTICE:
- Do not heat the vehicle body or No. 1 front door name plate excessively.
Put protective tape around the No. 1 front door name plate.
Insert piano wire between the vehicle body and No. 1 front door name plate.
Tie objects that can serve as handles (for example, wooden blocks) to the piano wire ends.
Pull the piano wire and scrape off the double-sided tape that holds the No. 1 front door name plate to the vehicle body.
- NOTICE:
- Be careful not to damage the vehicle body.
Remove the No. 1 front door name plate.
Text in Illustration *1 Protective Tape *2 Wooden Block
|
| 7. REMOVE NO. 2 FRONT DOOR NAME PLATE |
- HINT:
- Use the same procedure for the RH and LH sides.
- The procedure listed below is for the LH side.
- When removing the No. 2 front door name plate, heat the vehicle body and No. 2 front door name plate using a heat light.
- Standard:
Item Temperature Vehicle Body 40 to 60°C (104 to 140°F) No. 2 Front Door Name Plate 20 to 30°C (68 to 86°F)
- NOTICE:
- Do not heat the vehicle body or No. 2 front door name plate excessively.
Put protective tape around the No. 2 front door name plate.
Insert piano wire between the vehicle body and No. 2 front door name plate.
Tie objects that can serve as handles (for example, wooden blocks) to the piano wire ends.
Pull the piano wire and scrape off the double-sided tape that holds the No. 2 front door name plate to the vehicle body.
- NOTICE:
- Be careful not to damage the vehicle body.
Remove the No. 2 front door name plate.
Text in Illustration *1 Protective Tape *2 Wooden Block
|