Outer Rear View Mirror -- Removal |
- HINT:
- Use the same procedure for the RH and LH sides.
- The procedure listed below is for the LH side.
| 1. REMOVE POWER WINDOW REGULATOR MASTER SWITCH ASSEMBLY WITH FRONT DOOR ARMREST BASE PANEL LH (w/ Power Window) |
Using a moulding remover, detach the 2 clips.
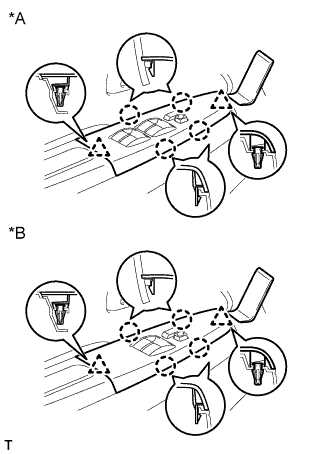 |
Disconnect the 4 claws and remove the power window regulator master switch assembly with front door armrest base panel.
Text in Illustration *A for Double Cab *B for Single Cab, for Extra Cab
| 2. REMOVE POWER WINDOW REGULATOR SWITCH ASSEMBLY WITH FRONT DOOR ARMREST BASE PANEL RH (w/ Power Window, for Front Passenger Side) |
 |
Using a moulding remover D, detach the 2 clips and 4 claws and remove the power window regulator switch assembly with front door armrest base panel.
Disconnect the connector.
| 3. REMOVE FRONT DOOR WINDOW REGULATOR HANDLE ASSEMBLY (w/o Power Window) |
Insert a clip remover between the plate and trim board.
- HINT:
- Tape the clip remover tip before use.
Text in Illustration *1 Protective Tape
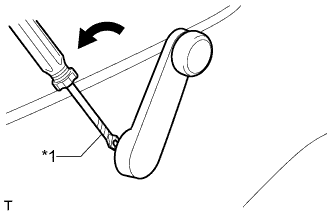 |
Turn the handle counterclockwise to remove the snap ring, front door window regulator handle and plate.
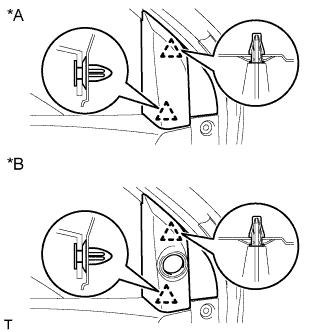
| 4. REMOVE FRONT DOOR LOWER FRAME BRACKET GARNISH LH |
Detach the 2 clips and remove the front door lower frame bracket garnish LH.
Text in Illustration *A w/o Front No. 2 Speaker *B w/ Front No. 2 Speaker
 |
| 5. REMOVE DOOR PULL HANDLE |
Remove the screw and door pull handle.
 |
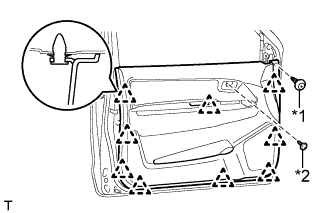
| 6. REMOVE FRONT DOOR TRIM BOARD SUB-ASSEMBLY LH |
for Double Cab:
Remove the clip and screw.
Text in Illustration *1 Clip *2 Screw Detach the 8 clips and remove the front door trim board sub-assembly LH.
 |
for Single Cab:
Remove the clip and screw.
Text in Illustration *1 Clip *2 Screw Detach the 9 clips and remove the front door trim board sub-assembly LH.
 |
| 7. REMOVE OUTER REAR VIEW MIRROR ASSEMBLY LH |
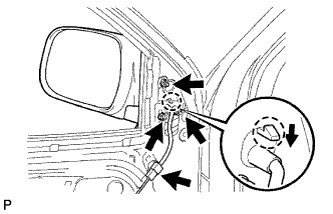 |
w/ Power Mirror Control System:
Disconnect the mirror connector.
Remove the 3 nuts.
Push down the claw and remove the outer rear view mirror assembly LH.