Cigarette Lighter -- Installation |
| 1. INSTALL CIGARETTE LIGHTER BEZEL STAY (w/ Illumination) |
Attach the 2 claws to install the cigarette lighter bezel stay.
| 2. INSTALL CIGARETTE LIGHTER INDICATOR LENS (w/o Illumination) |
Attach the 2 claws to install the cigarette lighter indicator lens.
| 3. INSTALL CIGAR LIGHTER SOCKET AND RETAINER ASSEMBLY |
 |
w/ Illumination:
Align the protrusion on the backside of the cigar lighter socket and retainer assembly with the groove of the cigarette lighter bezel stay.
Push the cigar lighter socket and retainer assembly into the cigarette lighter bezel stay.
w/o Illumination:
Align the protrusion on the backside of the cigar lighter socket and retainer assembly with the groove of the cigarette lighter indicator lens.
Push the cigar lighter socket and retainer assembly into the cigarette lighter indicator lens.
| 4. INSTALL CIGARETTE LIGHTER COVER |
Attach the 2 claws to install the cigarette lighter cover.
| 5. INSTALL CIGARETTE LIGHTER KNOB AND ELEMENT ASSEMBLY |
| 6. INSTALL SWITCH BASE |
Connect the connectors.
Attach the 8 claws to install the switch base.
| 7. INSTALL GLOVE COMPARTMENT DOOR ASSEMBLY |
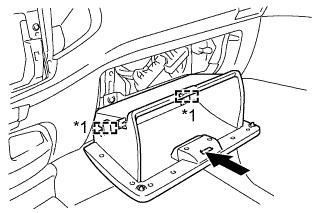 |
Attach the 2 hinges to install the glove compartment door.
Text in Illustration *1 Hinge
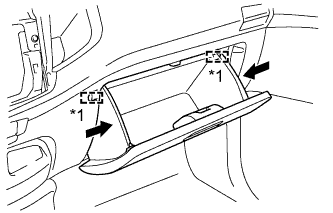
While pushing in the sides of the glove compartment door as indicated by the arrows in the illustration, close the door to engage it to the 2 stoppers.
Text in Illustration *1 Stopper
 |
| 8. INSTALL LOWER INSTRUMENT PANEL FINISH PANEL SUB-ASSEMBLY |
Attach the 3 guides, 2 claws and 3 clips to install the lower instrument panel finish panel.