Stereo Jack Adapter Assembly Removal
PRECAUTION
DISCONNECT CABLE FROM NEGATIVE BATTERY TERMINAL
REMOVE GLOVE COMPARTMENT DOOR ASSEMBLY
REMOVE LOWER INSTRUMENT PANEL FINISH PANEL SUB-ASSEMBLY
REMOVE SWITCH BASE
REMOVE NO. 1 STEREO JACK ADAPTER ASSEMBLY
Stereo Jack Adapter Assembly -- Removal |
- NOTICE:
- After turning the ignition switch off, waiting time may be required before disconnecting the cable from the battery terminal. Therefore, make sure to read the disconnecting the cable from the battery terminal notice before proceeding with work (HILUX_TGN26 RM000004QR1006X.html).
| 2. DISCONNECT CABLE FROM NEGATIVE BATTERY TERMINAL |
- NOTICE:
- When disconnecting the cable, some systems need to be initialized after the cable is reconnected (HILUX_TGN26 RM000004QR3008X.html).
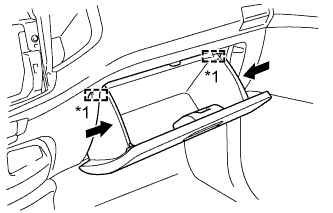
| 3. REMOVE GLOVE COMPARTMENT DOOR ASSEMBLY |
Slightly bend the upper part of the glove compartment door to release the 2 stoppers and open the glove compartment door until it is horizontal.
Text in Illustration*1
| Stopper
|
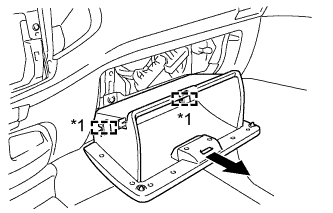
Pull the glove compartment door toward the rear of the vehicle to detach the 2 hinges and remove the glove compartment door.
Text in Illustration*1
| Hinge
|
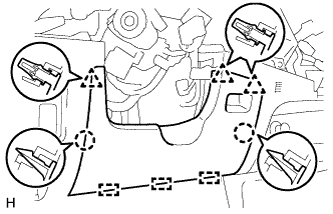
| 4. REMOVE LOWER INSTRUMENT PANEL FINISH PANEL SUB-ASSEMBLY |
Detach the 2 claws, 3 clips and 3 guides and remove the lower instrument panel finish panel.
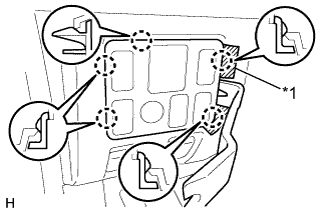
Put protective tape around the No. 1 switch hole base.
Text in Illustration*1
| Protective Tape
|
Using a moulding remover, detach the 5 claws.
Disconnect the connectors and remove the No. 1 switch hole base.
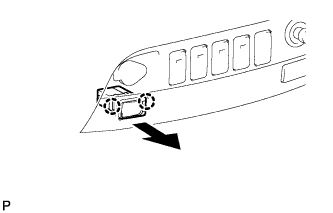
| 6. REMOVE NO. 1 STEREO JACK ADAPTER ASSEMBLY |
Detach the 2 claws and remove the stereo jack adapter.