INSTALL FUEL SENDER GAUGE ASSEMBLY
INSTALL NO. 1 FUEL TANK CUSHION
INSTALL NO. 1 FUEL TUBE CLAMP
INSTALL FUEL TANK RETURN TUBE
INSTALL FUEL TANK MAIN TUBE SUB-ASSEMBLY
INSTALL FUEL SUCTION VENT TUBE ASSEMBLY
INSTALL FUEL TANK VENT TUBE SET PLATE
DISCONNECT TANK MAIN TUBE SUB-ASSEMBLY
INSTALL FUEL EMISSION HOSE
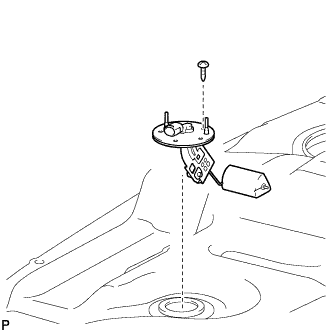
| 1. INSTALL FUEL SENDER GAUGE ASSEMBLY |
Install the sender gauge with the 5 screws.
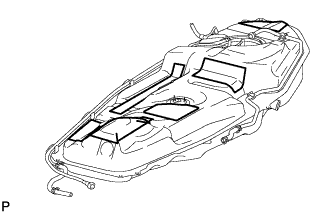
| 2. INSTALL NO. 1 FUEL TANK CUSHION |
Install 7 new fuel tank cushions onto the fuel tank as shown in the illustration.
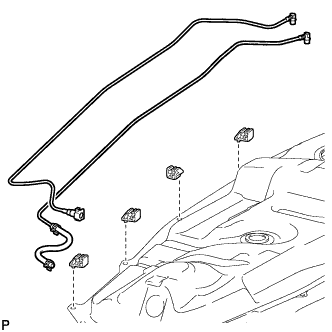
| 3. INSTALL NO. 1 FUEL TUBE CLAMP |
Install the 4 fuel tube clamps to the fuel tank.
| 4. INSTALL FUEL TANK RETURN TUBE |
Install the return tube to the fuel tube clamps
| 5. INSTALL FUEL TANK MAIN TUBE SUB-ASSEMBLY |
Install the main tube to the fuel tube clamps.
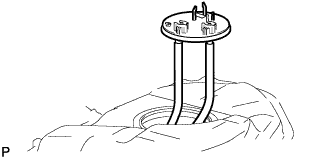
| 6. INSTALL FUEL SUCTION VENT TUBE ASSEMBLY |
Install a new gasket onto the suction vent tube assembly.
Connect the fuel hose and install the suction vent tube assembly into the fuel tank.
- ПРИМЕЧАНИЕ:
- Do not damage the suction vent tube assembly filter.
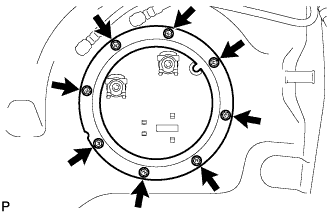
| 7. INSTALL FUEL TANK VENT TUBE SET PLATE |
Install the set plate with the 8 bolts.
- Момент затяжки:
- 4.0 Н*м{41 кгс*см, 35 фунт-сила-дюймов}
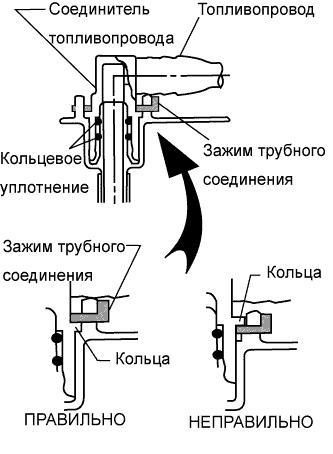
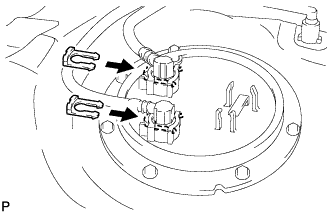
| 8. DISCONNECT TANK MAIN TUBE SUB-ASSEMBLY |
Install the fuel tube with the joint clips.
- ПРЕДОСТЕРЕЖЕНИЕ:
- Check that there are no scratches or foreign objects on the connecting parts.
- Check that the fuel tube joint is inserted securely.
- Check that the fuel tube joint clip is on the collars of the fuel tube joint.
- After installing the tube joint clips, check that the fuel tube joint has not been pulled off.
- Be careful not to damage any clips. If a clip is damaged, replace it.
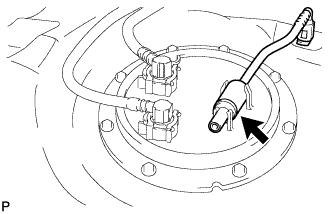
| 9. INSTALL FUEL EMISSION HOSE |
Connect the EVAP line tube.