Water Pump -- Removal |
| 1. REMOVE NO. 1 ENGINE UNDER COVER |
| 2. DRAIN ENGINE COOLANT |
Remove the radiator cap.
- CAUTION:
- Do not remove the radiator cap while the engine and radiator are still hot. Pressurized, hot engine coolant and steam may be released and cause serious burns.
Loosen the cylinder block drain cock plug and radiator drain cock plug to drain the coolant.
- HINT:
- Collect the coolant in a container and dispose of it according to the regulations in your area.
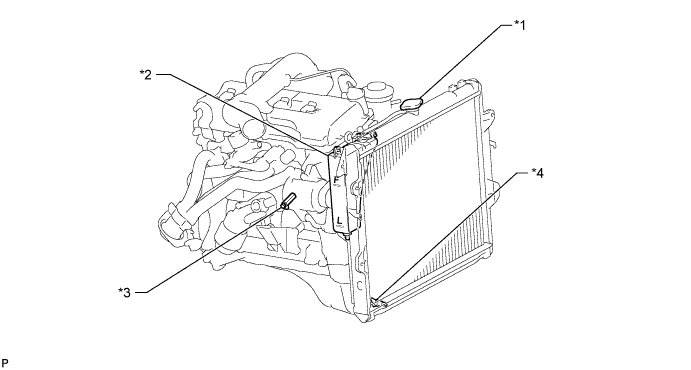
Text in Illustration *1 Radiator Cap *2 Radiator Reservoir *3 Cylinder Block Water Drain Cock Plug *4 Radiator Drain Cock Plug
| 3. DISCONNECT RADIATOR HOSE INLET |
Disconnect the radiator hose inlet from the radiator.
| 4. DISCONNECT RADIATOR HOSE OUTLET |
Disconnect the radiator hose outlet from the radiator.
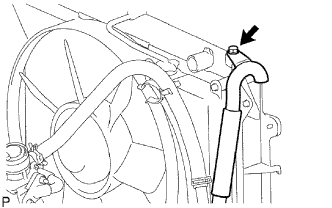
| 5. DISCONNECT AIR PUMP INLET |
Remove the bolt and disconnect the air pump inlet from the radiator.
 |
| 6. REMOVE FAN SHROUD |
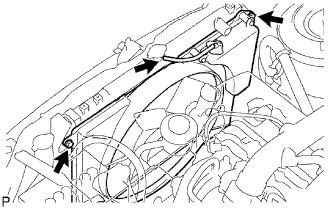 |
Disconnect the reservoir hose from the radiator.
Loosen the 4 nuts holding the fluid coupling fan.
Remove the fan and generator V belt (HILUX_TGN26 RM000000YMP01PX_01_0001.html).
Remove the 2 bolts holding the fan shroud.
Remove the 4 nuts holding the fluid coupling fan, and then remove the fan shroud together with the fluid coupling fan.
- NOTICE:
- Be careful not to damage the radiator core.
Remove the fan pulley from the engine water pump.
| 7. REMOVE GENERATOR ASSEMBLY |
| 8. REMOVE ENGINE OIL LEVEL DIPSTICK GUIDE |
Remove the engine oil level dipstick.
Remove the bolt and engine oil level dipstick guide.
- HINT:
- Cover the guide hole to prevent foreign matter from entering it.
Remove the O-ring from the engine oil level dipstick guide.
| 9. REMOVE NO. 1 IDLER PULLEY SUB-ASSEMBLY |
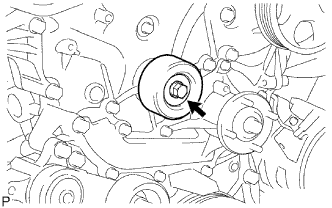 |
Remove the bolt, pulley and spacer.
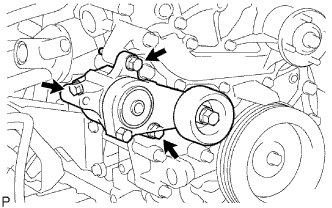
| 10. REMOVE V-RIBBED BELT TENSIONER ASSEMBLY |
Remove the 3 bolts and tensioner.
 |
| 11. REMOVE ENGINE WATER PUMP ASSEMBLY |
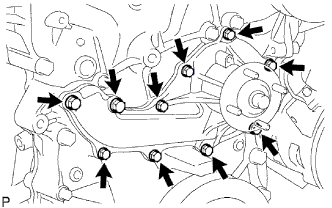 |
Remove the 10 bolts, engine water pump and gasket.