Ignition System -- On-Vehicle Inspection |
- NOTICE:
- In this section, the terms "Cold" and "Hot" refer to the temperature of the coils. "Cold" means approximately -10 to 50°C (14 to 122°F). "Hot" means approximately 50 to 100°C (122 to 212°F).
| 1. PERFORM SPARK TEST |
Check for DTCs (HILUX_TGN26 RM000000PDK0T7X.html).
- NOTICE:
- If any DTC is output, perform the troubleshooting procedures for that DTC.
Check if sparks occur.
Remove the 4 spark plugs (HILUX_TGN26 RM000000SK7016X.html).
Install the spark plug to the ignition coil and connect the ignition coil connector.
Disconnect the 4 injector connectors.
Ground the spark plug.
Visually check that sparks occur while the engine is being cranked.
- NOTICE:
- Be sure to ground the spark plug when checking.
- If the ignition coil has been struck or dropped, replace it.
- Do not crank the engine for more than 2 seconds.
Check that the wire harness side connector of the ignition coil with igniter is securely connected.
- Result:
Result Proceed to NG Connect securely OK Go to next step
Perform a spark test on each ignition coil with igniter.
If there is a cylinder where sparks do not occur, replace its ignition coil with the ignition coil of a cylinder where sparks occur normally.
Crank the engine and visually check that sparks occur at the cylinder with the normally operating ignition coil.
- Result:
Result Proceed to OK Replace ignition coil with igniter NG Go to next step
Inspect the spark plug.
Replace the spark plug with a normal one.
Perform spark test again.
- Result:
Result Proceed to OK Replace spark plug NG Go to next step
Check power supply to ignition coil with igniter.
Turn the ignition switch to ON.
Check that there is battery voltage at the ignition coil positive (+) terminal.
- Result:
Result Proceed to NG Check wiring between ignition switch and ignition coil with igniter OK Go to next step
Check the camshaft position sensor (HILUX_TGN26 RM0000012JE06KX.html).
Check the crankshaft position sensor (HILUX_TGN26 RM000000TCW0O8X.html).
Check the IGT signal circuit (HILUX_TGN26 RM000000XH40N0X.html).
Disconnect the 4 injector connectors.
Install the 4 spark plugs (HILUX_TGN26 RM000000SK5018X.html).
| 2. CHECK SPARK PLUG |
Check the electrode.
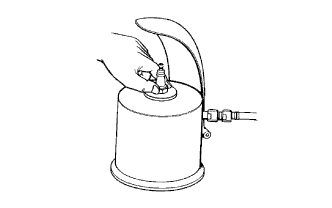
Text in Illustration *1 Ground Using a megohmmeter, measure the insulation resistance.
- Standard Insulation Resistance:
Tester Connection Condition Specified Condition Spark plug (terminal part) - Body ground Always 10 MΩ or higher
- HINT:
- If a megohmmeter is not available, perform the following simple inspection instead.
 |
Alternative inspection method:
Quickly accelerate the engine to 4000 rpm 5 times.
Remove the spark plug.
Visually check the spark plug.
If the electrode is dry, the spark plug is functioning properly. If the electrode is damp, proceed to the next step.
Check the spark plug for any damage on its thread and insulator.
If there is damage, replace the spark plug. If not, reinstall the spark plug.- Recommended Spark Plug:
Manufacturer Product DENSO FK20HR8-G
Check and adjust the spark plug electrode gap.
- Maximum electrode gap for used spark plug:
- 1.1 mm (0.0433 in.)
- Electrode gap for new spark plug:
- 0.7 to 0.8 mm (0.0276 to 0.0315 in.)
- NOTICE:
- When adjusting the gap of a new spark plug, bend only the base of the ground electrode. Do not touch the tip. Never attempt to adjust the gap of a used plug.
Clean the spark plugs.
If the electrode has traces of wet carbon, clean the electrode with a spark plug cleaner and then dry it.- Air pressure:
- 588 kPa (6.0 kgf/cm2, 85 psi)
- Duration:
- 20 seconds or less
- HINT:
- Only use the spark plug cleaner when the electrode is free of oil. If the electrode has traces of oil, use gasoline to clean off the oil before using the spark plug cleaner.
 |