Lower Instrument Panel (For Hatchback) -- Disassembly |
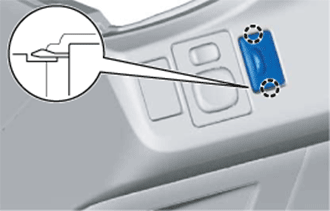
| 1. REMOVE NO. 2 INSTRUMENT PANEL SAFETY PAD |
Disengage the 2 claws and remove the instrument panel safety pad.
 |
| 2. REMOVE NO. 1 INSTRUMENT PANEL SAFETY PAD |
Disengage the 2 claws and remove the instrument panel safety pad.
 |
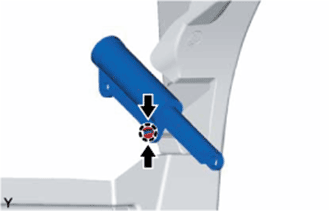
| 3. REMOVE GLOVE COMPARTMENT DOOR STOPPER SUB-ASSEMBLY |
Disengage the claw and remove the glove compartment door stopper.
 |
| 4. REMOVE NO. 1 INSTRUMENT PANEL BOX |
Remove the 3 <A> screws.
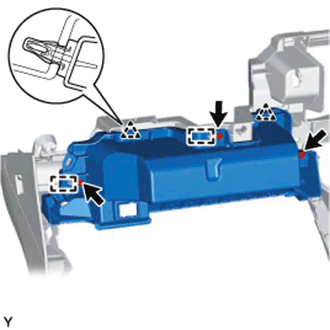 |
Disengage the 2 clips and 2 guides and remove the instrument panel box.
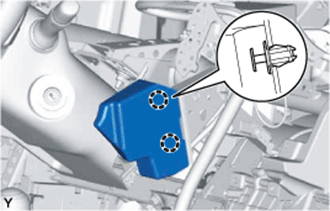
| 5. REMOVE LIGHT CONTROL RHEOSTAT |
Disengage the 2 claws and remove the switch.
 |
| 6. REMOVE OUTER MIRROR SWITCH ASSEMBLY (w/ Power Mirror Control System) |
Disengage the 2 claws and remove the switch.
 |
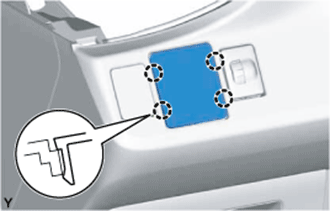
| 7. REMOVE REMOTE CONTROL MIRROR HOLE COVER |
Disengage the 4 claws and remove the hole cover.
 |
| 8. REMOVE NO. 2 SPARE SWITCH HOLE COVER |
Disengage the 2 claws and remove the hole cover.
 |
| 9. REMOVE POWER OUTLET SOCKET ASSEMBLY |
Disconnect the connector.
 |
Using a screwdriver with its tip wrapped in protective tape, disengage the claw, then turn the power outlet socket clockwise and pull the power outlet socket half way out.
Text in Illustration *1 Protective Tape
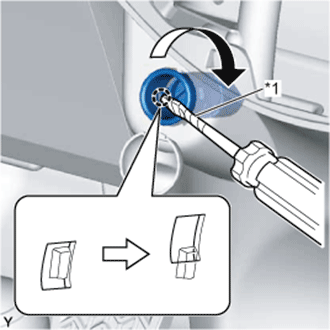 |
Align the protrusion of the power outlet socket with the cutout of the power outlet socket cover and then pull the power outlet socket out.
 |
| 10. REMOVE POWER OUTLET SOCKET COVER |
Disengage the 2 claws and remove the power outlet socket cover.
 |