INSTALL LUGGAGE DOOR OPENING SWITCH ASSEMBLY (w/ Smart Key System)
INSTALL LUGGAGE COMPARTMENT DOOR OUTSIDE GARNISH SUB-ASSEMBLY
INSTALL LUGGAGE COMPARTMENT DOOR LOCK CYLINDER ASSEMBLY (w/o Smart Key System)
INSTALL LUGGAGE COMPARTMENT DOOR LOCK CYLINDER ASSEMBLY (w/ Smart Key System)
INSTALL LUGGAGE COMPARTMENT DOOR LOCK ASSEMBLY (w/o Smart Key System)
INSTALL LUGGAGE COMPARTMENT DOOR LOCK ASSEMBLY (w/ Smart Key System)
Luggage Compartment Door -- Reassembly |
| 1. INSTALL LICENSE PLATE LIGHT ASSEMBLY |
Engage the 2 claws to install the license plate light assembly.
 |
Connect the connector.
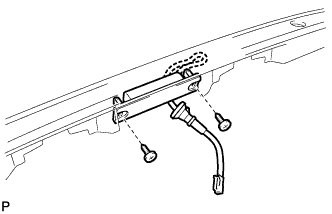
| 2. INSTALL LUGGAGE DOOR OPENING SWITCH ASSEMBLY (w/ Smart Key System) |
Install the luggage door opening switch assembly with the 2 screws.
 |
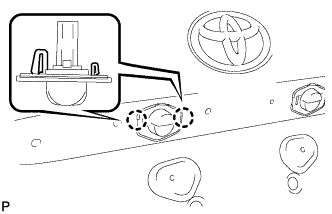
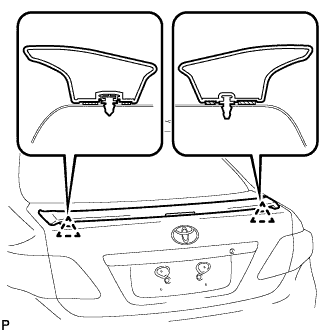
| 3. INSTALL LUGGAGE COMPARTMENT DOOR OUTSIDE GARNISH SUB-ASSEMBLY |
Install 6 new gaskets to the luggage compartment door outside garnish.
Engage the 3 clips and install the luggage compartment door outside garnish sub-assembly.
Install the 6 nuts.
w/ Smart Key System:
Connect the connector.
| 4. INSTALL REAR LIGHT ASSEMBLY LH |
Engage the clip.
 |
Install the rear light assembly with the 2 nuts.
- Torque:
- 5.4 N*m{55 kgf*cm, 48 in.*lbf}
 |
Connect the connector.
| 5. INSTALL REAR LIGHT ASSEMBLY RH |
- HINT:
- Use the same procedure for the RH side and the LH side.
| 6. INSTALL LUGGAGE COMPARTMENT SIDE COVER LH |
Engage the 2 guides.
 |
Engage the 2 claws and install the luggage compartment side cover.
| 7. INSTALL LUGGAGE COMPARTMENT SIDE COVER RH |
- HINT:
- Use the same procedure for the RH side and the LH side.
| 8. INSTALL LUGGAGE COMPARTMENT DOOR LOCK CYLINDER ASSEMBLY (w/o Smart Key System) |
Install the luggage compartment door lock cylinder with the 2 nuts.
 |
| 9. INSTALL LUGGAGE COMPARTMENT DOOR LOCK CYLINDER ASSEMBLY (w/ Smart Key System) |
Install the luggage compartment door lock cylinder with the 2 nuts.
 |
Connect the luggage door lock control cable sub-assembly.
 |
Connect the connector.
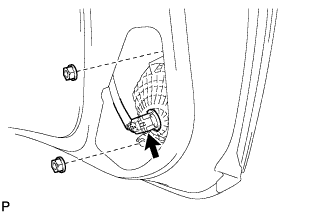
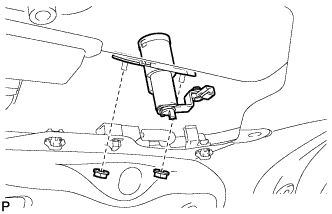
| 10. INSTALL LUGGAGE COMPARTMENT DOOR LOCK ASSEMBLY (w/o Smart Key System) |
Install the luggage compartment door lock assembly with the 2 bolts.
- Torque:
- 5.5 N*m{56 kgf*cm, 49 in.*lbf}
 |
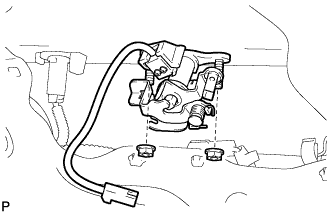
Connect the connector.
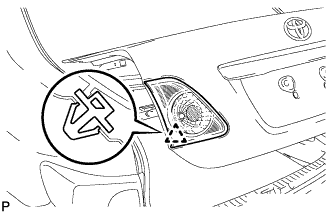
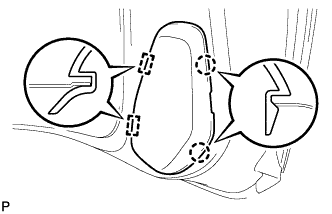
Raise the cover of the luggage compartment door lock as shown in the illustration.
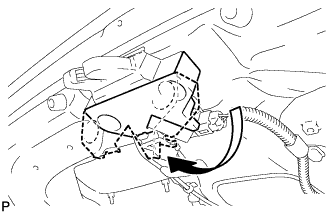 |
Connect the luggage door lock control cable subassembly.
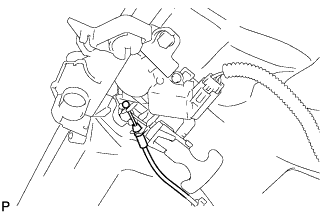 |
Return the cover of the luggage compartment door lock to its original position.
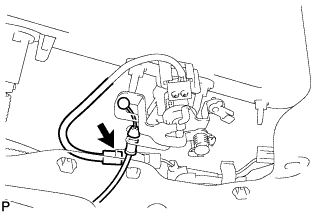
Connect the rod as shown in the illustration.
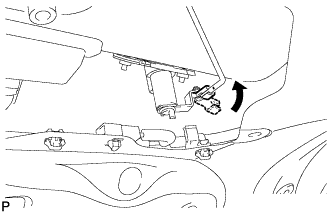 |
| 11. INSTALL LUGGAGE COMPARTMENT DOOR LOCK ASSEMBLY (w/ Smart Key System) |
Install the luggage compartment door lock assembly with the 2 bolts.
- Torque:
- 5.5 N*m{56 kgf*cm, 49 in.*lbf}
 |
Connect the connector.
Connect the rod as shown in the illustration.
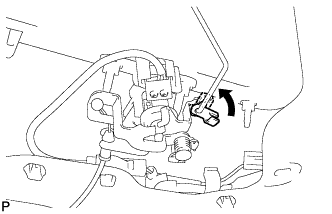 |
| 12. INSTALL REAR SPOILER ASSEMBLY (w/ Rear Spoiler) |
- HINT:
- When installing the rear spoiler assembly, using a heat light and then heat the vehicle body and rear spoiler assembly.
- Heating Temperature:
Item Temperature Vehicle Body 40 to 60°C (104 to 140°F) Rear Spoiler 20 to 30°C (68 to 86°F)
- NOTICE:
- Do not heat the vehicle body and rear spoiler assembly excessively.
Clean the vehicle body surface.
Using a heat light, heat the vehicle body surface.
Remove the double-sided tape from the vehicle body.
Wipe off any tape adhesive residue with cleaner.
Using a heat light, carefully heat the vehicle body and rear spoiler assembly.
Remove the release paper from the face of the rear spoiler assembly.
- HINT:
- After removing the release paper, keep the exposed adhesive free from foreign matter.
Engage the 2 clips and install the rear spoiler assembly.
 |
Install the 2 bolts.
 |
Connect the connector.
| 13. INSTALL LUGGAGE COMPARTMENT DOOR COVER |
Install the luggage compartment door cover with the 9 clips.