Compressor (For 2Az-Fe) -- Removal |
| 1. RECOVER REFRIGERANT FROM REFRIGERATION SYSTEM |
Start up the engine.
Turn the A/C switch on.
Operate the cooler compressor at an engine speed of approximately 1000 rpm for 5 to 6 minutes to circulate the refrigerant. This causes most of the compressor oil from the various components of the A/C system to collect in the A/C compressor.
Stop the engine.
Recover the refrigerant from the A/C system using a refrigerant recovery unit.
| 2. REMOVE ENGINE UNDER COVER RH |
| 3. REMOVE V-RIBBED BELT |
Using SST, slowly turn the V-ribbed belt tensioner clockwise.
- SST
- 09216-42010(09216-04010)
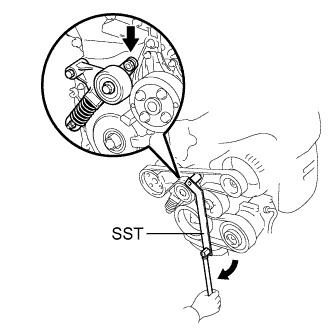 |
Remove the V-ribbed belt from each pulley and slowly return the tensioner.
- NOTICE:
- Make sure that SST and other tools are set to the tensioner securely.
- When compressing the V-ribbed belt tensioner, slowly turn the tensioner.
- Be careful not to pinch your fingers between the parts.
| 4. DISCONNECT SUCTION HOSE SUB-ASSEMBLY |
Remove the bolt and disconnect the suction hose sub-assembly from the compressor assembly with pulley.
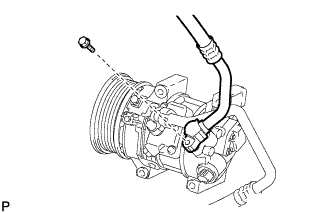 |
Remove the O-ring from the suction hose sub-assembly.
- NOTICE:
- Seal the openings of the disconnected parts using vinyl tape to prevent entry of moisture and foreign matter.
| 5. DISCONNECT DISCHARGE HOSE SUB-ASSEMBLY |
Remove the bolt and disconnect the discharge hose sub-assembly from the compressor assembly with pulley.
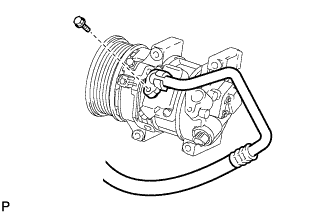 |
Remove the O-ring from the discharge hose sub-assembly.
- NOTICE:
- Seal the openings of the disconnected parts using vinyl tape to prevent entry of moisture and foreign matter.
| 6. REMOVE COMPRESSOR ASSEMBLY WITH PULLEY |
Disconnect the connector.
Remove the 2 bolts and the 2 nuts.
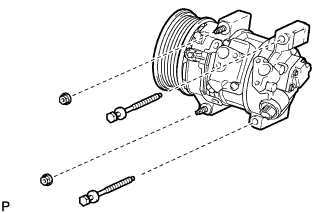 |
Using a "TORX" socket wrench (E8), remove the 2 stud bolts and the compressor assembly with pulley.
 |