REMOVE AIR OUTLET CONTROL SERVO MOTOR (for Automatic Air Conditioning System)
REMOVE AIR MIX CONTROL SERVO MOTOR (for TMC Made with Automatic Air Conditioning System)
REMOVE AIR MIX CONTROL SERVO MOTOR (for TMMC Made with Automatic Air Conditioning System)
REMOVE NO. 2 HEATER CONTROL CABLE SUB-ASSEMBLY (for Manual Air Conditioning System)
REMOVE AIR MIX DAMPER CONTROL CABLE SUB-ASSEMBLY (for Manual Air Conditioning System)
REMOVE AIR CONDITIONING HARNESS ASSEMBLY (for Automatic Air Conditioning System)
REMOVE AIR CONDITIONING DUCT SUB-ASSEMBLY (for Automatic Air Conditioning System)
Air Conditioning Unit -- Disassembly |
| 1. REMOVE IMMOBILIZER CODE ECU (w/ Smart Key System) |
Disconnect the connector.
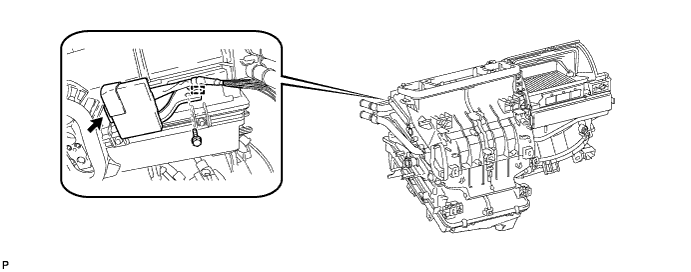
Disengage the clamp.
Remove the bolt and the immobilizer code ECU.
| 2. REMOVE TRANSPONDER KEY ECU (w/o Smart Key System) |
Disconnect the connector.
Disengage the clamp.
Remove the bolt and the transponder key ECU.
| 3. REMOVE AIR OUTLET CONTROL SERVO MOTOR (for Automatic Air Conditioning System) |
Disconnect the connector.
 |
Remove the 3 screws and the air outlet control servo motor.
| 4. REMOVE AIR MIX CONTROL SERVO MOTOR (for TMC Made with Automatic Air Conditioning System) |
Disconnect the connector.
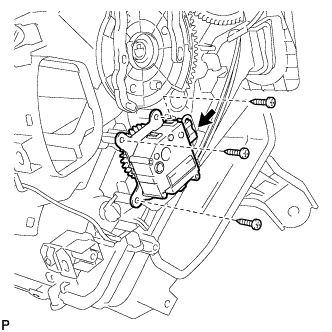 |
Remove the 3 screws and the air mix control servo motor.
| 5. REMOVE AIR MIX CONTROL SERVO MOTOR (for TMMC Made with Automatic Air Conditioning System) |
Disconnect the connector.
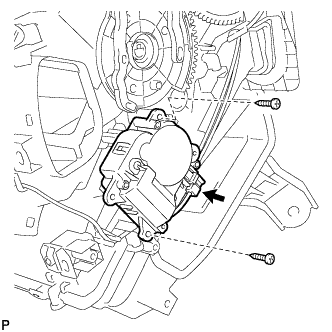 |
Remove the 2 screws and the air mix control servo motor.
| 6. REMOVE NO. 2 HEATER CONTROL CABLE SUB-ASSEMBLY (for Manual Air Conditioning System) |
Using a screwdriver with the tip taped, disengage the claw and remove the No. 2 heater control cable sub-assembly.
 |
| 7. REMOVE AIR MIX DAMPER CONTROL CABLE SUB-ASSEMBLY (for Manual Air Conditioning System) |
Using a screwdriver with the tip taped, disengage the claw and remove the air mix damper control cable sub-assembly.
 |
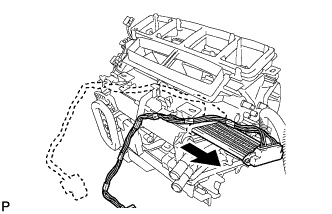
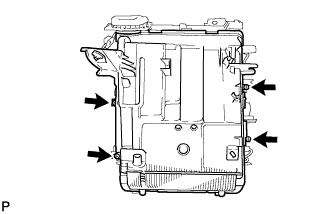
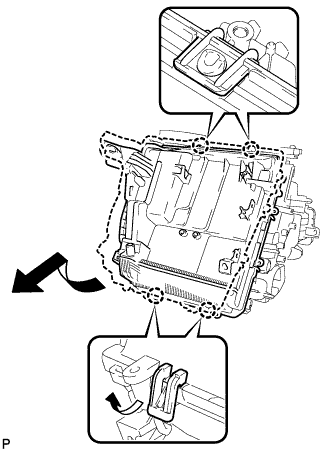
| 8. REMOVE QUICK HEATER ASSEMBLY (w/ PTC Heater) |
Disengage each clamp.
 |
Remove the 2 screws.
Remove the quick heater assembly as shown in the illustration.
 |
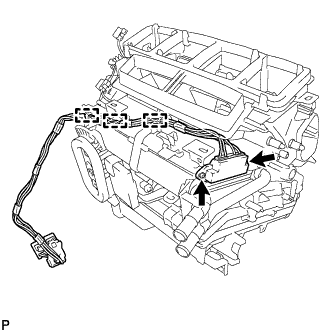
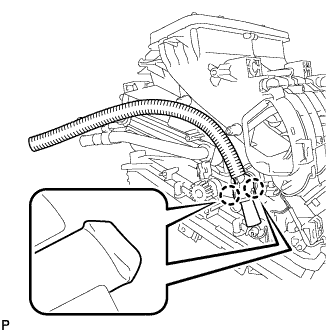
| 9. REMOVE AIR CONDITIONING HARNESS ASSEMBLY (for Automatic Air Conditioning System) |
Disconnect the connector.
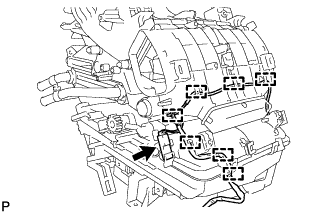 |
Disengage each clamp and remove the air conditioning harness.
| 10. REMOVE CONSOLE MOUNTING BRACKET RH |
Disengage the 2 claws and remove the console mounting bracket RH as shown in the illustration.
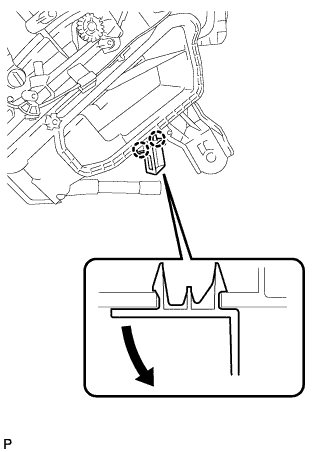 |
| 11. REMOVE CONSOLE MOUNTING BRACKET LH |
Remove the screw and the console mounting bracket LH.
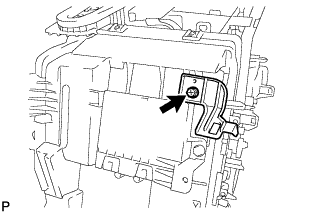 |
| 12. REMOVE AIR CONDITIONING AMPLIFIER ASSEMBLY |
Remove the screw.
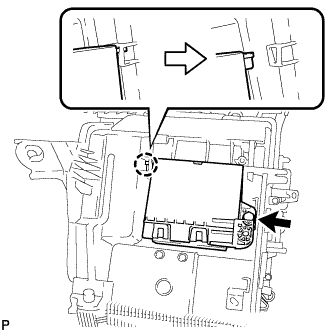 |
Disengage the claw and remove the air conditioning amplifier assembly as shown in the illustration.
| 13. REMOVE AIR CONDITIONING DUCT SUB-ASSEMBLY (for Automatic Air Conditioning System) |
Disengage the 2 claws and remove the air conditioning duct sub-assembly.
 |
| 14. REMOVE DRAIN COOLER HOSE |
Remove the drain cooler hose from the air conditioning radiator assembly.
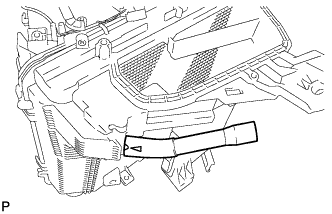 |
| 15. REMOVE HEATER RADIATOR UNIT SUB-ASSEMBLY |
Remove the screw and the clamp.
 |
Remove the heater radiator unit sub-assembly from the air conditioning unit assembly.
| 16. REMOVE COOLER EXPANSION VALVE |
Using a 4 mm hexagon wrench, remove the 2 hexagon bolts and cooler expansion valve.
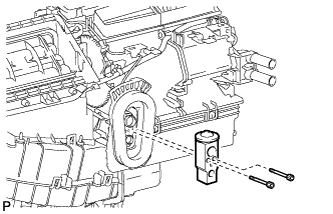 |
| 17. REMOVE NO. 1 COOLER EVAPORATOR SUB-ASSEMBLY |
Remove the 4 screws.
 |
Disengage the 4 claws and remove the lower heater case.
 |
Disengage the clamp, and remove the No. 1 cooler evaporator sub-assembly together with the No. 1 cooler thermistor.
 |
Remove the 2 O-rings.
| 18. REMOVE NO. 1 COOLER THERMISTOR |
Remove the No. 1 cooler thermistor from the No. 1 cooler evaporator sub-assembly.
 |