Television Camera Removal
DISCONNECT CABLE FROM NEGATIVE BATTERY TERMINAL
REMOVE BACK DOOR CENTER GARNISH
REMOVE BACK DOOR SIDE GARNISH LH
REMOVE BACK DOOR SIDE GARNISH RH
REMOVE BACK DOOR TRIM BOARD ASSEMBLY
REMOVE BACK DOOR OUTSIDE GARNISH SUB-ASSEMBLY
REMOVE TELEVISION CAMERA ASSEMBLY
Television Camera -- Removal |
| 1. DISCONNECT CABLE FROM NEGATIVE BATTERY TERMINAL |
- CAUTION:
- Wait at least 90 seconds after disconnecting the cable from the negative (-) battery terminal to prevent airbag and seat belt pretensioner activation.
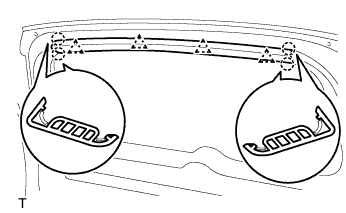
| 2. REMOVE BACK DOOR CENTER GARNISH |
Using a screwdriver, detach the 4 claws and 4 clips and remove the garnish.
- HINT:
- Tape the screwdriver tip before use.
| 3. REMOVE BACK DOOR SIDE GARNISH LH |
Using a screwdriver, detach the 2 claws and 2 clips and remove the garnish.
| 4. REMOVE BACK DOOR SIDE GARNISH RH |
- HINT:
- Use the same procedure described for the LH side.
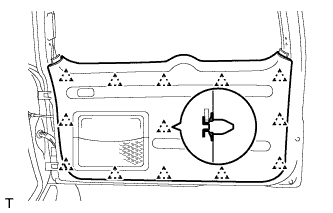
| 5. REMOVE BACK DOOR TRIM BOARD ASSEMBLY |
Using a screwdriver, detach the 13 clips and remove the trim board.
- HINT:
- Tape the screwdriver tip before use.
- If the screwdriver cannot reach the clips, pull on the lower trim to remove it.
Remove the 5 screws and the back door trim pocket.
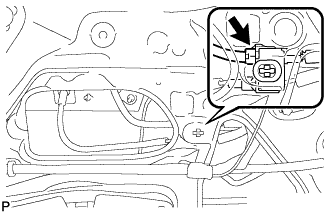
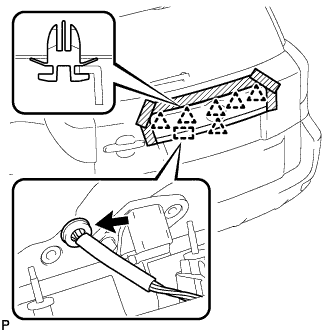
| 6. REMOVE BACK DOOR OUTSIDE GARNISH SUB-ASSEMBLY |
Disconnect the connector.
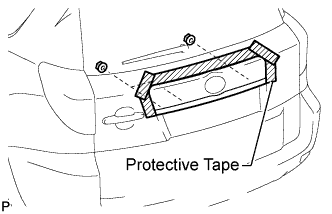
Put protective tape around the back door outside garnish.
Remove the 3 nuts.
Detach the grommet and 5 clips, and remove the back door outside garnish.
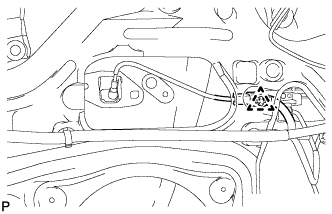
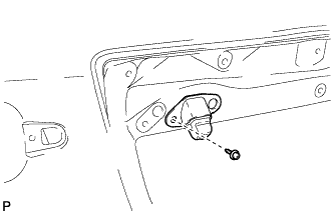
| 7. REMOVE TELEVISION CAMERA ASSEMBLY |
Disconnect the television camera connector and detach the clamp.
Remove the screw and television camera.