INSTALL UPPER CONSOLE PANEL SUB-ASSEMBLY (for Manual Transaxle)
INSTALL FLOOR SHIFT POSITION INDICATOR HOUSING SUB-ASSEMBLY (for Automatic Transaxle)
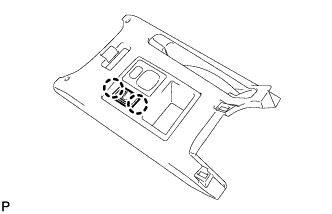
Stereo Jack Adapter Assembly -- Installation |
| 1. INSTALL STEREO JACK ADAPTER ASSEMBLY |
Attach the 2 claws to install the stereo jack adapter.
 |
| 2. INSTALL UPPER REAR CONSOLE PANEL SUB-ASSEMBLY |
Connect the connectors.
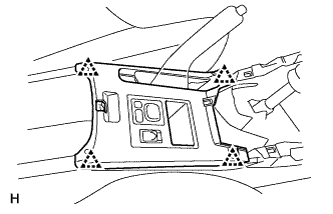 |
Attach the 4 clips to install the upper rear console panel.
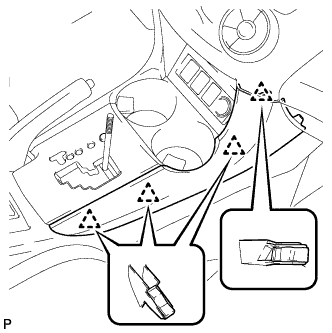
| 3. INSTALL UPPER CONSOLE PANEL SUB-ASSEMBLY (for Manual Transaxle) |
Attach the 2 clips and 4 claws to install the upper console panel.
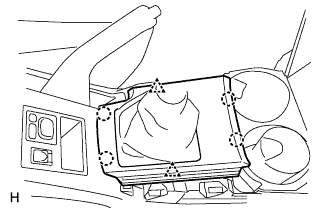 |
| 4. INSTALL FLOOR SHIFT POSITION INDICATOR HOUSING SUB-ASSEMBLY (for Automatic Transaxle) |
Connect the connector.
 |
Attach the 2 clips and 4 claws to install the floor shift position indicator housing.
| 5. INSTALL NO. 2 CONSOLE UPPER PANEL GARNISH |
Attach the 4 clips to install the upper panel garnish.
 |
| 6. INSTALL NO. 1 CONSOLE UPPER PANEL GARNISH |
Attach the 4 clips to install the upper panel garnish.
 |
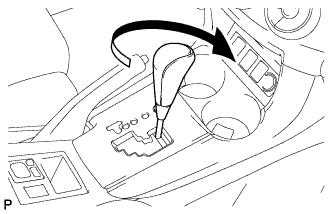
| 7. INSTALL SHIFT LEVER KNOB SUB-ASSEMBLY |
for Manual Transaxle:
Twist the shift lever knob in the direction indicated by the arrow to install it.
 |
for Automatic Transaxle:
Twist the shift lever knob in the direction indicated by the arrow to install it.
 |
| 8. CONNECT CABLE TO NEGATIVE BATTERY TERMINAL |