Front Seat Assembly (W/ Front Seat Side Airbag) Disassembly
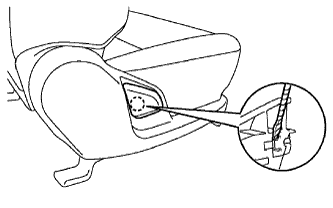
REMOVE RECLINING ADJUSTER RELEASE HANDLE RH
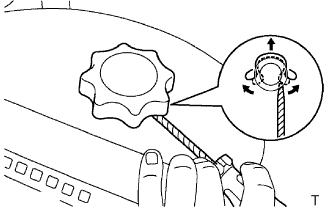
REMOVE VERTICAL SEAT ADJUSTER KNOB RH (for Driver Side)
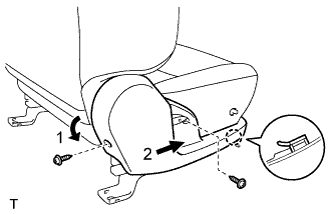
REMOVE FRONT SEAT CUSHION SHIELD RH
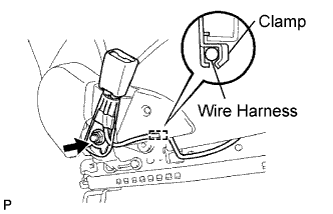
REMOVE FRONT SEAT INNER BELT ASSEMBLY RH
REMOVE FRONT SEAT CUSHION COVER RH
REMOVE FRONT SEAT CUSHION INNER SHIELD RH
REMOVE SEATBACK SPRING
REMOVE SEAT CUSHION COVER WITH PAD
REMOVE FRONT SEAT CUSHION PROTECTOR
REMOVE SEPARATE TYPE FRONT SEAT CUSHION COVER
REMOVE SEPARATE TYPE FRONT SEATBACK COVER
REMOVE SEPARATE TYPE FRONT SEATBACK PAD
REMOVE NO. 1 SEATBACK CLOTH
REMOVE FRONT SEAT CUSHION FRAME SUB-ASSEMBLY
REMOVE VERTICAL ADJUSTING SHAFT SUB-ASSEMBLY (for Driver Side)
REMOVE SEAT TRACK HANDLE SUB-ASSEMBLY
REMOVE FRONT SEAT ADJUSTER ROD (for Driver Side)
REMOVE RECLINING ADJUSTER LOWER ARM SUB-ASSEMBLY RH
REMOVE RECLINING ADJUSTER LOWER ARM SUB-ASSEMBLY LH
REMOVE FRONT SEAT CUSHION EDGE PROTECTOR RH
Front Seat Assembly (W/ Front Seat Side Airbag) -- Disassembly |
- HINT:
- Use the same procedures for the RH side and LH side.
- The procedures listed below are for the RH side.
| 1. REMOVE RECLINING ADJUSTER RELEASE HANDLE RH |
Raise the reclining adjuster release handle to reveal the claw. Using a screwdriver, detach the claw and remove the release handle.
- HINT:
- Tape the screwdriver tip before use.
| 2. REMOVE VERTICAL SEAT ADJUSTER KNOB RH (for Driver Side) |
Using a screwdriver, remove the snap ring as shown in the illustration.
- HINT:
- Tape the screwdriver tip before use.
Remove the knob.
| 3. REMOVE FRONT SEAT CUSHION SHIELD RH |
Remove the 2 screws.
Detach the rear part of the cushion shield in the order indicated in the illustration, and then detach the claw and remove the cushion shield.
| 4. REMOVE FRONT SEAT INNER BELT ASSEMBLY RH |
Detach the clamp.
Detach the wire harness from the clamp.
Remove the nut and seat belt.
Remove the buckle cover.
| 5. REMOVE FRONT SEAT CUSHION COVER RH |
Remove the seat cushion cover.
| 6. REMOVE FRONT SEAT CUSHION INNER SHIELD RH |
Remove the 2 screws. Then remove the inner shield in the order indicated in the illustration.
| 7. REMOVE SEATBACK SPRING |
Remove the seatback spring.
| 8. REMOVE SEAT CUSHION COVER WITH PAD |
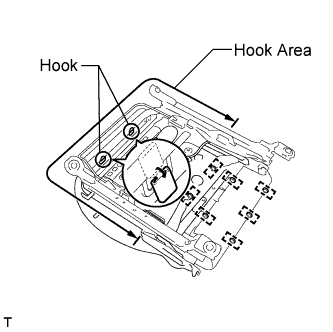
Detach the 2 hooks.
Detach the hooks in the hook area shown in the illustration.
Remove the hog rings and seat cushion cover with pad from the seat cushion frame.
| 9. REMOVE FRONT SEAT CUSHION PROTECTOR |
Remove the 2 protectors.
| 10. REMOVE SEPARATE TYPE FRONT SEAT CUSHION COVER |
Remove the hog rings and seat cushion cover.
| 11. REMOVE SEPARATE TYPE FRONT SEATBACK COVER |
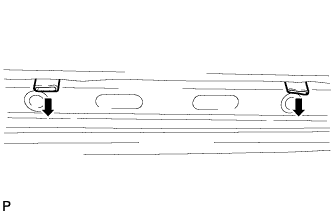
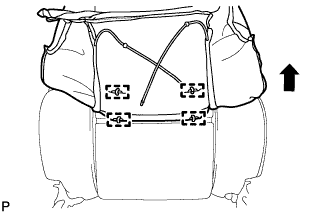
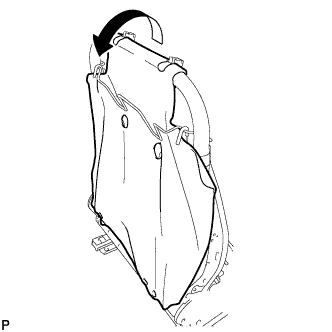
Remove the hog rings from the wires of the seatback cover. Then roll up the seatback cover.
Remove the hog rings and detach the strap of the seatback cover. Then roll up the seatback cover.
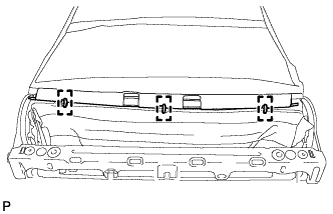
Remove the hog rings from the center of the seatback pad and roll up the seatback cover.
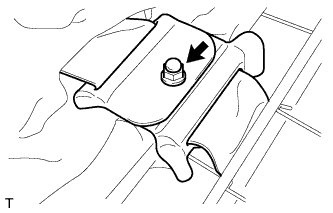
Remove the nut and detach the seatback cover bracket.
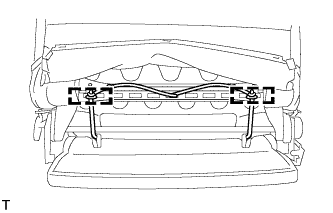
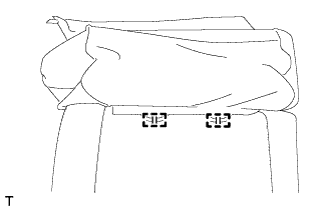
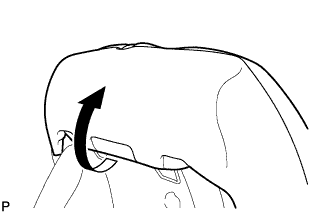
Remove the hog rings from the upper part of the seatback pad. Then roll up the seatback cover.
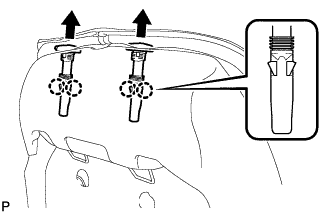
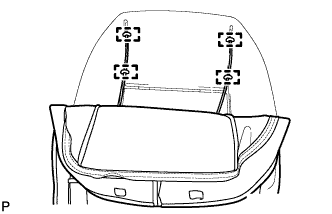
Detach the 4 claws and remove the 2 headrest supports.
Remove the hog rings and seatback cover.
| 12. REMOVE SEPARATE TYPE FRONT SEATBACK PAD |
Remove the seatback pad.
| 13. REMOVE NO. 1 SEATBACK CLOTH |
Remove the seatback cloth.
| 14. REMOVE FRONT SEAT CUSHION FRAME SUB-ASSEMBLY |
Detach the wire harness clamps.
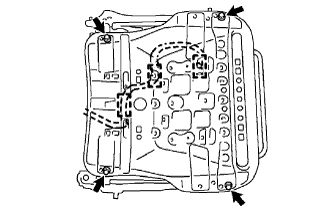
Remove the 4 bolts and seat cushion frame.
| 15. REMOVE VERTICAL ADJUSTING SHAFT SUB-ASSEMBLY (for Driver Side) |
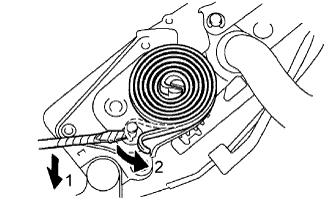
Using a screwdriver, detach the seat spring from the reclining adjuster lower arm.
- HINT:
- Tape the screwdriver tip before use.
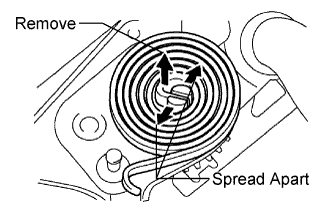
Using a screwdriver, spread apart the tabs that hold the spring, and then remove the spring.
- HINT:
- Tape the screwdriver tip before use.
Using a 6 mm socket hexagon wrench, remove the front seat No. 2 adjuster pin.
Temporarily install the vertical seat adjuster knob.
Turn the knob clockwise and move the gear of the vertical adjusting shaft to the position shown in the illustration.
Remove the vertical seat adjuster knob.
Using a screwdriver, remove the 2 E-rings and vertical adjusting shaft.
| 16. REMOVE SEAT TRACK HANDLE SUB-ASSEMBLY |
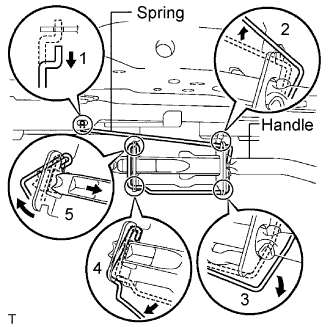
Detach the spring of the seat track in the order indicated in the illustration. Then remove the handle.
| 17. REMOVE FRONT SEAT ADJUSTER ROD (for Driver Side) |
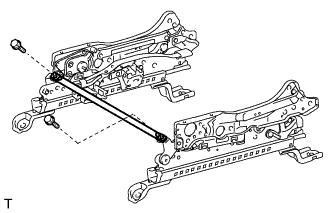
Remove the 2 bolts and front seat adjuster rod.
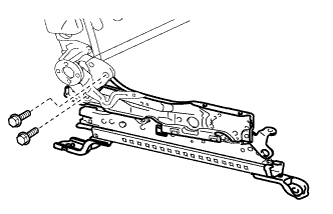
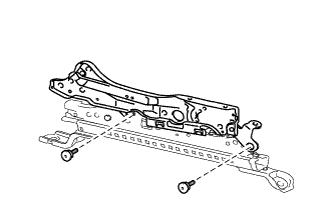
| 18. REMOVE RECLINING ADJUSTER LOWER ARM SUB-ASSEMBLY RH |
for Driver Side:
Remove the 2 bolts and reclining adjuster lower arm with front outer seat track assembly.
Using a T40 "TORX" socket wrench, remove the 2 "TORX" bolts and reclining adjuster lower arm.
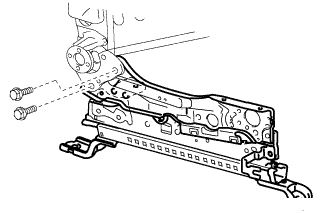
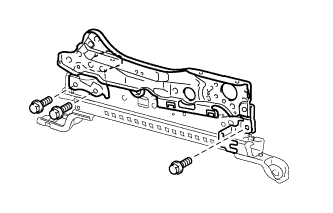
for Passenger Side:
Remove the 2 bolts and reclining adjuster lower arm with front inner seat track assembly.
Remove the 3 bolts and reclining adjuster lower arm.
| 19. REMOVE RECLINING ADJUSTER LOWER ARM SUB-ASSEMBLY LH |
for Driver Side:
- HINT:
- Use the same procedures described for the RH side.
for Passenger Side:
- HINT:
- Use the same procedures described for the RH side.
| 20. REMOVE FRONT SEAT CUSHION EDGE PROTECTOR RH |
Remove the seat cushion edge protector.
