Light Control Rheostat Removal
REMOVE NO. 1 SWITCH HOLE BASE
REMOVE LIGHT CONTROL RHEOSTAT KNOB
REMOVE LIGHT CONTROL RHEOSTAT
Light Control Rheostat -- Removal |
- HINT:
- Use the same procedure for RHD and LHD vehicles.
- The procedure listed below is for LHD vehicles.
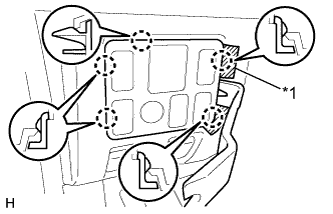
| 1. REMOVE NO. 1 SWITCH HOLE BASE |
Put protective tape around the No. 1 switch hole base.
Text in Illustration*1
| Protective Tape
|
Using a moulding remover, detach the 5 claws.
Disconnect the connectors and remove the No. 1 switch hole base.
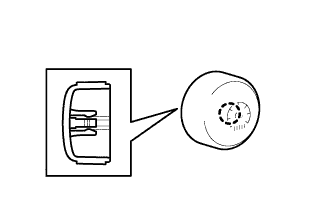
| 2. REMOVE LIGHT CONTROL RHEOSTAT KNOB |
Detach the claw and remove the light control rheostat knob.
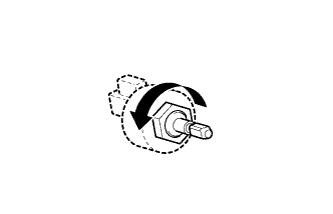
| 3. REMOVE LIGHT CONTROL RHEOSTAT |
Remove the nut and light control rheostat.