Side Moulding (For Rear Door) Removal
REMOVE REAR POWER WINDOW REGULATOR SWITCH ASSEMBLY WITH REAR DOOR ARMREST BASE PANEL
REMOVE DOOR PULL HANDLE
REMOVE REAR DOOR TRIM BOARD SUB-ASSEMBLY LH
REMOVE REAR DOOR INSIDE HANDLE SUB-ASSEMBLY LH
REMOVE REAR DOOR NO. 2 TRIM BRACKET
REMOVE REAR DOOR SERVICE HOLE COVER LH
REMOVE REAR DOOR OUTSIDE MOULDING LH
Side Moulding (For Rear Door) -- Removal |
- HINT:
- Use the same procedure for the RH and LH sides.
- The procedure listed below is for the LH side.
| 1. REMOVE REAR POWER WINDOW REGULATOR SWITCH ASSEMBLY WITH REAR DOOR ARMREST BASE PANEL |
Using a moulding remover, detach the 2 clips and 2 claws.
Disconnect the connector and remove the rear power window regulator switch assembly with rear door armrest base panel.
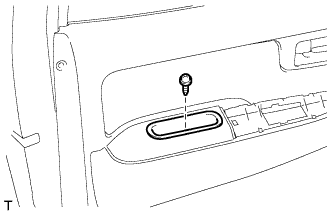
| 2. REMOVE DOOR PULL HANDLE |
Remove the screw and door pull handle.
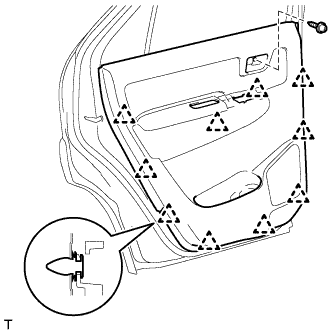
| 3. REMOVE REAR DOOR TRIM BOARD SUB-ASSEMBLY LH |
Remove the screw.
Detach the 10 clips and remove the rear door trim board.
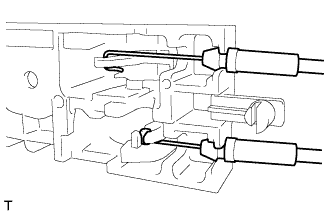
| 4. REMOVE REAR DOOR INSIDE HANDLE SUB-ASSEMBLY LH |
Detach the claw and 2 guides as indicated by the arrows in the order shown in the illustration.
Disconnect the rear door inside locking cable and rear door lock remote control cable and remove the rear door inside handle.
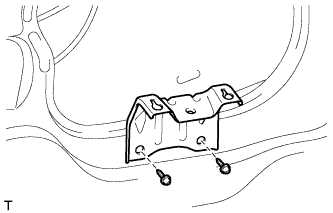
| 5. REMOVE REAR DOOR NO. 2 TRIM BRACKET |
Remove the 2 screws and rear door No. 2 trim bracket.
| 6. REMOVE REAR DOOR SERVICE HOLE COVER LH |
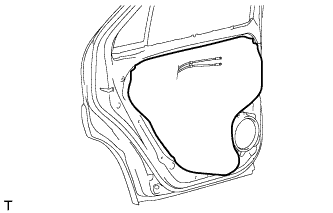
Pull out the rear door inside locking cable, rear door lock remote control cable and wire harness from the rear door service hole cover, and then remove the rear door service hole cover.
- HINT:
- Remove any remaining butyl tape from the rear door panel.
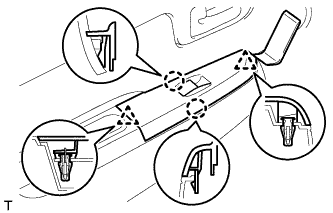
| 7. REMOVE REAR DOOR OUTSIDE MOULDING LH |
Put a 4 mm (0.157 in.) drill bit into a drill.
Wind tape around the drill bit approximately 5 mm (0.197 in.) from the tip of the drill as shown in the illustration.
- NOTICE:
- Tape the 4 mm (0.157 in.) drill bit to prevent the drill bit from going too deep.
- Standard:
Area
| Specified Condition
|
A
| 5 mm (0.197 in.)
|
Lightly press the drill against the 3 rivets and drill off the flanges of the 3 rivets.
- CAUTION:
- Be careful of the drilled rivet as it may become hot.
- NOTICE:
- Pressing the drill too firmly will cause the rivet to turn and result in the rivet not being drilled through.
- Do not pry the rivet with the drill because this may cause damage to the installation holes of the rivet or the drill bit.
Put protective tape around the rear door outside moulding.
Text in Illustration*1
| Protective Tape
|
Detach the 5 clips and remove the rear door outside moulding.
Remove the 5 clips from the vehicle body.
Using a vacuum cleaner, remove the rivet fragments and shavings from the drilled area.