Radio Receiver -- Installation |
| 1. INSTALL NO. 2 RADIO BRACKET |
Install the No. 2 radio bracket to the radio receiver with the 4 screws.
 |
| 2. INSTALL NO. 1 RADIO BRACKET |
Install the No. 1 radio bracket to the radio receiver with the 4 screws.
 |
| 3. INSTALL RADIO RECEIVER ASSEMBLY WITH BRACKET |
Connect all the connectors and insert the radio receiver assembly with bracket.
 |
Install the radio receiver with the 4 screws.
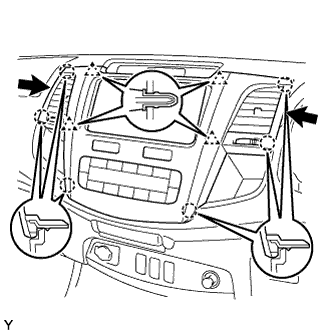
| 4. INSTALL CENTER INSTRUMENT CLUSTER FINISH PANEL ASSEMBLY (for Automatic Air Conditioning System) |
Connect all the connectors.
Attach the 6 claws and 4 clips to install the panel.
 |
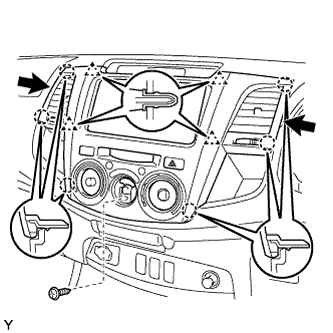
| 5. INSTALL CENTER INSTRUMENT CLUSTER FINISH PANEL ASSEMBLY |
Connect all the connectors.
 |
Attach the 6 claws and 4 clips to install the panel.
Install the screw.
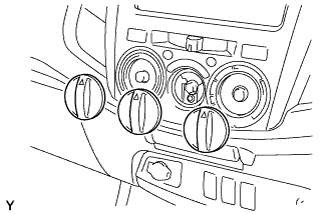
| 6. INSTALL NO. 2 HEATER CONTROL KNOB |
Install the 3 control knobs.
 |
| 7. INSTALL HEATER CONTROL KNOB |
Install the control knob.
 |
| 8. CONNECT CABLE TO NEGATIVE BATTERY TERMINAL |
- NOTICE:
- When disconnecting the cable, some systems need to be initialized after the cable is reconnected (Toyota Fortuner RM000002HD2002X.html).