Front Bumper -- Installation |
- HINT:
- A bolt without a torque specification is shown in the standard bolt chart (Toyota Fortuner RM00000118W017X.html).
| 1. INSTALL FRONT BUMPER REINFORCEMENT EXTENSION LH |
Attach the claws to install the reinforcement extension.
| 2. INSTALL FRONT BUMPER REINFORCEMENT EXTENSION RH |
- HINT:
- Use the same procedures described for the LH side.
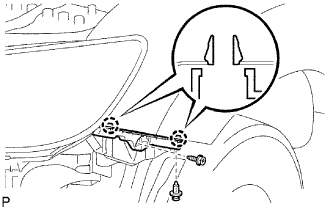
| 3. INSTALL FRONT BUMPER REINFORCEMENT SUB-ASSEMBLY |
 |
Install the reinforcement with the 4 nuts.
- Torque:
- 67 N*m{683 kgf*cm, 49 ft.*lbf}
| 4. INSTALL FRONT BUMPER SIDE SUPPORT LH |
 |
Attach the 2 claws to install the side support.
Install the screw and clip.
| 5. INSTALL FRONT BUMPER SIDE SUPPORT RH |
- HINT:
- Use the same procedures described for the LH side.
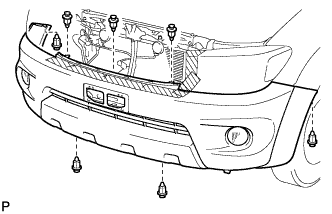
| 6. INSTALL FRONT BUMPER COVER |
 |
Put protective tape around the bumper cover.
w/ Fog Light:
Connect the 2 fog light connectors.
Attach the 8 claws to install the bumper cover.
Install the 7 clips.
 |
| 7. INSTALL ENGINE SIDE COVER SUB-ASSEMBLY LH |
 |
Install the engine side cover with the 3 bolts and 2 clips.
- Torque:
- 11.5 N*m{117 kgf*cm, 8 ft.*lbf}
| 8. INSTALL ENGINE SIDE COVER SUB-ASSEMBLY RH |
- HINT:
- Use the same procedures described for the LH side.
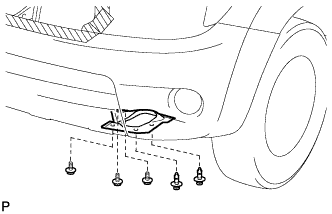
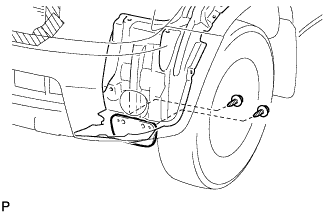
| 9. INSTALL FRONT FENDER SPLASH SHIELD SUB-ASSEMBLY LH |
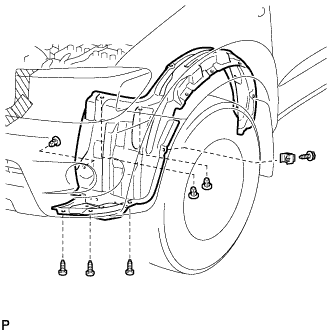 |
Install the splash shield with the 3 clips and 4 screws.
| 10. INSTALL FRONT FENDER SPLASH SHIELD SUB-ASSEMBLY RH |
- HINT:
- Use the same procedures described for the LH side.
| 11. INSTALL FRONT NO. 1 WHEEL OPENING EXTENSION PAD |
 |
- HINT:
- Use the same procedures to install the extension pad on the other side.
Install the extension pad with the 2 screws.
| 12. INSTALL RADIATOR GRILLE |
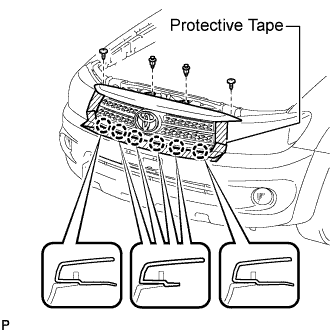 |
Put protective tape around the radiator grille.
Attach the 6 claws to install the radiator grille.
Install the 2 clips and 2 screws.