Outer Rear View Mirror -- Removal |
- HINT:
- Use the same procedure for RHD and LHD vehicles.
- The procedure listed below is for LHD vehicles.
- Use the same procedure for the RH and LH sides.
- The procedure listed below is for the LH side.
| 1. REMOVE POWER WINDOW REGULATOR MASTER SWITCH ASSEMBLY WITH FRONT DOOR ARMREST BASE PANEL LH |
Using a moulding remover, detach the 2 clips and 4 claws.
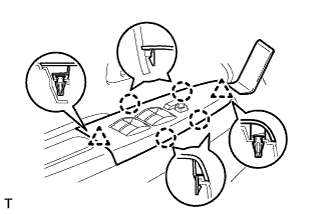 |
Disconnect the connector and remove the power window regulator master switch assembly with front door armrest base panel.
| 2. REMOVE POWER WINDOW REGULATOR SWITCH ASSEMBLY WITH FRONT DOOR ARMREST BASE PANEL RH (for Front Passenger Side) |
Using a moulding remover, detach the 2 clips and 4 claws.
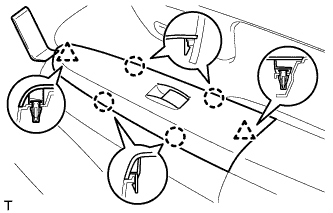 |
Disconnect the connector and remove the power window regulator switch assembly with front door armrest base panel.
| 3. REMOVE FRONT DOOR LOWER FRAME BRACKET GARNISH LH |
Detach the 2 clips and remove the front door lower frame bracket garnish.
Text in Illustration *A w/o Front No. 2 Speaker *B w/ Front No. 2 Speaker
 |
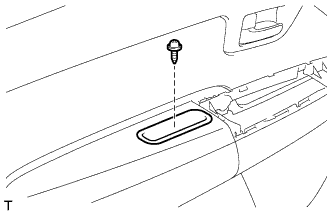
| 4. REMOVE DOOR PULL HANDLE |
Remove the screw and door pull handle.
 |
| 5. REMOVE FRONT DOOR TRIM BOARD SUB-ASSEMBLY LH |
Remove the clip and screw.
 |
Detach the 8 clips and remove the front door trim board.
Text in Illustration *1 Clip *2 Screw
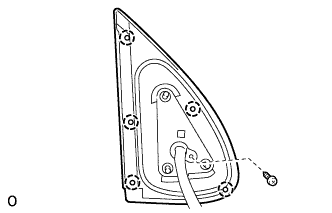
| 6. REMOVE OUTER REAR VIEW MIRROR ASSEMBLY LH |
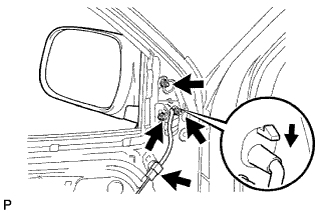 |
Disconnect the mirror connector.
Remove the 3 nuts.
Push down the claw and remove the outer rear view mirror assembly LH.
| 7. REMOVE OUTER MIRROR LH |
Using a screwdriver, detach the 2 claws as shown in the illustration.

Text in Illustration *1 Screwdriver *2 Protective Tape - NOTICE:
- Do not pull the outer mirror LH with excessive force. Doing so may cause the actuator to come off or break the mirror surface.
- HINT:
- Apply protective tape to the mirror body and screwdriver tip.
Detach the 2 claws at the upper part of the outer mirror.
 |
Remove the outer mirror LH.
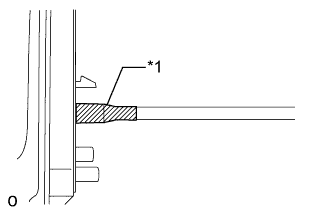
| 8. REMOVE OUTER MIRROR COVER LH |
Remove the tape.
Text in Illustration *1 Tape
 |
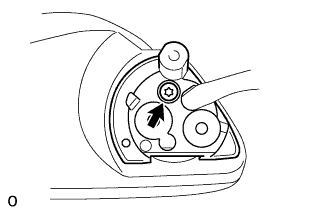
Remove the screw, detach the 5 claws and remove the rubber base.
- HINT:
- It is not necessary to completely remove the rubber base. Slightly move the rubber base so that the outer mirror cover LH can be removed in a later step.
 |
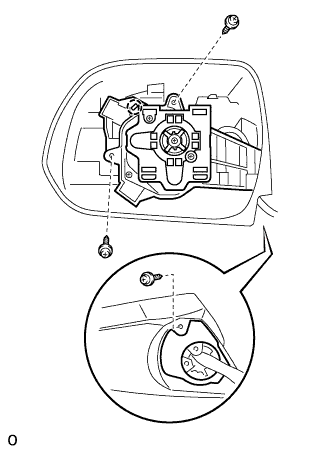
Using a T25 "TORX" socket wrench, remove the 3 screws.
 |
Using a T25 "TORX" socket wrench, remove the screw.
 |
Remove the 3 screws.
 |
Detach the 6 claws.

Detach the 2 claws and remove the outer mirror cover LH as shown in the illustration.