Fuel Filter -- Replacement |
- HINT:
- When replacing the filter, use TOYOTA genuine parts or equivalent parts.
| 1. DISCONNECT CABLE FROM NEGATIVE BATTERY TERMINAL |
- CAUTION:
- Wait at least 90 seconds after disconnecting the cable from the negative (-) battery terminal to prevent airbag and seat belt pretensioner activation.
| 2. LOOSEN FUEL TANK CAP ASSEMBLY |
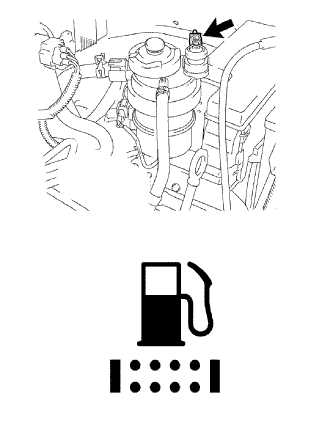
| 3. REMOVE FUEL FILTER |
 |
- HINT:
- Replacement of the fuel filter element can be performed with the fuel filter installed to the bracket.
Disconnect the warning switch connector.
Move the clip to disconnect the hose connected to the filter outlet side.
Connect a hose to the drain cock. Place the other side of the same hose into a container.
Loosen the drain cock to drain the fuel (approximately 50 cc (3.0 cu in.)).
Tighten the drain cock.
Using a screwdriver as a lever, loosen the fastener nut until it can be loosened by hand.
 |
Fully loosen the fastener nut by hand.
 |
To remove the cap, pull up one side of the cap and then lift it off.
 |
Remove the filter element from the case.
Remove the case side O-ring.
| 4. INSTALL FUEL FILTER |
Clean the fuel filter case.
- NOTICE:
- When replacing the fuel filter, clean the fuel filter case and remove dirt completely.
Attach 2 new O-rings to a new element and a new O-ring to the case.
 |
Install the element to the case.
Align the cap's mark and case's mark.
 |
Push the cap into the case by hand.
- Standard clearance (A):
- 1.5 mm (0.059 in.) or less
- HINT:
- The clearance between the cap and case should be even around the entire circumference of the cap and case.
 |
Turn the fastener nut until a "click" sound is heard.
- HINT:
- Just before the marks of the case and nut align, the turning difficulty of the fastener nut will increase. Use a screwdriver as a lever to turn the fastener nut.
 |
Measure the distance between the marks on the cap and case, and the clearance between the cap and case.
- Standard distance (A):
- 1.0 mm (0.039 in.) or more
- Standard clearance (B):
- 1.0 mm (0.039 in.) or less
Connect the hose to the filter outlet side and install the clip as shown in the illustration.
 |
| 5. TIGHTEN FUEL TANK CAP ASSEMBLY |
| 6. CONNECT CABLE TO NEGATIVE BATTERY TERMINAL |
| 7. RESET FUEL SYSTEM WARNING LIGHT |
 |
Turn the ignition switch ON.
After turning the ignition switch ON, connect the warning switch connector within 3 to 60 seconds.
Check that the combination meter's fuel system warning light turns off.
| 8. BLEED AIR FROM FUEL SYSTEM |
 |
Using the hand pump, bleed air from the fuel system until pumping becomes difficult.
| 9. CHECK FOR FUEL LEAKS |
- CAUTION:
- During Active Test mode, engine speed becomes high and combustion noise becomes loud, so pay attention.
- During Active Test mode, fuel becomes high-pressured. Be extremely careful not to expose your eyes, hands, or body to escaped fuel.
Check that there are no leaks from any part of the fuel system when the engine is stopped. If there is fuel leakage, repair or replace parts as necessary.
Start the engine and check that there are no leaks from any part of the fuel system. If there is fuel leakage, repair or replace parts as necessary.
Disconnect the return hose from the common rail.
Start the engine and check for fuel leaks from the return pipe.
If there is fuel leakage, replace the common rail.
Connect the intelligent tester to the DLC3.
Start the engine and push the intelligent tester main switch on.
Select the Fuel Leak test from the Active Test mode on the intelligent tester.
If the intelligent tester is not available, fully depress the accelerator pedal quickly. Increase the engine speed to the maximum and maintain that speed for 2 seconds. Repeat this operation several times.
Check that there are no leaks from any part of the fuel system.
- NOTICE:
- A return pipe leakage of less than 10 cc (0.6 cu in.) per minute is acceptable.
Reconnect the return hose to the common rail.