Fuel Injector -- Removal |
- NOTICE:
- After removing the injection pipes, clean them with a brush and compressed air.
- When replacing the injector, also replace the injection pipe.
| 1. DISCONNECT CABLE FROM NEGATIVE BATTERY TERMINAL |
- CAUTION:
- Wait at least 90 seconds after disconnecting the cable from the negative (-) battery terminal to prevent airbag and seat belt pretensioner activation.
| 2. LOOSEN FUEL TANK CAP ASSEMBLY |
| 3. DRAIN FUEL |
| 4. REMOVE NO. 1 ENGINE COVER SUB-ASSEMBLY |
 |
Remove the 3 bolts, 2 nuts and engine cover.
| 5. REMOVE CHARGE AIR COOLER ASSEMBLY WITH INTAKE AIR CONNECTOR |
Disconnect the diesel turbo IAT sensor connector.
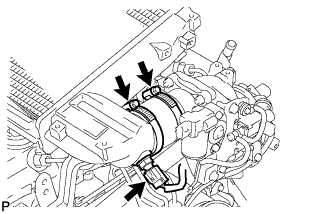 |
Loosen the 2 hose clamps of the No. 1 air hose.
Loosen the 2 hose clamps of the No. 2 air hose.
 |
Remove the 4 bolts and CAC.
 |
Using a 22 mm deep socket wrench, remove the IAT sensor and gasket.
- HINT:
- Replace the IAT sensor if it is deformed, cracked or malfunctioning. It is not necessary to replace the IAT sensor each time the CAC is replaced.
 |
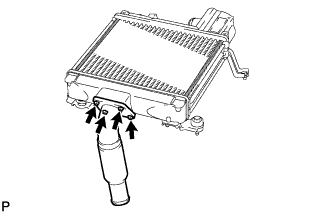
Remove the 4 bolts, intake air connector and gasket.
 |
| 6. REMOVE INJECTION PIPE |
 |
- NOTICE:
- After removing the fuel pipe, cover the outlets on the common rail with tape to keep out foreign matter.
- After removing the fuel pipe, put it in a plastic bag to prevent foreign matter from contaminating its injector inlet.
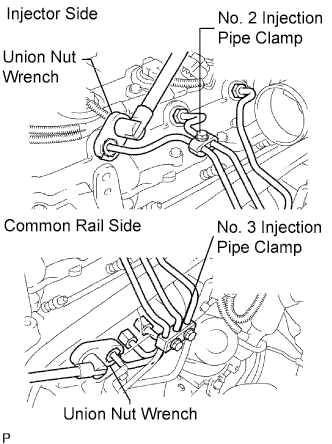
Remove the 2 nuts and No. 3 injection pipe clamp.
Remove the bolt and No. 2 injection pipe clamp.
Using union nut wrench, loosen the union nuts and remove the No. 1, No. 2 and No. 3 injection pipes.
Remove the 2 bolts and disconnect the 2 injection pipe clamps.
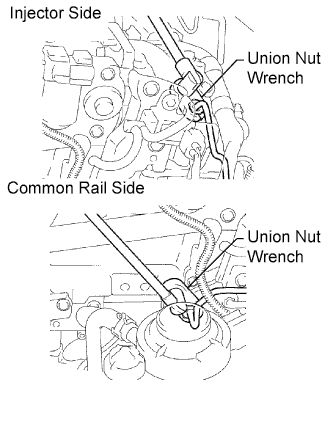
Using union nut wrench, loosen the union nuts and remove the No. 4 injection pipe.

| 7. REMOVE CYLINDER HEAD COVER |
Disconnect the ventilation hose.
 |
Disconnect the 4 connectors.
Using a small screwdriver, remove the 4 holder seals by prying the portion between each holder seal and the cutout part of the cylinder head.
 |
Remove the 10 bolts, 2 nuts, cylinder head cover and gasket.
 |
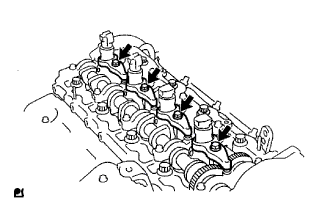
| 8. REMOVE INJECTOR |
 |
Remove the union bolt, 4 hollow screws, 5 gaskets and nozzle leakage pipe.
- NOTICE:
- When removing the nozzle leakage pipe, place a cushion under the pipe.
- Be careful not to deform or scratch the union seal surface.
- After removing the fuel pipe, put it in a plastic bag to prevent foreign matter from contaminating its injector inlet.
Remove the 4 bolts, 4 washers, 4 nozzle holder clamps and 4 injectors.
- HINT:
- Arrange the injectors, holder clamps, washers and bolts in the correct order.
 |
Remove the O-ring and back-up ring from each injector.
Remove the 4 injection nozzle sheets from the cylinder head.