Fuel Lid Lock Control -- Removal |
| 1. DISCONNECT CABLE FROM NEGATIVE BATTERY TERMINAL |
- CAUTION:
- For vehicles with SRS:
- Wait at least 90 seconds after disconnecting the cable from the negative (-) battery to disable the SRS system.
- NOTICE:
- When disconnecting the cable, some systems need to be initialized after the cable is reconnected (Toyota Fortuner RM000002HD2006X.html).
| 2. REMOVE FRONT SEAT ASSEMBLY LH |
Remove the front seat (Toyota Fortuner RM000000Z8U004X.html).
| 3. REMOVE FRONT SEAT ASSEMBLY RH (for RHD) |
- HINT:
- Use the same procedures described for the LH side.
| 4. REMOVE REAR NO. 2 SEAT ASSEMBLY LH |
Remove the rear No. 2 seat (Toyota Fortuner RM000001DOK002X.html).
| 5. REMOVE CONSOLE BOX ASSEMBLY (for RHD) |
Remove the console box assembly (Toyota Fortuner RM000000SQH00QX.html).
| 6. REMOVE FRONT DOOR SCUFF PLATE LH |
 |
Detach the 7 claws and 3 clips, and remove the front door scuff plate.
| 7. REMOVE FRONT DOOR SCUFF PLATE RH (for RHD) |
- HINT:
- Use the same procedures described for the LH side.
| 8. REMOVE COWL SIDE TRIM BOARD LH (for LHD) |
 |
Remove the cap nut.
Detach the 2 clips and remove the cowl side trim board.
| 9. REMOVE COWL SIDE TRIM BOARD RH (for RHD) |
- HINT:
- Use the same procedures described for the LH side.
| 10. REMOVE REAR DOOR SCUFF PLATE LH |
 |
Detach the 7 claws and 2 clips, and remove the rear door scuff plate.
| 11. REMOVE LOWER CENTER PILLAR GARNISH LH |
Disconnect the front outer seat belt anchor's built-in bolt.
Detach the 2 claws and remove the outer lap belt anchor cover.
Disconnect the anchor's built-in bolt from the pillar.

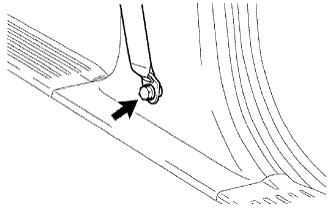
Detach the 2 claws and 2 clips, and remove the center pillar garnish.
 |
| 12. REMOVE BACK DOOR SCUFF PLATE |
 |
Detach the 4 claws and 6 clips, and remove the back door scuff plate.
| 13. REMOVE QUARTER INSIDE TRIM BOARD LH |
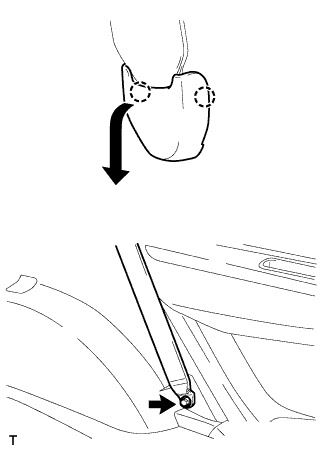
Disconnect the rear outer No. 1 seat belt anchor.
Detach the 2 claws and remove the outer lap belt anchor cover.
Remove the bolt and disconnect the anchor.
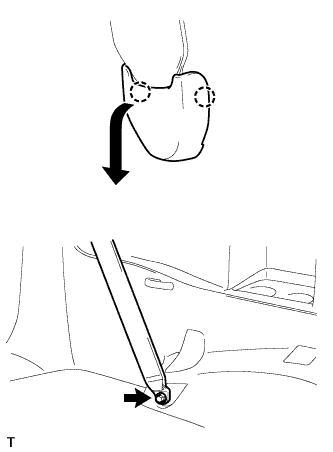
Disconnect the rear outer No. 2 seat belt anchor.
Detach the 2 claws and remove the outer lap belt anchor cover.
Remove the bolt and disconnect the anchor.
Remove the screw and quarter trim hook.
 |
Using a clip remover, remove the clip labeled A.
Detach the 6 claws and 10 clips, and remove the quarter inside trim board.
Disconnect the power point socket connector.
Remove the 2 belt hangers.
| 14. REMOVE FRONT FLOOR CARPET ASSEMBLY (for RHD) |
Partially remove the floor carpet.
- HINT:
- It is not necessary to fully remove the floor carpet. Partially remove it so that the lock control cable can be removed in a later step.
| 15. REMOVE FUEL LID LOCK CONTROL CABLE SUB-ASSEMBLY |
Remove the fuel lid lock open lever.
Remove the tape and cable from the clamps as shown in the illustration.
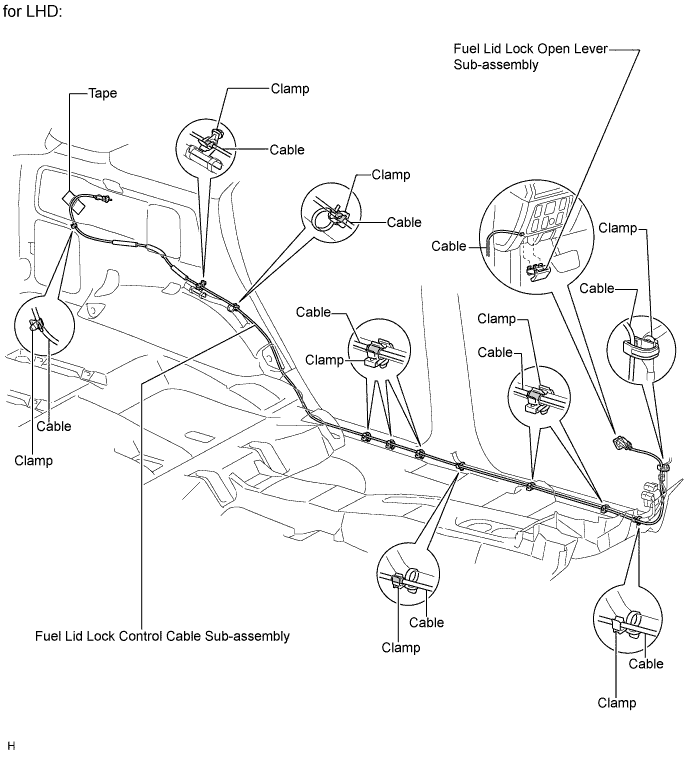

Turn the lock retainer counterclockwise and remove the cable from the retainer.
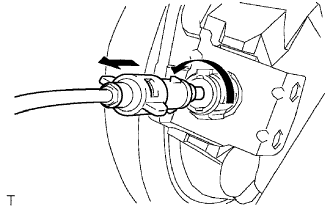 |
| 16. REMOVE FUEL FILLER OPENING LID LOCK RETAINER |
 |
Turn the lock retainer clockwise and remove the lock retainer as shown in the illustration.