Fuel Lid Lock Control -- Removal |
| 1. DISCONNECT CABLE FROM NEGATIVE BATTERY TERMINAL |
- CAUTION:
- Wait at least 90 seconds after disconnecting the cable from the negative (-) battery terminal to prevent airbag and seat belt pretensioner activation.
| 2. REMOVE FRONT SEAT ASSEMBLY RH |
Remove the front seat (Toyota Fortuner RM000000Z8U004X.html).
| 3. REMOVE FRONT SEAT ASSEMBLY LH |
- HINT:
- Use the same procedures described for the RH side.
| 4. REMOVE REAR NO. 2 SEAT ASSEMBLY LH |
Remove the rear No. 2 seat (Toyota Fortuner RM000001DOK002X.html).
| 5. REMOVE SHIFT LEVER KNOB SUB-ASSEMBLY |
 |
Twist the transmission shift lever knob in the direction indicated by the arrow and remove it.
for 4WD:
Twist the transfer shift lever knob in the direction indicated by the arrow and remove it.
| 6. REMOVE PARKING BRAKE HOLE COVER SUB-ASSEMBLY |
 |
Detach the 4 claws and remove the hole cover.
| 7. REMOVE UPPER CONSOLE PANEL SUB-ASSEMBLY |
 |
- NOTICE:
- Be careful not to damage the instrument panel lower and console box with the claws of the upper console panel.
Detach the 12 claws and remove the console panel.
| 8. REMOVE CONSOLE BOX ASSEMBLY |
 |
Remove the 4 screws <F> and 2 bolts <E>.
Using a clip remover, remove the 2 clips and console box.
| 9. REMOVE FRONT DOOR SCUFF PLATE LH |
Using a screwdriver, detach the 7 claws.
- HINT:
- Tape the screwdriver tip before use.
 |
Using a clip remover, detach the 3 clips and remove the scuff plate.
| 10. REMOVE FRONT DOOR SCUFF PLATE RH |
- HINT:
- Use the same procedures described for the LH side.
| 11. REMOVE COWL SIDE TRIM BOARD RH |
- HINT:
- Use the same procedures described for the LH side.
| 12. REMOVE REAR DOOR SCUFF PLATE LH |
Using a screwdriver, detach the 7 claws.
- HINT:
- Tape the screwdriver tip before use.
 |
Using a clip remover, detach the 2 clips and remove the scuff plate.
| 13. REMOVE CENTER PILLAR LOWER GARNISH LH |
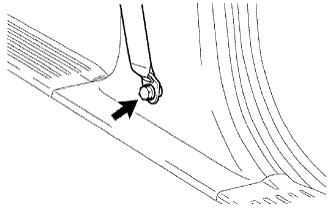
Disconnect the front seat outer belt anchor's built-in bolt.
Detach the 2 claws and remove the lap belt outer anchor cover.
Disconnect the anchor's built-in bolt from the pillar.

Using a screwdriver, detach the 2 claws.
- HINT:
- Tape the screwdriver tip before use.
 |
Using a clip remover, detach the 2 clips and remove the garnish.
| 14. REMOVE BACK DOOR SCUFF PLATE |
Using a screwdriver, detach the 4 claws.
- HINT:
- Tape the screwdriver tip before use.
 |
Using a clip remover, detach the 6 clips and remove the scuff plate.
| 15. REMOVE QUARTER INSIDE TRIM BOARD LH |
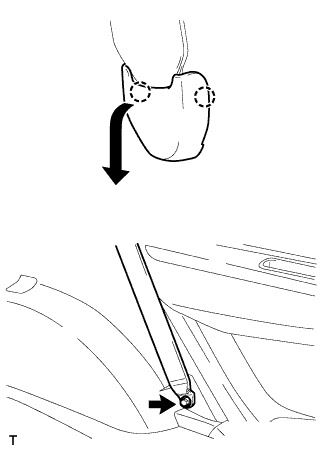
Disconnect the rear No. 1 seat belt outer anchor.
Detach the 2 claws and remove the lap belt outer anchor cover.
Remove the bolt and disconnect the anchor.
 |
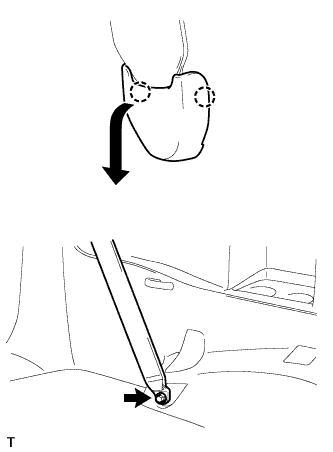
Disconnect the rear No. 2 seat belt outer anchor.
Detach the 2 claws and remove the lap belt outer anchor cover.
Remove the bolt and disconnect the anchor.
Remove the screw and quarter trim hook.
Using a clip remover, remove the clip labeled A.
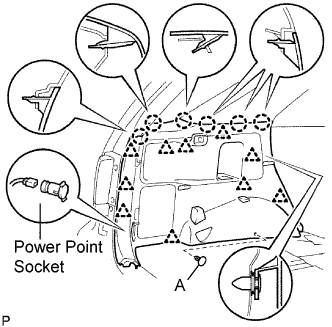 |
Using a screwdriver, detach the 6 claws.
- HINT:
- Tape the screwdriver tip before use.
Using a clip remover, detach the 10 clips and remove the trim board.
Disconnect the power point socket connector.
Remove the 2 belt hangers.
| 16. REMOVE FRONT FLOOR CARPET ASSEMBLY |
Partially remove the floor carpet.
- HINT:
- It is not necessary to fully remove the floor carpet. Partially remove it so that the lock control cable can be removed in a later step.
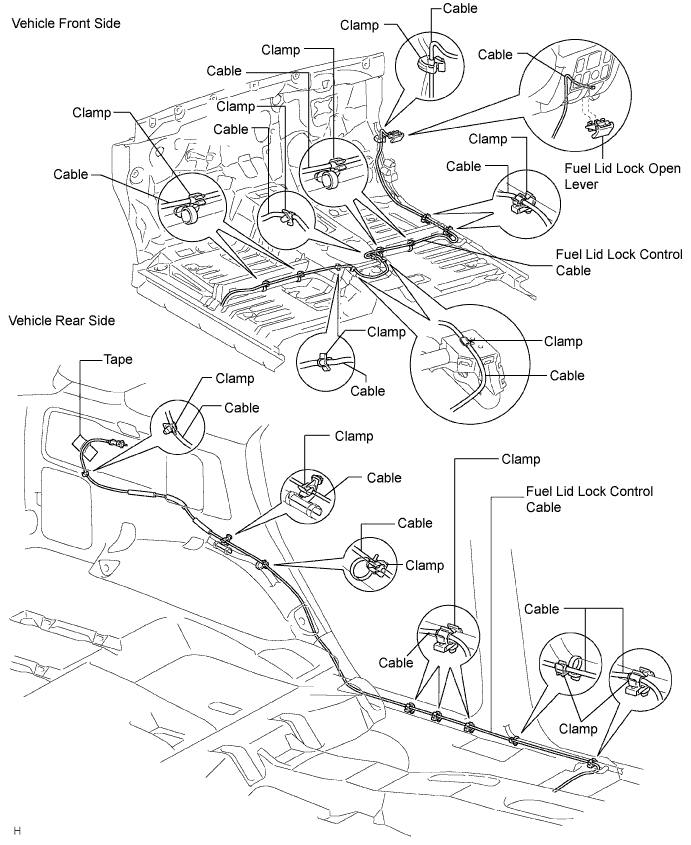
| 17. REMOVE FUEL LID LOCK CONTROL CABLE SUB-ASSEMBLY |
Remove the open lever.
Remove the tape and cable from the clamps as shown in the illustration.
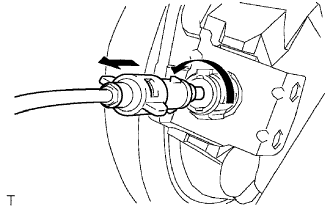
Turn the lock retainer counterclockwise and remove the cable from the retainer.
 |
| 18. REMOVE FUEL FILLER OPENING LID LOCK RETAINER |
 |
Turn the lock retainer clockwise and remove the lock retainer as shown in the illustration.