Front Seat Assembly (W/ Front Seat Side Airbag) Reassembly
INSTALL FRONT SEAT CUSHION EDGE PROTECTOR LH
INSTALL LOWER RECLINING ADJUSTER ARM SUB-ASSEMBLY LH
INSTALL LOWER RECLINING ADJUSTER ARM SUB-ASSEMBLY RH
INSTALL SEAT TRACK HANDLE SUB-ASSEMBLY LH
INSTALL FRONT SEAT CUSHION FRAME SUB-ASSEMBLY LH
INSTALL FRONT SEAT CUSHION PROTECTOR
INSTALL SEPARATE TYPE FRONT SEAT CUSHION COVER
INSTALL NO. 1 SEATBACK CLOTH
INSTALL SEPARATE TYPE FRONT SEATBACK PAD
INSTALL SEPARATE TYPE FRONT SEATBACK COVER
INSTALL SEPARATE TYPE FRONT SEATBACK ASSEMBLY
INSTALL SEATBACK SPRING LH
INSTALL FRONT SEAT CUSHION SHIELD LH
INSTALL RECLINING ADJUSTER RELEASE HANDLE LH
INSTALL FRONT SEAT INNER CUSHION SHIELD LH
INSTALL FRONT SEAT CUSHION COVER LH
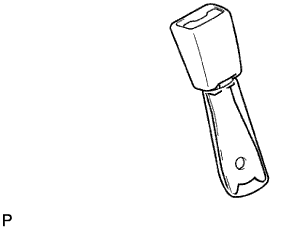
INSTALL FRONT SEAT INNER BELT ASSEMBLY LH
Front Seat Assembly (W/ Front Seat Side Airbag) -- Reassembly |
- CAUTION:
- Wear protective gloves. Sharp areas on the parts may injure your hands.
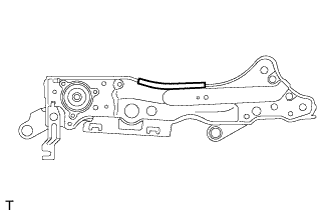
| 1. INSTALL FRONT SEAT CUSHION EDGE PROTECTOR LH |
Install the front seat cushion edge protector LH as shown in the illustration.
| 2. INSTALL LOWER RECLINING ADJUSTER ARM SUB-ASSEMBLY LH |
Install the lower reclining adjuster arm sub-assembly LH with the 3 bolts.
- Torque:
- 20 N*m{199 kgf*cm, 14 ft.*lbf}
| 3. INSTALL LOWER RECLINING ADJUSTER ARM SUB-ASSEMBLY RH |
- HINT:
- Use the same procedure described for the LH side.
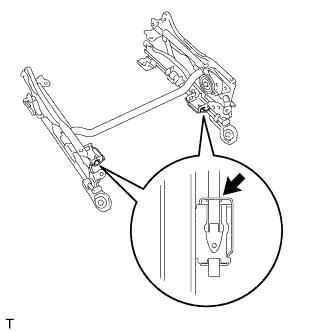
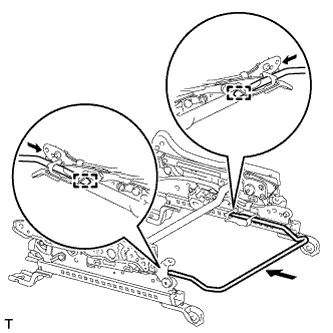
| 4. INSTALL SEAT TRACK HANDLE SUB-ASSEMBLY LH |
Apply MP grease to the locations shown in the illustration.
Text in Illustration
| MP Grease
|
Attach the 2 springs to install the seat track handle sub-assembly LH as shown in the illustration.
- HINT:
- The seat track handle sub-assembly LH will get caught on the springs when installing it. Detach the springs to install the seat track handle sub-assembly LH.
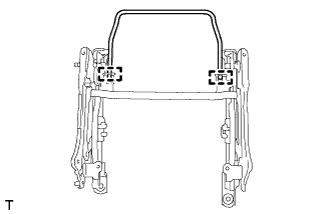
| 5. INSTALL FRONT SEAT CUSHION FRAME SUB-ASSEMBLY LH |
Install the front seat cushion frame sub-assembly LH to the lower reclining adjuster arm sub-assembly RH and the lower reclining adjuster arm sub-assembly LH with the 4 bolts.
- Torque:
- 20 N*m{199 kgf*cm, 14 ft.*lbf}
| 6. INSTALL FRONT SEAT CUSHION PROTECTOR |
Install the 2 front seat cushion protectors.
| 7. INSTALL SEPARATE TYPE FRONT SEAT CUSHION COVER |
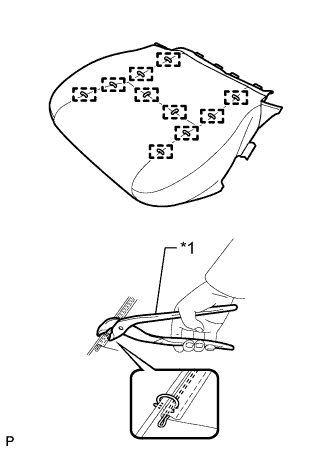
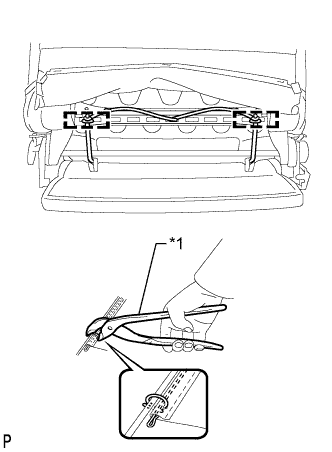
Using hog ring pliers, install the separate type front seat cushion cover to the separate type front seat cushion pad with new hog rings.
- NOTICE:
- Be careful not to damage the cover.
- When installing the hog rings, avoid wrinkling the cover.
Text in Illustration*1
| Hog Ring Pliers
|
Attach the hooks to install the separate type front seat cushion cover with pad to the front seat cushion frame sub-assembly LH.
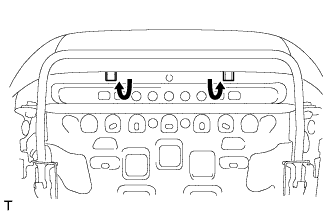
Bend the 2 front seat cushion frame claws downward.
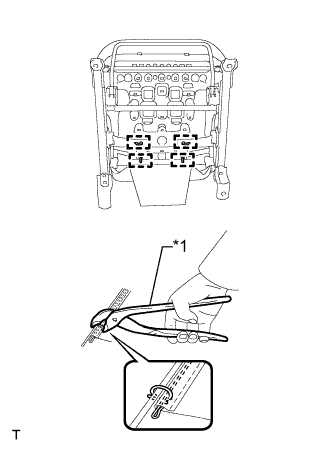
Using hog ring pliers, attach the separate type front seat cushion cover to the front seat cushion frame sub-assembly LH with new hog rings.
Text in Illustration*1
| Hog Ring Pliers
|
Attach the wire harness clamp.
| 8. INSTALL NO. 1 SEATBACK CLOTH |
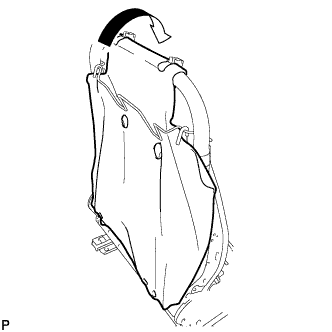
Install the separate type front seatback pad to the separate type front seatback spring assembly.
| 9. INSTALL SEPARATE TYPE FRONT SEATBACK PAD |
Install the separate type front seatback pad to the separate type front seatback spring assembly.
| 10. INSTALL SEPARATE TYPE FRONT SEATBACK COVER |
Using hog ring pliers, install the separate type front seatback cover to the separate type front seatback pad with new hog rings.
- NOTICE:
- Be careful not to damage the cover.
- When installing the hog rings, avoid wrinkling the cover.
Text in Illustration*1
| Hog Ring Pliers
| -
| -
|
*a
| Front view of front seatback
| *b
| Rear view of front seatback
|
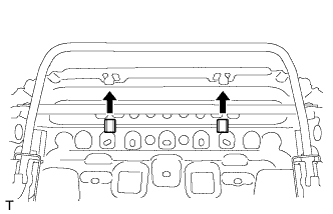
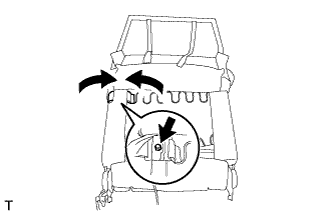
Attach the 4 claws to install the 2 front seat headrest supports.
Attach the separate type front seatback cover bracket and install the nut.
- Torque:
- 5.5 N*m{56 kgf*cm, 49 in.*lbf}
- NOTICE:
- After the separate type front seatback cover is installed, make sure the separate type front seatback cover bracket is not twisted.
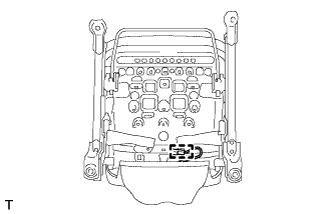
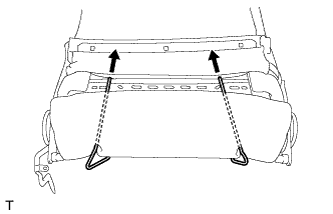
Pass the straps of the separate type front seatback cover through the holes of the separate type front seatback pad.
Using hog ring pliers, attach the 2 straps of the separate type front seatback cover to the separate type front seatback spring assembly with new hog rings.
Text in Illustration*1
| Hog Ring Pliers
|
Pass the front seat airbag wire harness through the hole of the separate type front seatback cover.
Using hog ring pliers, attach the separate type front seatback cover with new hog rings.
- NOTICE:
- Be careful not to damage the cover.
- When installing the hog rings, avoid wrinkling the cover.
Text in Illustration*1
| Hog Ring Pliers
|
| 11. INSTALL SEPARATE TYPE FRONT SEATBACK ASSEMBLY |
Install the separate type front seatback assembly with the 4 bolts.
- Torque:
- 40 N*m{408 kgf*cm, 30 ft.*lbf}
Using hog ring pliers, attach the separate type front seat cushion cover and rubber bands of the separate type front seatback cover to the front seat cushion frame sub-assembly LH with new hog rings.
Text in Illustration*1
| Hog Ring Pliers
|
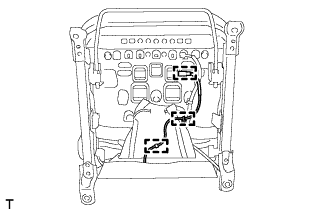
Attach the 3 front seat airbag wire harness clamps.
| 12. INSTALL SEATBACK SPRING LH |
Install the seatback spring LH.
| 13. INSTALL FRONT SEAT CUSHION SHIELD LH |
Attach the guide and 2 hooks in the order shown in the illustration to install the front seat cushion shield LH.
Text in Illustration*1
| Guide
|
*2
| Hook
|
Install the 2 screws.
| 14. INSTALL RECLINING ADJUSTER RELEASE HANDLE LH |
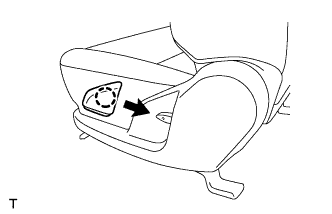
Attach the claw to install the reclining adjuster release handle LH.
| 15. INSTALL FRONT SEAT INNER CUSHION SHIELD LH |
Attach the 2 hooks in the order shown in the illustration to install the front seat inner cushion shield LH.
Install the 2 screws.
| 16. INSTALL FRONT SEAT CUSHION COVER LH |
Install the front seat cushion cover LH.
| 17. INSTALL FRONT SEAT INNER BELT ASSEMBLY LH |
w/ Passenger Seat Belt Warning Light:
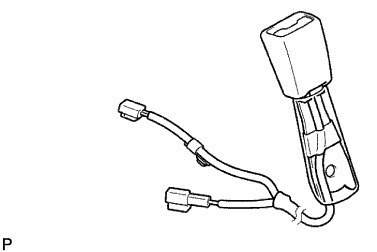
Attach the 2 clamps as shown in the illustration.
Connect the connector.
Install the buckle cover on the inner belt.
Attach the wire harness to the clamp.
Install the seat belt with the nut.
- Torque:
- 42 N*m{428 kgf*cm, 31 ft.*lbf}
- NOTICE:
- Do not overlap the anchor part of the seat belt and protruding part of the seat adjuster.
w/o Passenger Seat Belt Warning Light:
Install the buckle cover on the inner belt.
Install the seat belt with the nut.
- Torque:
- 42 N*m{428 kgf*cm, 31 ft.*lbf}
- NOTICE:
- Do not overlap the anchor part of the seat belt and protruding part of the seat adjuster.
