INSTALL VERTICAL ADJUSTING SHAFT SUB-ASSEMBLY (w/ Vertical Adjuster)
INSTALL FRONT SEAT INNER BELT ASSEMBLY (for Front Passenger Side)
INSTALL VERTICAL SEAT ADJUSTER KNOB LH (w/ Vertical Adjuster)
Front Seat Assembly (For Separate Seat Type) -- Reassembly |
- CAUTION:
- Wear protective gloves. Sharp areas on the parts may injure your hands.
- HINT:
- Use the same procedure for RHD and LHD vehicles.
- The procedure listed below is for LHD vehicles.
- Use the same procedure for the RH and LH sides.
- The procedure listed below is for the LH side.
| 1. INSTALL FRONT SEAT CUSHION EDGE PROTECTOR LH |
Install the seat cushion edge protector.
| 2. INSTALL RECLINING ADJUSTER LOWER ARM SUB-ASSEMBLY LH |
w/ Vertical Adjuster:
Using a T40 "TORX" socket wrench, install the reclining adjuster arm with the 2 "TORX" bolts.- Torque:
- 25 N*m{255 kgf*cm, 18 ft.*lbf}
 |
w/o Vertical Adjuster:
Install the reclining adjuster arm with the 3 bolts.- Torque:
- 19.5 N*m{199 kgf*cm, 14 ft.*lbf}
 |
| 3. INSTALL RECLINING ADJUSTER LOWER ARM SUB-ASSEMBLY RH |
w/ Vertical Adjuster:
- HINT:
- Use the same procedures described for the LH side.
w/o Vertical Adjuster:
- HINT:
- Use the same procedures described for the LH side.
| 4. INSTALL FRONT SEAT ADJUSTER ROD (w/ Vertical Adjuster) |
 |
Install the adjuster rod with the 2 bolts.
- Torque:
- 19.5 N*m{199 kgf*cm, 14 ft.*lbf}
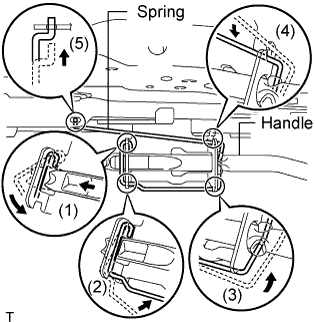
| 5. INSTALL SEAT TRACK ADJUSTING HANDLE |
Attach the spring of the seat track in the order shown in the illustration to install the handle.
 |
| 6. INSTALL VERTICAL ADJUSTING SHAFT SUB-ASSEMBLY (w/ Vertical Adjuster) |
Install the vertical adjusting shaft to the reclining adjuster arm with 2 new E-rings.
 |
Temporarily install the vertical seat adjuster knob.
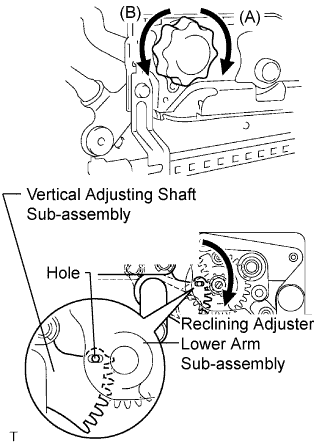 |
Turn the knob as much as possible in the direction indicated by arrow A in the illustration.
Mesh the gear of the vertical adjusting shaft with the gear of the reclining adjuster lower arm.
Align the holes of the adjusting shaft and adjusting arm by turning the knob in the direction indicated by arrow B in the illustration.
Remove the vertical seat adjuster knob.
Install the seat spring as shown in the illustration.
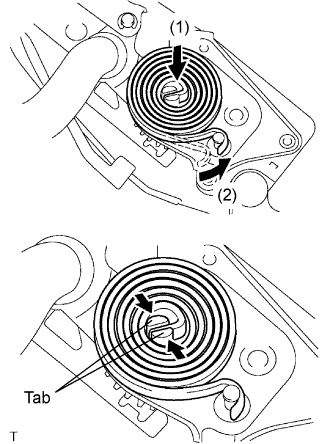 |
Using pliers, push together the tabs that hold the spring.
Using a 6 mm socket hexagon wrench, install the front seat No. 2 adjuster pin.
- Torque:
- 8.0 N*m{82 kgf*cm, 71 in.*lbf}
| 7. INSTALL FRONT SEAT CUSHION FRAME SUB-ASSEMBLY |
Install the cushion frame with the 4 bolts.
- Torque:
- 19.5 N*m{199 kgf*cm, 14 ft.*lbf}
 |
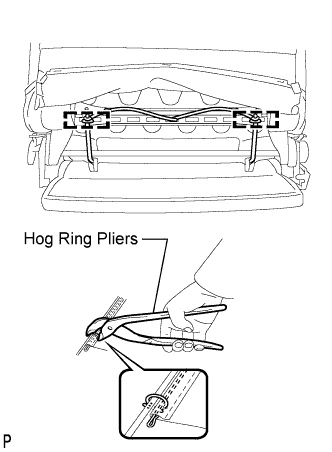
| 8. INSTALL FRONT SEAT CUSHION COVER |
Using hog ring pliers, install the seat cushion cover to the seat cushion pad with new hog rings.
- NOTICE:
- Be careful not to damage the cover.
- When installing the hog rings, avoid wrinkling the cover.
 |
Set the seat cushion cover with pad in place.
 |
Using hog ring pliers, install the seat cushion cover with pad with new hog rings.
- NOTICE:
- Be careful not to damage the cover.
- When installing the hog rings, avoid wrinkling the cover.
Attach the hooks in the hook area shown in the illustration.
Attach the 2 hooks.
w/ Occupant Detection Sensor:
Attach the wire harness clamp.
| 9. INSTALL FRONT SEAT CUSHION PROTECTOR |
Install the 2 protectors.
 |
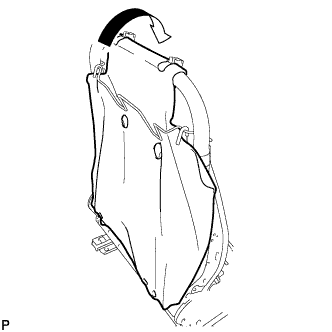
| 10. INSTALL NO. 1 SEATBACK CLOTH |
Install the seatback cloth.
 |
| 11. INSTALL FRONT SEATBACK PAD |
Install the seatback pad.
 |
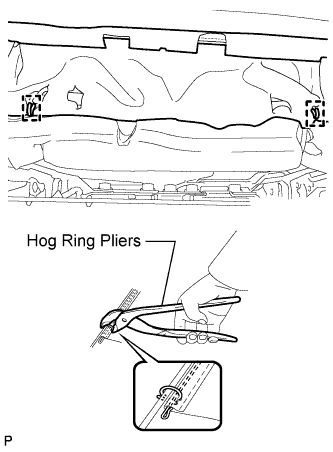
| 12. INSTALL FRONT SEATBACK COVER |
Using hog ring pliers, attach the 2 straps of the seatback cover to the seatback pad with new hog rings.
- NOTICE:
- Be careful not to damage the cover.
- When installing the hog rings, avoid wrinkling the cover.
 |
Attach the 4 claws to install the 2 headrest supports.
 |
Using hog ring pliers, install the upper part of the seatback cover to the seatback pad with new hog rings.
- NOTICE:
- Be careful not to damage the cover.
- When installing the hog rings, avoid wrinkling the cover.
 |
Using hog ring pliers, install the center of the seatback cover to the seatback pad with new hog rings.
- NOTICE:
- Be careful not to damage the cover.
- When installing the hog rings, avoid wrinkling the cover.
 |
Using hog ring pliers, attach the 2 straps of the seatback cover to the seatback spring with new hog rings.
- NOTICE:
- Be careful not to damage the cover.
- When installing the hog rings, avoid wrinkling the cover.
 |
Using hog ring pliers, attach the bottom of the seatback cloth to the seatback spring with new hog rings.
 |
Using hog ring pliers, attach the wires at the bottom of the seatback cover with new hog rings.
- NOTICE:
- Be careful not to damage the cover.
- When installing the hog rings, avoid wrinkling the cover.
 |
| 13. INSTALL FRONT SEATBACK ASSEMBLY |
Install the seatback with the 4 bolts.
- Torque:
- 40 N*m{408 kgf*cm, 30 ft.*lbf}
 |
| 14. INSTALL SEATBACK SPRING |
Install the seatback spring.
| 15. INSTALL FRONT SEAT CUSHION INNER SHIELD LH |
Attach the rear part of the inner shield in the order shown in the illustration to install the cushion shield.
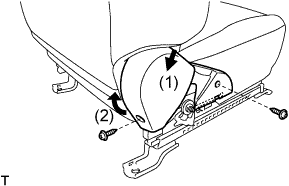 |
Install the 2 screws.
| 16. INSTALL FRONT SEAT CUSHION COVER LH |
Install the cushion cover.
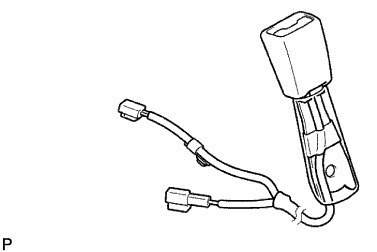
| 17. INSTALL FRONT SEAT INNER BELT ASSEMBLY (for Driver Side) |
 |
Install the buckle cover on the seat belt.
Install the seat belt with the nut.
- Torque:
- 42 N*m{428 kgf*cm, 31 ft.*lbf}
- NOTICE:
- Do not overlap the anchor part of the seat belt and protruding part of the seat adjuster.
 |
Attach the wire harness to the clamp.
Attach the clamp as shown in the illustration.
 |
| 18. INSTALL FRONT SEAT INNER BELT ASSEMBLY (for Front Passenger Side) |
 |
w/ Passenger Seat Belt Warning Light:
Attach the 2 clamps as shown in the illustration.
Connect the connector.
Install the buckle cover on the inner belt.
Attach the wire harness to the clamp.
Install the seat belt with the nut.
- Torque:
- 42 N*m{428 kgf*cm, 31 ft.*lbf}
- NOTICE:
- Do not overlap the anchor part of the seat belt and protruding part of the seat adjuster.

w/o Passenger Seat Belt Warning Light:
Install the buckle cover on the inner belt.
Install the seat belt with the nut.
- Torque:
- 42 N*m{428 kgf*cm, 31 ft.*lbf}
- NOTICE:
- Do not overlap the anchor part of the seat belt and protruding part of the seat adjuster.
 |
| 19. INSTALL FRONT SEAT CUSHION SHIELD LH |
Attach the claw, and then attach the rear part of the cushion shield in the order shown in the illustration to install the cushion shield.
 |
Install the 2 screws.
| 20. INSTALL RECLINING ADJUSTER RELEASE HANDLE LH |
Install the release handle.
 |
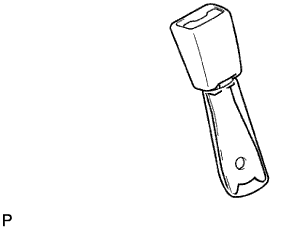
| 21. INSTALL VERTICAL SEAT ADJUSTER KNOB LH (w/ Vertical Adjuster) |
Install the knob with the snap ring.
 |