Lubrication System On-Vehicle Inspection
CHECK ENGINE OIL LEVEL
CHECK ENGINE OIL QUALITY
REMOVE OIL PRESSURE SWITCH
INSTALL OIL PRESSURE GAUGE
WARM UP ENGINE
CHECK OIL PRESSURE
INSTALL ENGINE OIL PRESSURE SWITCH
START ENGINE AND CHECK FOR LEAKS
Lubrication System -- On-Vehicle Inspection |
| 1. CHECK ENGINE OIL LEVEL |
Warm up the engine, stop the engine and wait 5 minutes. The oil level should be between the dipstick's low and full level marks.
If low, check for leakage and add oil up to the full level mark.
- NOTICE:
- Do not fill with engine oil over the full level mark.
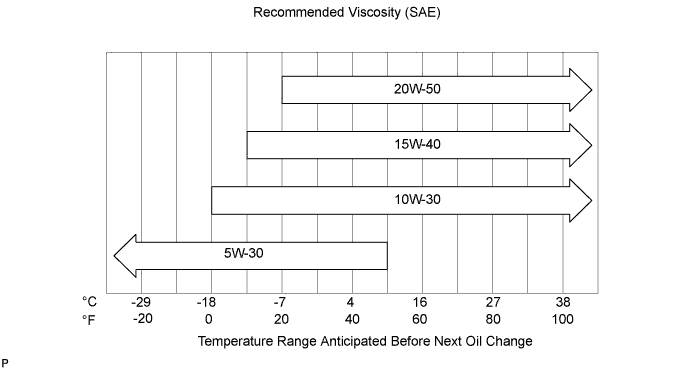
| 2. CHECK ENGINE OIL QUALITY |
Check the oil for deterioration, water contamination, discoloring or thinning.
If the oil quality is visibly poor, replace the oil.
- Oil grade:
- 20W-50 and 15W-40 -
API grade SL or SM multigrade engine oil
10W-30 and 5W-30 -
API grade SL "Energy-Conserving", SM or ILSAC multigrade engine oil
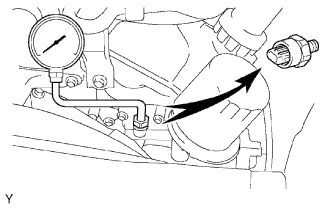
| 3. REMOVE OIL PRESSURE SWITCH |
Disconnect the oil pressure switch connector.
Using a 24 mm deep socket wrench, remove the oil pressure switch.
| 4. INSTALL OIL PRESSURE GAUGE |
- Standard oil pressure:
Condition
| Specified Condition
|
Idle
| 29 kPa (0.3 kgf/cm2, 4.2 psi) or more
|
3,000 rpm
| 294 to 588 kPa (3.0 to 6.0 kgf/cm2, 43 to 85 psi)
|
| 7. INSTALL ENGINE OIL PRESSURE SWITCH |
Remove the oil pressure gauge.
Apply adhesive to 2 or 3 threads of the oil pressure switch.
- Adhesive:
- Toyota Genuine Adhesive 1344, Three Bond 1344 or equivalent
Using a 24 mm deep socket wrench, install the oil pressure switch.
- Torque:
- 15 N*m{152 kgf*cm, 11 ft.*lbf}
- NOTICE:
- Do not start the engine for 1 hour after the installation.
Connect the oil pressure switch connector.
| 8. START ENGINE AND CHECK FOR LEAKS |