Land Cruiser URJ200 URJ202 GRJ200 VDJ200 - EXTERIOR PANELS / TRIM
SIDE STEP (w/ Foot light) - DISASSEMBLY
- HINT:
| 1. REMOVE NO. 1 SIDE STEP BRACKET LH |
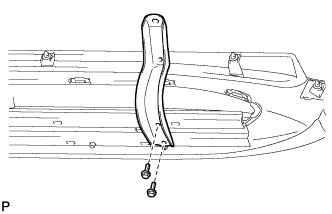
Remove the 2 bolts and No. 1 side step bracket LH.
| 2. REMOVE NO. 2 SIDE STEP BRACKET LH |
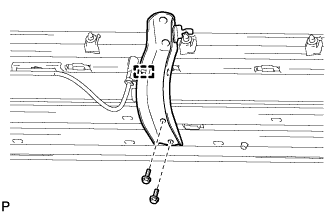
Detach the clamp.
Remove the 2 bolts and No. 2 side step bracket LH.
| 3. REMOVE NO. 3 SIDE STEP BRACKET LH |
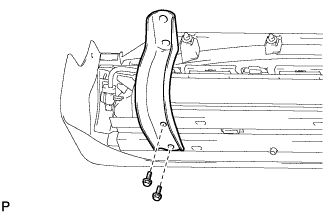
Remove the 2 bolts and No. 3 side step bracket LH.
| 4. REMOVE REAR STEP FLOOR WIRE LH |
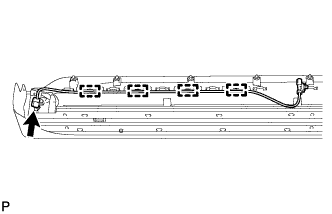
Disconnect the connector.
Detach the 4 clamps and remove the rear step floor wire LH.
| 5. REMOVE STEP LIGHT ASSEMBLY |
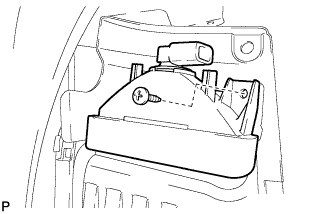
Remove the screw and step light assembly.
| 6. REMOVE STEP PLATE LH |
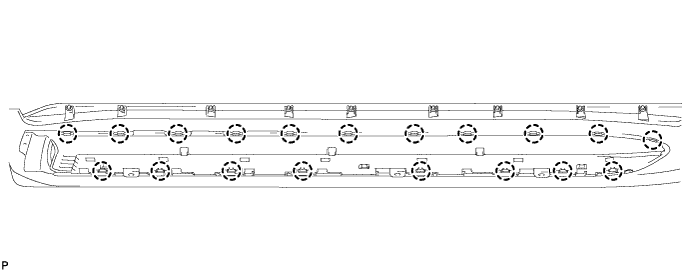
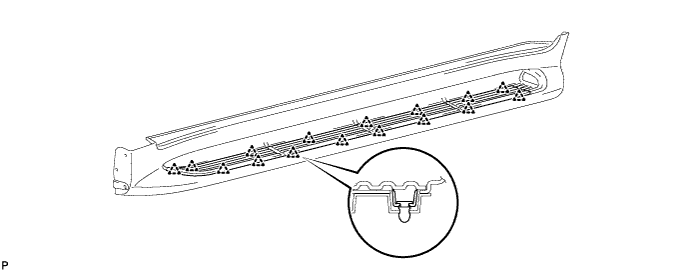
Detach the 16 clips and remove the step plate LH.
- HINT:
- Detach the clips from the backside of the step plate LH.
| 7. REMOVE STEP PANEL LH |
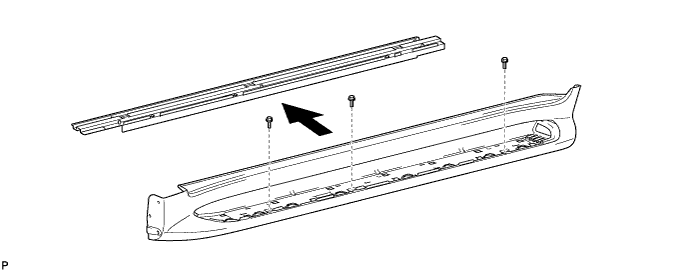
Remove the 3 bolts and step panel.
| 8. REMOVE NO. 2 STEP PLATE STAY |
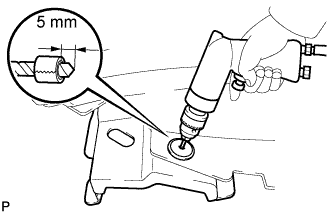
Put a 4 mm (0.157 in.) drill bit into a drill.
Wind tape around the drill bit approximately 5 mm (0.197 in.) from the tip of the drill, as shown in the illustration.
- HINT:
- Tape the 4 mm (0.157 in.) drill bit to prevent the drill bit from going too deep.
Lightly press the drill against the rivet, drill off the flanges of the rivet, and remove the No. 2 step plate stay.
- NOTICE:
- CAUTION:
- Be careful of the drilled rivet as it may become hot.
Using a vacuum cleaner, remove the rivet fragments and shavings from the drilled area.
| 9. REMOVE STEP COVER REINFORCEMENT LH |
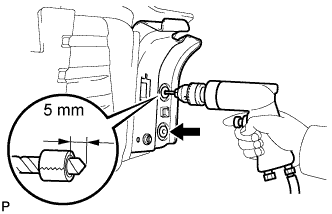
Put a 4 mm (0.157 in.) drill bit into a drill.
Wind tape around the drill bit approximately 5 mm (0.197 in.) from the tip of the drill, as shown in the illustration.
- HINT:
- Tape the 4 mm (0.157 in.) drill bit to prevent the drill bit from going too deep.
Lightly press the drill against the 2 rivets, drill off the flanges of the 2 rivets, and remove the step cover reinforcement LH.
- NOTICE:
- CAUTION:
- Be careful of the drilled rivet as it may become hot.
Using a vacuum cleaner, remove the rivet fragments and shavings from the drilled area.
| 10. REMOVE REAR SIDE DOOR STEP PLATE COVER LH |
Detach the 19 claws and remove the rear side door step plate cover LH.
