Land Cruiser URJ200 URJ202 GRJ200 VDJ200 - WIPER / WASHER
REAR WIPER MOTOR - INSTALLATION
| 1. INSTALL REAR WIPER MOTOR ASSEMBLY |
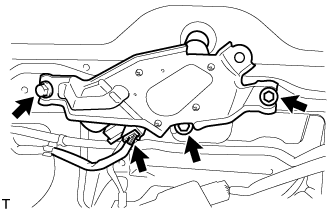
Temporarily install the rear wiper motor assembly with the 3 bolts.
Tighten the 3 bolts.
- Torque:
- 5.5 N*m{ 56 kgf*cm, 49 in.*lbf}
Connect the connector.
| 2. INSTALL REAR WIPER MOTOR GROMMET |

Apply MP grease to the entire inner surface of the rear wiper motor grommet.
| *1 | MP Grease |
- HINT:
- Make sure that the hole does not get clogged with grease and the grooves in the grommet are filled with grease.

Install the rear wiper motor grommet with the position mark facing upward as shown in the illustration.
| *1 | Position Mark |
| 3. INSTALL REAR WIPER ARM |

Operate the rear wiper, and stop the rear wiper motor at the automatic stop position.
| *1 | Wiper Arm Serration |
| *2 | Wiper Pivot Serration |
| *3 | Wire Brush |
Clean the wiper arm serration and wiper pivot serration with a wire brush.

Set the head of the blade on the defogger line.
| *1 | Defogger Line |
Install the nut and rear wiper arm.
- Torque:
- 5.5 N*m{ 56 kgf*cm, 49 in.*lbf}
Close the cover.
| 4. INSTALL BACK DOOR GARNISH |
Attach the 14 clips to install the back door garnish.
| 5. INSTALL DOOR OPENING SWITCH SUB-ASSEMBLY (for Face to Face Seat Type) |
Attach the 2 claws to install the door opening switch sub-assembly.
| 6. INSTALL NO. 2 BACK DOOR SERVICE HOLE COVER (for Face to Face Seat Type) |
Connect the connector.
Attach the 4 claws to install the No. 2 back door service hole cover.
| 7. INSTALL ASSIST GRIP (for Face to Face Seat Type) |
Install the assist grip with the 2 screws.
| 8. INSTALL BACK DOOR SIDE GARNISH LH |
Attach the 3 clips and 2 claws to install the back door side garnish LH.
| 9. INSTALL BACK DOOR SIDE GARNISH RH |
w/o Power Back Door:
- HINT:
- Use the same procedure described for the LH side.
w/ Power Back Door:
Attach the clip and 4 claws to install the back door side garnish RH.
| 10. INSTALL CENTER BACK DOOR GARNISH |
Attach the 5 clips and 4 claws to install the center back door garnish.