| 1. DISCONNECT CABLE FROM NEGATIVE BATTERY TERMINAL |
NOTICE:
When disconnecting the cable, some systems need to be initialized after the cable is reconnected .
| 2. REMOVE AUTOMATIC TRANSMISSION ASSEMBLY |
| 3. REMOVE DRIVE PLATE AND RING GEAR SUB-ASSEMBLY |
-
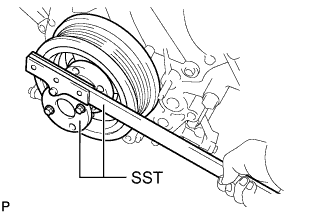
Using SST, hold the crankshaft.
SST
09213-70011 09330-00021
-
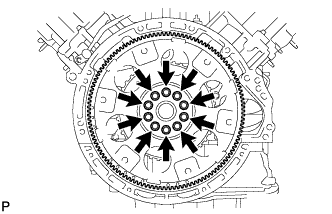
Remove the 10 bolts, rear drive plate spacer, drive plate and crankshaft angle sensor rotor.
| 4. REMOVE REAR CRANKSHAFT OIL SEAL |
-
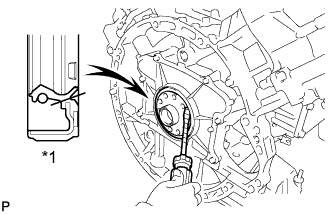
Using a knife, cut off the lip of the oil seal.
-
Using a screwdriver, pry out the oil seal.
Text in Illustration *1 Cut Position HINT:
Tape the screwdriver tip before use.
NOTICE:
Do not damage the surface of the oil seal press fit hole and crankshaft.