Блок Двигателя Разборка. Corolla Auris
Двигатель. COROLLA, AURIS. ZZE150 ZRE151,152 NDE150
REMOVE THERMOSTAT
REMOVE OIL FILLER CAP SUB-ASSEMBLY
REMOVE CYLINDER HEAD COVER SUB-ASSEMBLY
REMOVE WATER PUMP PULLEY
REMOVE TRANSVERSE ENGINE ENGINE MOUNTING BRACKET
REMOVE CRANKSHAFT DAMPER SUB-ASSEMBLY
REMOVE WATER PUMP ASSEMBLY
REMOVE NO. 2 TIMING CHAIN COVER
REMOVE OIL PUMP ASSEMBLY
REMOVE NO. 1 CHAIN TENSIONER ASSEMBLY
REMOVE CHAIN TENSIONER SLIPPER
REMOVE NO. 1 CHAIN VIBRATION DAMPER
REMOVE CHAIN SUB-ASSEMBLY
REMOVE CAMSHAFT
REMOVE NO. 1 VALVE ROCKER ARM SUB-ASSEMBLY
REMOVE CYLINDER HEAD SUB-ASSEMBLY
REMOVE CYLINDER HEAD GASKET
REMOVE OIL FILTER SUB-ASSEMBLY
REMOVE OIL COOLER ASSEMBLY
REMOVE OIL FILTER UNION
REMOVE NO. 2 OIL PAN SUB-ASSEMBLY
REMOVE OIL STRAINER SUB-ASSEMBLY
REMOVE OIL PAN SUB-ASSEMBLY
REMOVE ENGINE REAR OIL SEAL
Блок Двигателя -- Разборка |
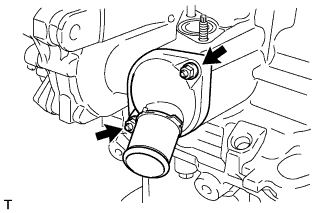
Remove the 2 nuts and the water inlet.
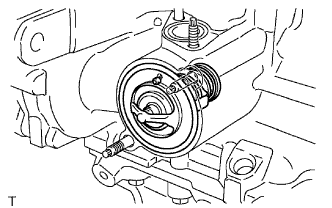
Remove the thermostat.
Remove the gasket from the thermostat.
| 2. REMOVE OIL FILLER CAP SUB-ASSEMBLY |
Remove the oil filler cap from the cylinder head cover.
Using a screwdriver with its tip wrapped in protective tape, remove the oil filler cap gasket.
| 3. REMOVE CYLINDER HEAD COVER SUB-ASSEMBLY |
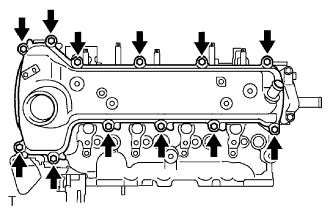
Remove the 12 bolts, then remove the cylinder head cover.
Remove the cylinder head cover gasket from the cylinder head cover.
| 4. REMOVE WATER PUMP PULLEY |
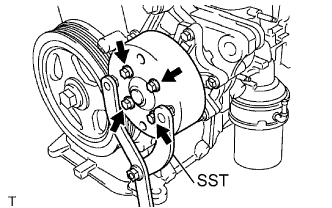
Using SST, hold the water pump pulley.
- SST
- 09960-10010(09962-01000,09963-00700)
Remove the 4 bolts and the water pump pulley.
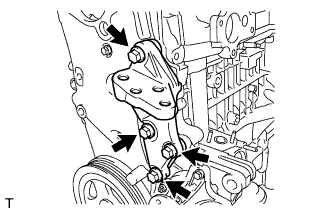
| 5. REMOVE TRANSVERSE ENGINE ENGINE MOUNTING BRACKET |
Remove the 4 bolts and nut, then remove the engine mounting bracket.
| 6. REMOVE CRANKSHAFT DAMPER SUB-ASSEMBLY |
Using SST, hold the crankshaft damper and loosen the crankshaft bolt.
- SST
- 09960-10010(09962-01000,09963-01000)
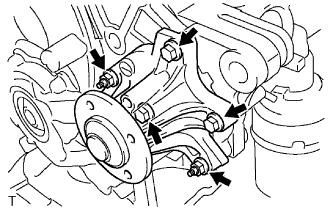
| 7. REMOVE WATER PUMP ASSEMBLY |
Remove the 3 bolts and 2 nuts, then remove the water pump.
Remove the water pump gasket.
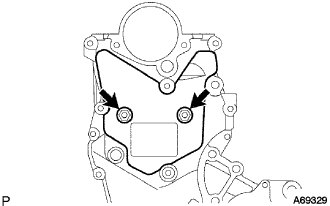
| 8. REMOVE NO. 2 TIMING CHAIN COVER |
Remove the 2 bolts and No. 2 timing chain cover.
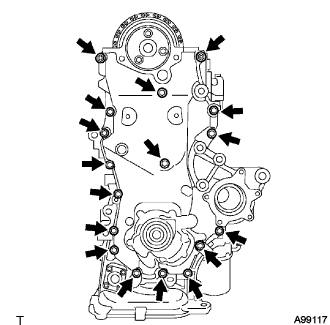
| 9. REMOVE OIL PUMP ASSEMBLY |
Remove the 16 bolts and the nut.
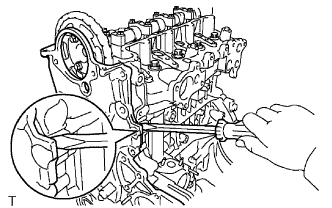
Using a screwdriver with its tip wrapped in protective tape, remove the oil pump by prying between the cylinder head and cylinder block.
- ПРИМЕЧАНИЕ:
- Do not damage the contact surfaces of the oil pump assembly, cylinder head or cylinder block.
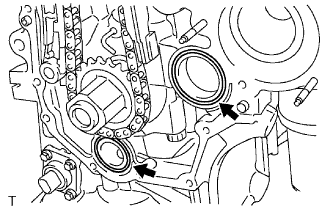
Remove the 2 O-rings from the cylinder block and oil pan.
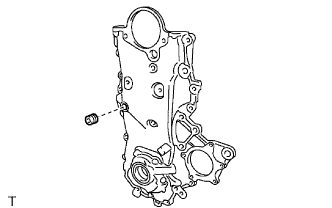
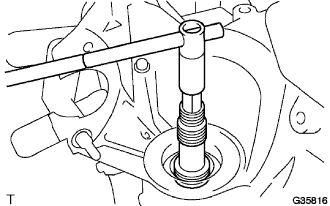
Using an 8 mm socket hexagon wrench, remove the service hole screw plug.
| 10. REMOVE NO. 1 CHAIN TENSIONER ASSEMBLY |
- ПРИМЕЧАНИЕ:
- Do not rotate the crankshaft with the chain tensioner removed.
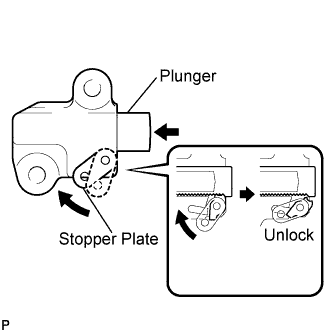
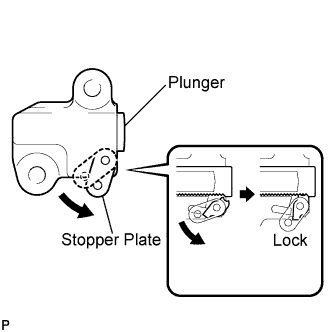
Pull up the stopper plate to unlock the plunger.
Unlock the plunger and push it in to the end.
Pull down the stopper plate with the plunger pushed to the end to lock the plunger.
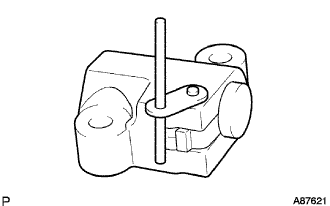
Insert a 2.5 mm (0.098 in.) diameter bar into the hole in the stopper plate with the plunger locked.
- УКАЗАНИЕ:
- If the stopper plate is not completely pulled down and a 2.5 mm (0.098 in.) diameter bar cannot be inserted, unlock and pull out the plunger slightly. The stopper plate will be completely pulled down and a 2.5 mm (0.098 in.) diameter bar can be inserted easily.
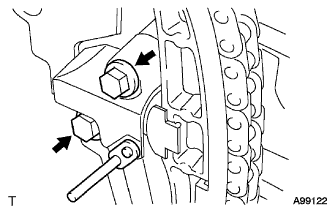
Remove the 2 bolts and No. 1 chain tensioner.
| 11. REMOVE CHAIN TENSIONER SLIPPER |
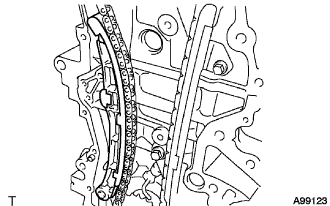
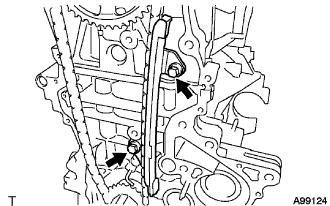
Remove the 2 bolts and No. 1 chain tensioner.
| 12. REMOVE NO. 1 CHAIN VIBRATION DAMPER |
Remove the 2 bolts and chain vibration damper.
| 13. REMOVE CHAIN SUB-ASSEMBLY |
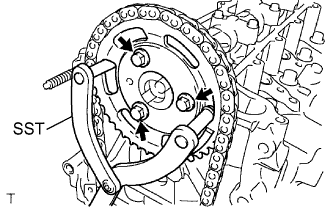
Using SST, hold the camshaft timing sprocket.
- SST
- 09960-10010(09962-01000,09963-01000)
Remove the 3 bolts, then remove the camshaft timing sprocket.
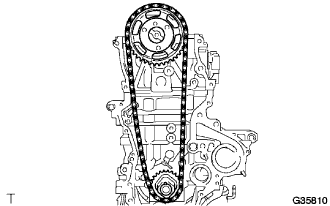
Remove the camshaft timing sprocket, crankshaft timing sprocket and chain together.
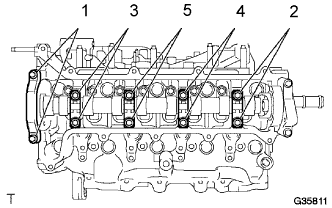
Remove the 10 bolts from the camshaft bearing caps by loosening them in the sequence shown in the illustration, and then remove the 5 camshaft bearing caps.
Remove the camshaft.
- ПРИМЕЧАНИЕ:
- Using several steps, uniformly loosen the bolts while keeping the camshaft level.
- Do not remove camshaft bearing cap No. 3.
| 15. REMOVE NO. 1 VALVE ROCKER ARM SUB-ASSEMBLY |
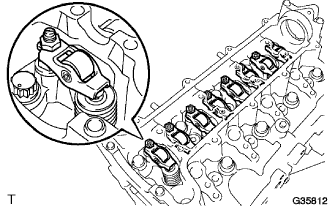
Remove the No. 1 valve rocker arm sub-assembly from the cylinder head.
| 16. REMOVE CYLINDER HEAD SUB-ASSEMBLY |
Using several steps, loosen the 10 bolts in the sequence shown in the illustration, and then remove the bolts and washers.
- ПРИМЕЧАНИЕ:
- When removing the bolts, do not drop the washers into the engine.
- Removing the cylinder head bolts in the wrong order may cause damage to the cylinder head.
| 17. REMOVE CYLINDER HEAD GASKET |
Remove the cylinder head gasket.
| 18. REMOVE OIL FILTER SUB-ASSEMBLY |
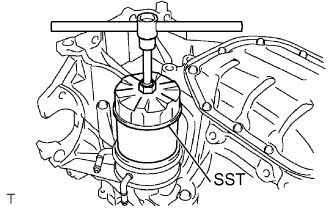
Using SST, remove the oil filter.
- SST
- 09228-07501
| 19. REMOVE OIL COOLER ASSEMBLY |
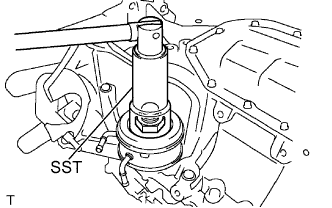
Using SST, remove the nut.
- SST
- 09229-55010
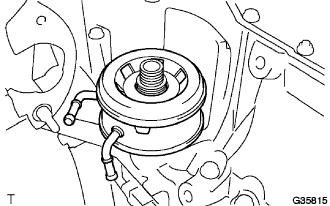
Remove the oil cooler.
| 20. REMOVE OIL FILTER UNION |
Using a 12 mm socket hexagon wrench, remove the oil filter union.
| 21. REMOVE NO. 2 OIL PAN SUB-ASSEMBLY |
Remove the oil pan drain plug and gasket.
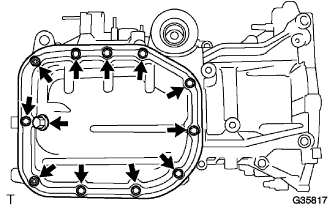
Remove the 9 bolts and 2 nuts.
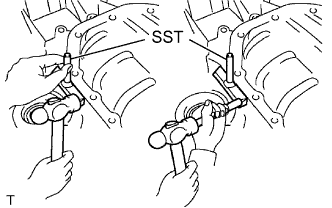
Insert the SST blade between the oil pan and No. 2 oil pan, and cut off the applied sealer. Remove No. 2 oil pan.
- SST
- 09032-00100
- ПРИМЕЧАНИЕ:
- Do not damage the oil pan or No. 2 oil pan.
| 22. REMOVE OIL STRAINER SUB-ASSEMBLY |
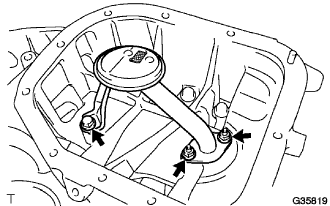
Remove the bolt and 2 nuts, then remove the oil strainer and gasket.
| 23. REMOVE OIL PAN SUB-ASSEMBLY |
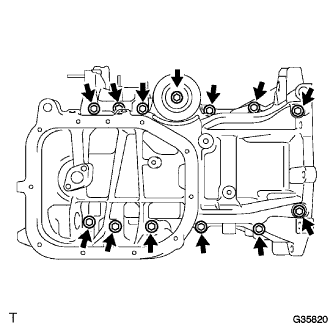
Remove the 13 bolts.
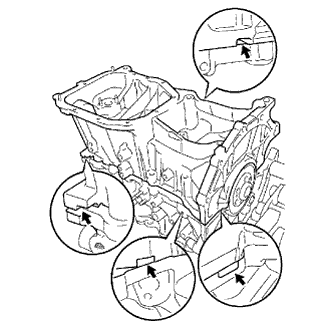
Using a screwdriver with its tip wrapped in protective tape, remove the oil pan by prying between the cylinder block and oil pan as illustrated.
- ПРИМЕЧАНИЕ:
- Do not apply excessive force when prying between the cylinder block and oil pan.
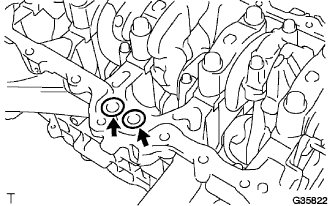
Remove the 2 O-rings from the cylinder block.
| 24. REMOVE ENGINE REAR OIL SEAL |
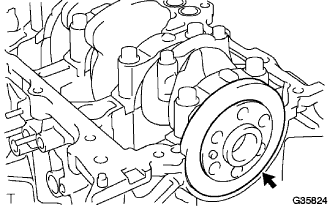
Remove the engine rear oil seal.
