Lexus IS250 IS220d GSE20 ALE20 4GR-FSE FUEL
FUEL TANK - REMOVAL
| 1. DISCHARGE FUEL SYSTEM PRESSURE |
- HINT:
- .
| 2. DISCONNECT CABLE FROM NEGATIVE BATTERY TERMINAL |
| 3. REMOVE REAR SEAT CUSHION ASSEMBLY |
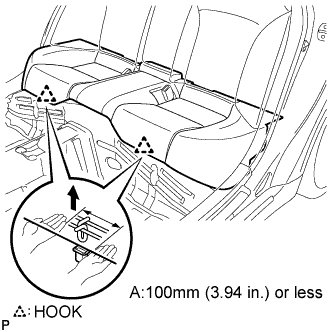
Detach the 2 front hooks of the seat cushion from the vehicle body.
- NOTICE:
- Follow the instructions below carefully as the cushion frame deforms easily.
Choose a hook to detach first. Place your hands near the hook as shown in the illustration. Then lift the seat cushion to detach the hook.
Repeat for the other hook.
Detach the 2 rear hooks of the seat cushion from the seatback.
Remove the seat cushion.
| 4. REMOVE NO.2 REAR FLOOR SERVICE HOLE COVER |
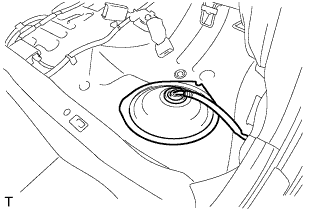
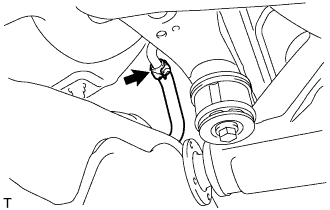
Remove the No. 2 rear floor service hole cover and disconnect the fuel suction tube connector.
| 5. REMOVE FUEL SUCTION WITH PUMP AND GAUGE TUBE ASSEMBLY |
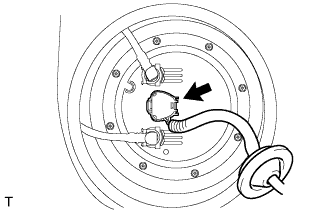
Disconnect the connector from the fuel suction with pump and gauge assembly.
Disconnect fuel pump tube.
- NOTICE:
- Before beginning this procedure, check for foreign matter on the joint clips. Clean if necessary.
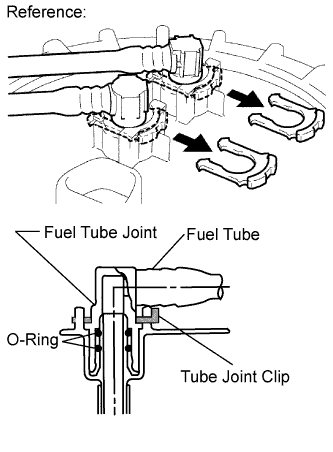
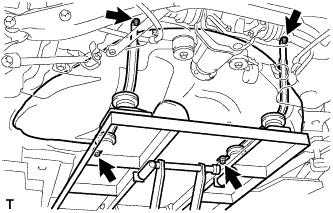
Remove the 2 tube joint clips, fuel tank main tube and fuel tank return vent tube.
- NOTICE:
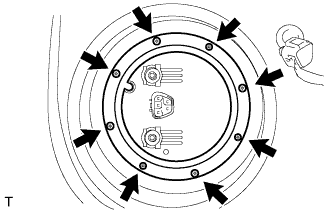
Remove the 8 bolts and the fuel tank vent tube set plate.
- HINT:
- While holding the fuel suction tube by hand, remove the fuel tank vent tube set plate.
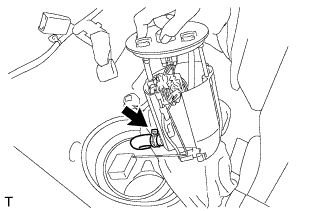
Disconnect the fuel tube.
Remove the fuel suction tube from the fuel tank.
- HINT:
| 6. DRAIN FUEL |
| 7. REMOVE REAR FLOOR SERVICE HOLE COVER |
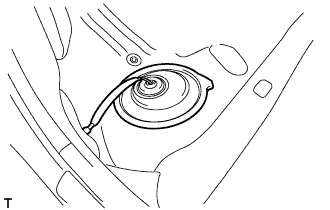
Remove the rear floor service hole cover.
| 8. REMOVE FUEL SENDER GAUGE ASSEMBLY |
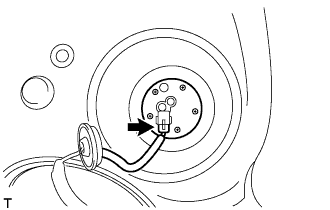
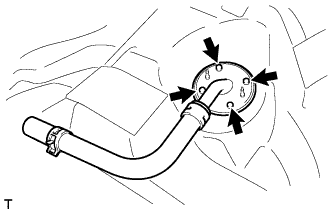
Disconnect the fuel sender gauge connector.
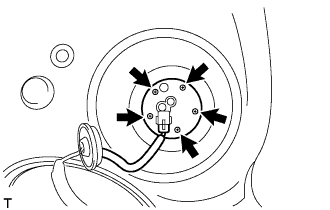
Remove the 5 bolts and fuel sender gauge.
Remove the fuel sender gauge from the fuel tank.
- NOTICE:
- Be careful not to bend the arm of the fuel sender gauge.
| 9. REMOVE EXHAUST PIPE ASSEMBLY FRONT |
- HINT:
- .
| 10. REMOVE PROPELLER SHAFT WITH CENTER BEARING ASSEMBLY |
- HINT:
- .
| 11. REMOVE NO. 2 DIFFERENTIAL SUPPORT PROTECTOR |
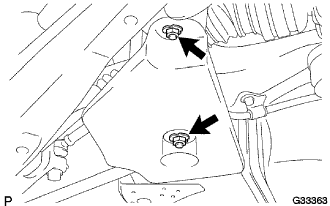
Remove the 2 nuts and No. 2 differential support protector from the suspension member brace.
| 12. REMOVE NO. 1 DIFFERENTIAL SUPPORT PROTECTOR |
- HINT:
- Removal procedure of the No. 1differential support protector is the same as that of the No. 2 differential support protector.
| 13. REMOVE NO. 1 FLOOR UNDER COVER |
| 14. REMOVE NO. 2 FLOOR UNDER COVER |
| 15. REMOVE REAR SUSPENSION MEMBER BRACE LH |
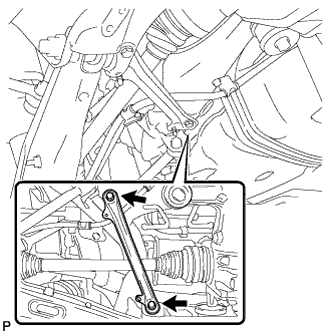
Remove the 2 bolts and rear suspension member brace LH.
| 16. REMOVE REAR SUSPENSION MEMBER BRACE RH |
- HINT:
- Removal procedure of the RH side is the same as that of the LH side.
| 17. DISCONNECT PARKING BRAKE CABLE ASSEMBLY |
Remove the 2 parking brake cables from the 4 clamps.
Remove the 4 bolts and disconnect the 2 parking brake cables.
| 18. DISCONNECT FUEL TUBE SUB-ASSEMBLY |
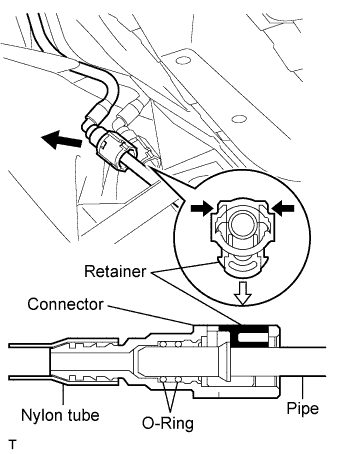
Disconnect the fuel tank return vent tube.
- NOTICE:
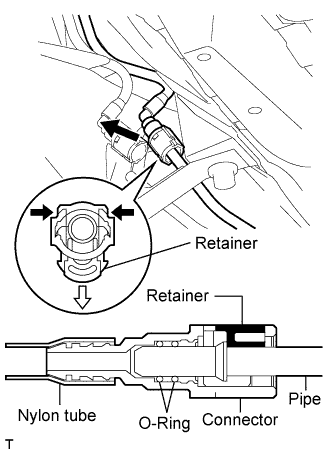
Disconnect the fuel tank main tube.
- NOTICE:
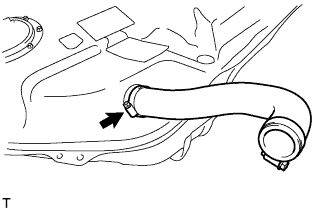
| 19. DISCONNECT FUEL TANK TO FILLER PIPE HOSE |
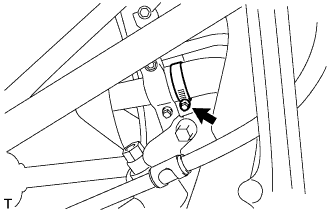
Loosen the hose clamp bolt and disconnect the fuel tank to filler pipe hose.
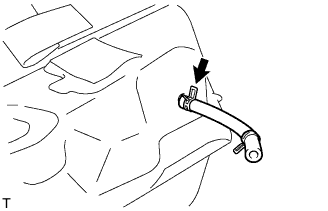
| 20. DISCONNECT FUEL TANK VENT HOSE |
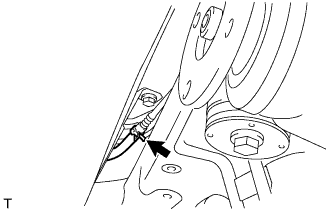
Remove the clamp and disconnect the fuel tank vent hose.
| 21. REMOVE FUEL TANK ASSEMBLY |
Place a engine lifter under the fuel tank assembly.
Remove the 4 bolts, fuel tank bands and fuel tank assembly.
Slightly lower the transmission jack.
Disconnect the fuel tank breather hose and remove the fuel tank assembly.
| 22. REMOVE NO. 1 FUEL TANK BREATHER TUBE SUB-ASSEMBLY |
Remove the 4 bolts, No. 1 fuel tank breather tube sub-assembly and gasket.
| 23. REMOVE FUEL TUBE SUB-ASSEMBLY |
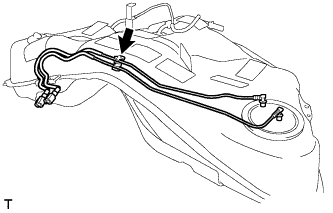
Disconnect the clamp and remove the fuel tank main tube and fuel tank return vent tube.

Disconnect the 2 clamps and remove the edge protector.
| 24. REMOVE FUEL TANK TO FILLER PIPE HOSE |
Loosen the hose clamp bolt and remove the fuel tank to filler pipe hose from the fuel tank.
| 25. REMOVE FUEL TANK VENT HOSE |
Remove the clip and fuel tank vent hose.
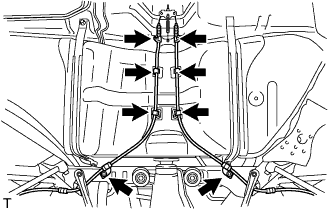
| 26. REMOVE FUEL TANK CUSHION |
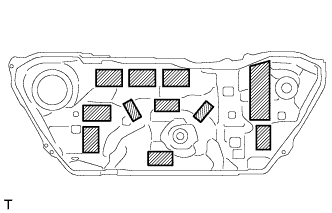
Remove the 11 fuel tank cushions shown in the illustration.
| 27. REMOVE NO. 2 FUEL TANK PROTECTOR |

Remove the No. 2 fuel tank protector from fuel tank assembly.