Lexus IS250 IS220d GSE20 ALE20 4GR-FSE ENGINE CONTROL SYSTEM
CRANKSHAFT POSITION SENSOR - REMOVAL
| 1. REMOVE COOL AIR INTAKE DUCT SEAL |
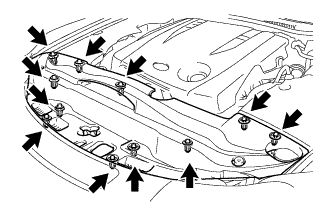
Remove the 11 clips and intake duct seal.
| 2. REMOVE V-BANK COVER SUB-ASSEMBLY |
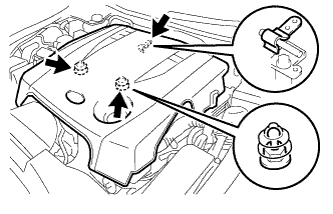
Raise the V-bank cover to disengage the clip on the rear of the cover. Raise the cover again to disengage the 2 clips on the front of the cover and remove the cover.
- NOTICE:
- Attempting to disengage both front and rear clips at the same time may cause the cover to break.
| 3. DISCHARGE REFRIGERANT FROM REFRIGERATION |
Start up the engine.
Turn the A/C switch on.
Operate the cooler compressor at an engine rpm of approximately 1,000 for 5 to 6 minutes to circulate the refrigerant and collect compressor oil remaining in each component into the cooler compressor as much as possible.
Stop the engine.
Using SST, let the refrigerant gas out.
- SST
- 07110-58060(07117-58060,07117-58070,07117-58080,07117-58090,07117-78050,07117-88060,07117-88070,07117-88080)
| 4. REMOVE NO. 1 INLET AIR CLEANER |
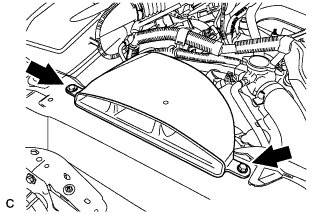
Remove the bolt, clip and inlet air cleaner.
| 5. REMOVE V-RIBBED BELT |
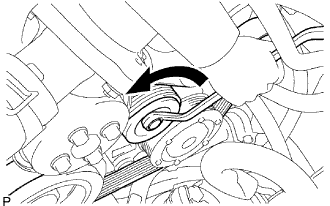
While releasing the belt tension by turning the belt tensioner counterclockwise, and remove the V-ribbed belt from the belt tensioner.
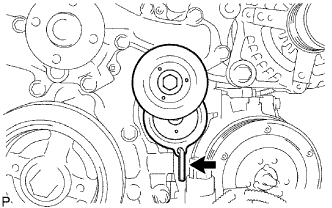
While turning the belt tensioner counterclockwise, align with its holes, and then insert the 5 mm bi-hexagon wrench into the holes to fix the belt tensioner.
| 6. REMOVE ENGINE UNDER COVER |
| 7. REMOVE ENGINE UNDER COVER REAR LH |
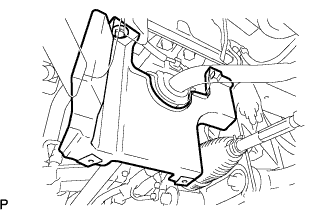
Remove the bolt and engine under cover LH.
| 8. DISCONNECT NO. 1 COOLER REFRIGERANT SUCTION HOSE |
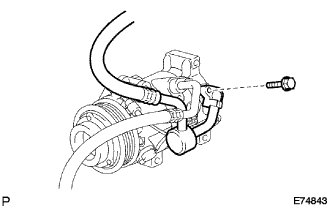
Remove the bolt and disconnect the No. 1 cooler refrigerant suction hose from the compressor.
Remove the O-ring from the cooler refrigerant suction hose.
- NOTICE:
- Seal the openings of the disconnected parts using vinyl tape to prevent moisture and foreign matter from entering.
| 9. DISCONNECT DISCHARGE HOSE SUB-ASSEMBLY |
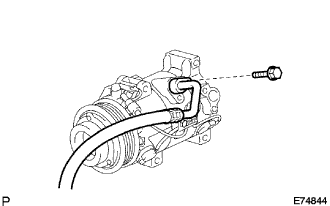
Remove the bolt and disconnect the discharge hose from the compressor.
Remove the O-ring from the discharge hose sub-assembly.
- NOTICE:
- Seal the openings of the disconnected parts using vinyl tape to prevent moisture and foreign matter from entering.
| 10. REMOVE COMPRESSOR AND MAGNETIC CLUTCH |
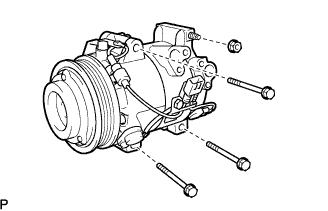
Disconnect the magnetic clutch connector.
Remove the 3 bolts and nut.
Remove the compressor and magnetic clutch.
| 11. REMOVE CRANKSHAFT POSITION SENSOR |
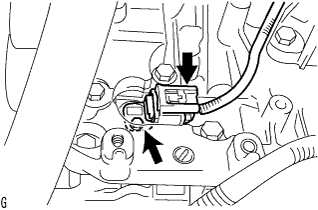
Disconnect the crankshaft position sensor connector.
Remove the bolt and crankshaft position sensor.