Lexus IS250 IS220d GSE20 ALE20 2AD-FHV LUBRICATION
OIL PUMP - REMOVAL
| 1. REMOVE ENGINE ASSEMBLY |
- HINT:
| 2. INSTALL ENGINE STAND |
Fix the engine onto a engine stand with the bolts.
| 3. REMOVE INJECTOR ASSEMBLY |
- HINT:
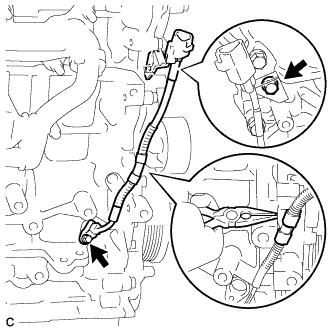
| 4. REMOVE CAM POSITION SENSOR |
Remove the bolt and cam position sensor.
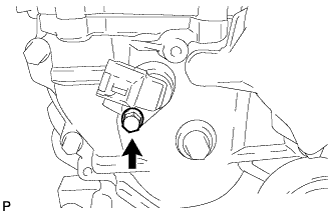
| 5. REMOVE CRANK POSITION SENSOR |
Remove the 2 bolts, clamp and crank position sensor.
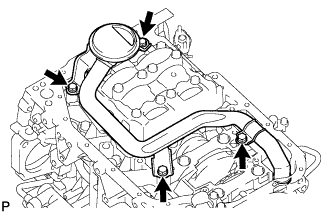
| 6. REMOVE CYLINDER HEAD COVER SUB-ASSEMBLY |
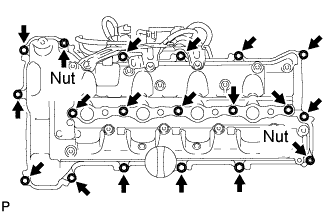
Disconnect the ventilation hose.
Remove the 13 bolts, 2 nuts, 2 washers, 4 nozzle holder clamp seats and cylinder head cover sub-assembly.
Remove the cylinder head cover gasket and No. 2 cylinder head cover gasket.
Remove the 2 engine cover joints.
| 7. REMOVE OIL FILLER CAP SUB-ASSEMBLY |
Remove the oil filler cap and gasket.
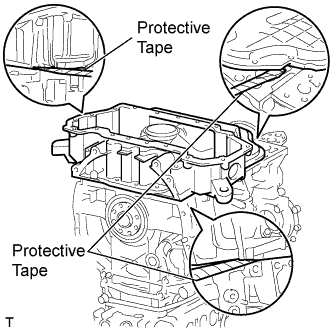
| 8. REMOVE NO. 2 OIL PAN SUB-ASSEMBLY |
Remove the drain plug and gasket.
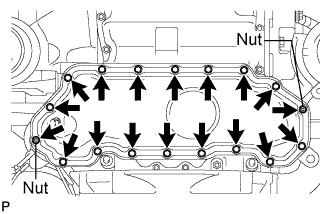
Remove the 16 bolts and 2 nuts.

Insert the blade of the SST between the oil pan and No. 2 oil pan, and cut through the applied sealer and remove the oil pan.
- SST
- 09032-00100
- NOTICE:
| 9. REMOVE OIL PAN SUB-ASSEMBLY |

Remove the 20 bolts and nut.
Remove the oil pan by prying between the oil pan and cylinder block with a screwdriver.
- NOTICE:
- Be careful not to damage the contact surfaces of the cylinder block and oil pan.
- HINT:
- Tape the screwdriver tip before use.
| 10. REMOVE OIL FILTER BRACKET |
Remove the 4 bolts, oil filter bracket and gasket.
| 11. REMOVE OIL STRAINER SUB-ASSEMBLY |
Remove the 4 bolts, oil strainer and O-ring.
| 12. REMOVE CRANKSHAFT PULLEY |
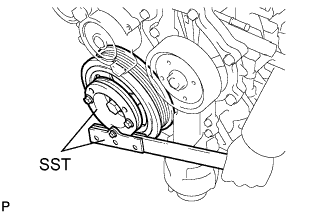
Using SST, remove the bolt holding the crankshaft.
- SST
- 09213-58013
09330-00021
Insert the service bolt.
- Recommended service bolt:
Item Specified Condition Thread diameter 12 mm (0.47 in.) Thread pitch 1.5 mm (0.059 in.) Bolt length Approx. 30 to 38 mm (1.18 to 1.50 in.)
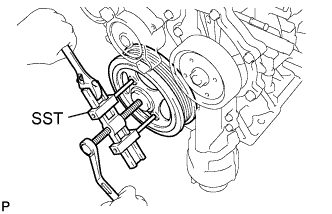
Using SST, remove the crankshaft pulley.
- SST
- 09950-50013(09951-05010,09952-05010,09953-05020,09954-05021)
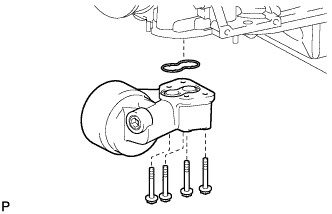
| 13. REMOVE WATER PUMP ASSEMBLY |
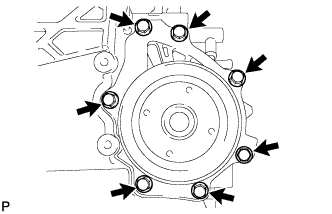
Remove the 7 bolts and water pump assembly.
Remove the gasket.
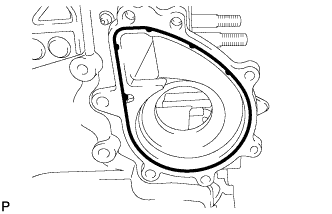
| 14. REMOVE TIMING CHAIN OR BELT COVER SUB-ASSEMBLY |
Using a 10 mm socket hexagon wrench, remove the timing chain cover tight plug and gasket.
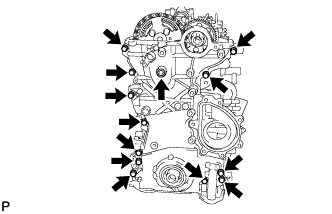
Remove the 13 bolts and seal washer as shown in the illustration.
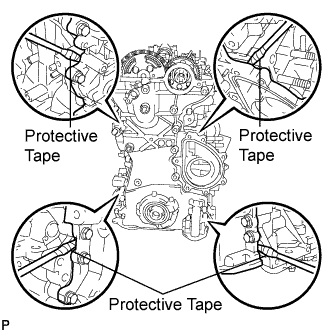
Remove the timing chain cover by prying between the timing chain cover and either the cylinder head or cylinder block using a screwdriver.
- HINT:
- Tape the screwdriver tip before use.
- NOTICE:
- Do not damage the contact surfaces of the cylinder head, cylinder block or timing chain cover.
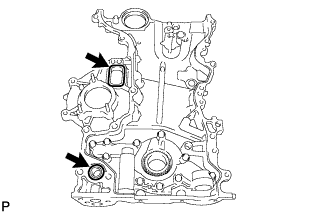
Remove the gasket and O-ring.
Place the timing chain cover on wooden blocks.
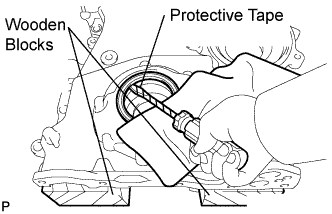
Using a screwdriver, pry out the oil seal.
- HINT:
- Tape the screwdriver tip before use.
- NOTICE:
- Do not damage the surface of the oil seal press-fit hole.