Lexus IS250 IS220d GSE20 ALE20 2AD-FHV FUEL
FUEL PUMP - INSTALLATION
| 1. INSTALL FUEL PRESSURE REGULATOR ASSEMBLY |
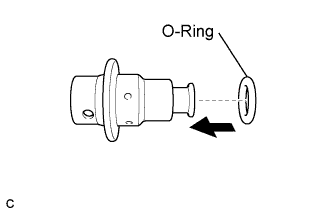
Apply a light coat of diesel fuel to a new O-ring, and install it to the fuel pressure regulator.
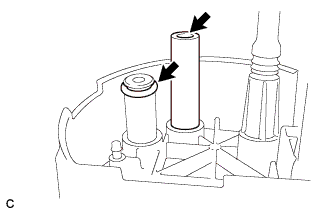
Push in the fuel pressure regulator to the fuel filter.
| 2. INSTALL CUSHION RUBBER |
Install the fuel pump cushion rubber to the fuel pump.
| 3. INSTALL NO. 2 FUEL SUCTION SUPPORT |
Install the No. 2 fuel suction support to the fuel pump.
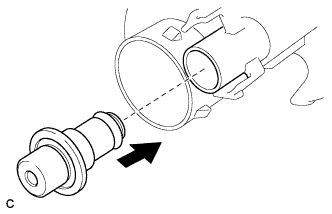
| 4. INSTALL FUEL PUMP |
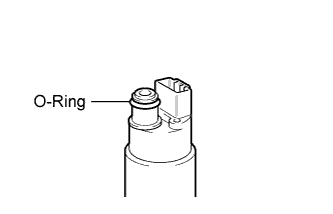
Apply a light coat of diesel fuel to the O-ring of the fuel pump.
Push in the fuel pump to the fuel filter.
Install the No. 2 fuel suction support.
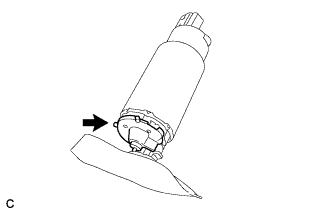
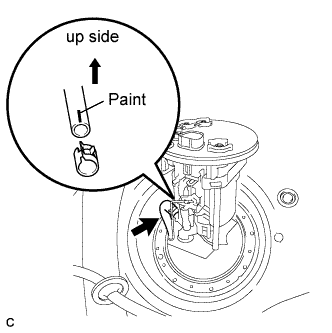
| 5. INSTALL FUEL RETURN JET TUBE |
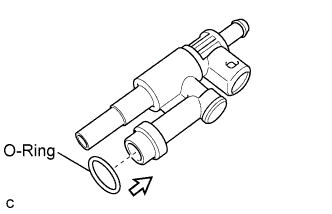
Apply a light coat of diesel fuel to a new O-ring, and install the O-ring to the fuel return jet tube.
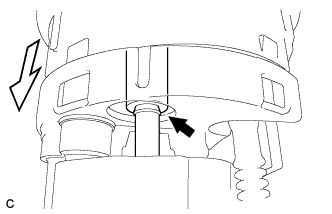
Push in the fuel return jet tube to the housing.
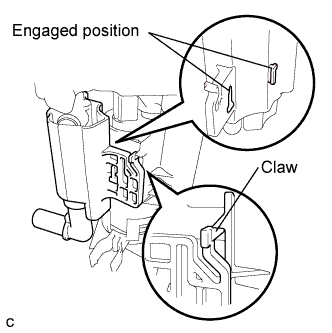
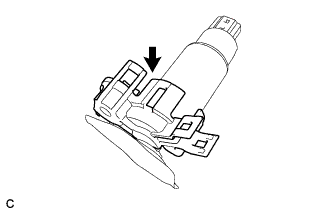
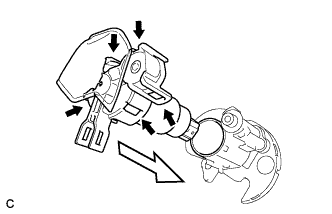
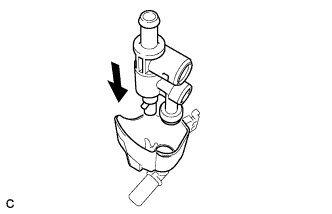
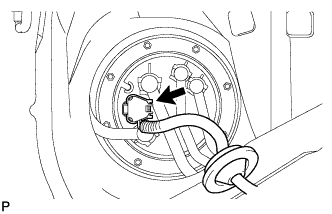
Set the jet pump housing to the fuel filter. Then slide the jet pump housing downward to install it.
- HINT:
- Make sure that the housing is engaged at the 2 positions as shown in the illustration.
| 6. INSTALL FUEL PUMP HARNESS |

Connect the fuel pump harness to the fuel suction plate sub-assembly(*1).
Install the fuel pump harness(*2).
| 7. INSTALL FUEL SUCTION PLATE SUB-ASSEMBLY |
Apply a light coat of diesel fuel of a O-ring and fuel hose.
Connect the fuel pump connector.
Align the fuel hose and install the fuel suction plate.
Connect the fuel suction filter.
| 8. INSTALL FUEL SENDER GAUGE ASSEMBLY |
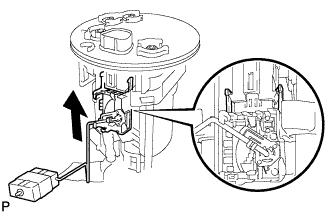
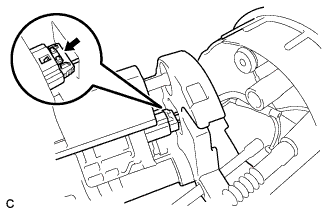
Slide the fuel sender gauge to engage the claws.
| 9. INSTALL FUEL SUCTION WITH PUMP AND GAUGE TUBE ASSEMBLY |
Install a new gasket to the fuel suction tube assembly.
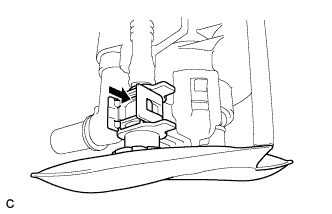
Connect the No. 2 fuel hose with the clip as shown in the illustration.
Set the fuel suction tube to the fuel tank.
- NOTICE:
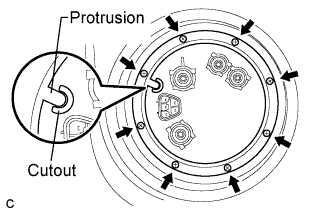
Align the protrusion of the fuel suction tube and the cutout of the fuel tank vent tube set plate.
While holding the fuel suction tube by hand, install the fuel tank vent tube to the fuel tank with the 8 bolts.
- Torque:
- 6.0 N*m{ 61 kgf*cm, 53 in.*lbf}
Connect the fuel tube.
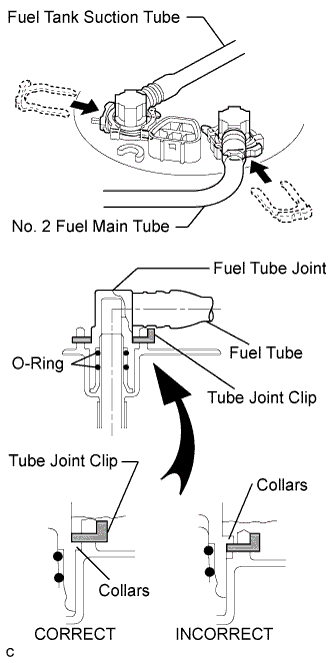
Push the fuel tube joint in the plug of the fuel suction plate, then install the 2 tube joint clips.
- NOTICE:
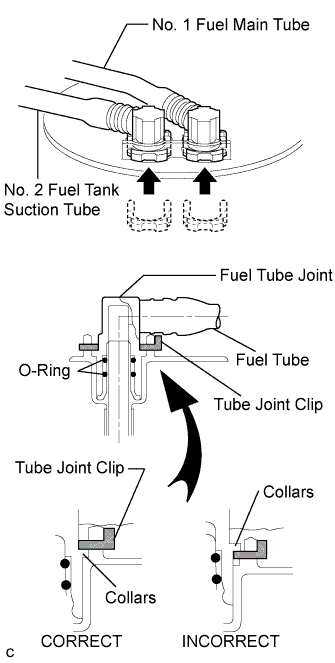
Push the fuel tube joint in the plug of the fuel suction plate, then install the 2 tube joint clips.
- NOTICE:
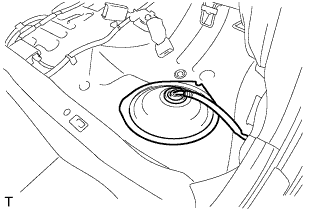
Connect the fuel suction tube connector.
| 10. CONNECT CABLE TO NEGATIVE BATTERY TERMINAL |
| 11. CHECK FOR FUEL LEAKS |
PERFORM ACTIVE TEST
Connect the intelligent tester to the DLC3.
Turn the engine switch ON (IG).
Turn the intelligent tester ON.
Enter the following menus: Powertrain / ENGINE / Active Test.
Perform the Active Test.
| Intelligent Tester Display | Test Details | Control Range | Diagnostic Notes |
| Test the Fuel Leak | Pressurize common rail internal fuel pressure, and check for fuel leaks | Stop/Start | Fuel pressure inside common rail pressurized to specified value and engine speed increased to 2,000 rpm when "Start" is selected Above conditions to be maintained while "Start" is selected |
| 12. INSTALL REAR NO. 2 FLOOR SERVICE HOLE COVER |
Install the rear No. 2 floor service hole cover with new butyl tape.
| 13. INSTALL REAR SEAT CUSHION ASSEMBLY |
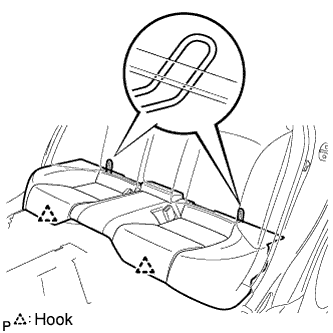
Attach the 2 rear hooks of the seat cushion to the seatback.
Attach the 2 front hooks of the seat cushion to the vehicle body.
Confirm that the seat cushion is firmly installed.
- NOTICE:
- When installing the seat cushion, make sure the seat belt buckle is not under the seat cushion.
| 14. PERFORM INITIALIZATION |
Perform initialization procedure .
- HINT:
- Some vehicle systems require initialization after reconnecting the negative battery terminal.