INSTALL CENTER DIFFERENTIAL LOCK SWITCH (for Manual Transmission)
INSTALL LOWER NO. 1 INSTRUMENT PANEL FINISH PANEL (for Manual Transmission)
INSTALL LOWER INSTRUMENT PANEL PAD SUB-ASSEMBLY LH (for Manual Transmission)
INSTALL NO. 2 INSTRUMENT PANEL FINISH PANEL CUSHION (for Manual Transmission)
INSTALL NO. 2 INSTRUMENT CLUSTER FINISH PANEL GARNISH (for Manual Transmission)
INSTALL NO. 1 INSTRUMENT CLUSTER FINISH PANEL GARNISH (for Manual Transmission)
INSTALL INTEGRATION CONTROL AND PANEL ASSEMBLY (for Automatic Transmission)
Center Differential Lock Switch (W/ Entry And Start System) -- Installation |
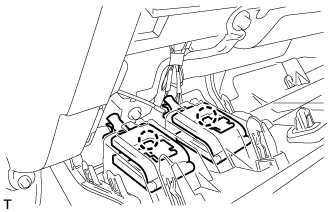
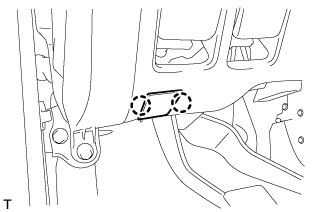
| 1. INSTALL CENTER DIFFERENTIAL LOCK SWITCH (for Manual Transmission) |
Attach the 2 claws to install the center differential lock switch.
| 2. INSTALL LOWER NO. 1 INSTRUMENT PANEL FINISH PANEL (for Manual Transmission) |
Connect the connectors.
Attach the 2 claws to connect the 2 control cables.
 |
for Automatic Air Conditioning System:
Attach the 2 claws to install the room temperature sensor.

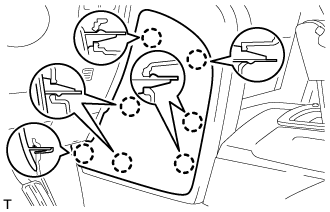
w/ Driver Side Knee Airbag:
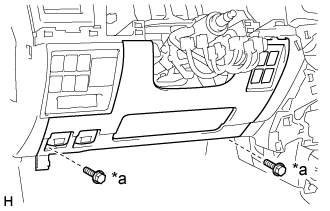
Attach the 16 claws to install the lower No. 1 instrument panel finish panel.
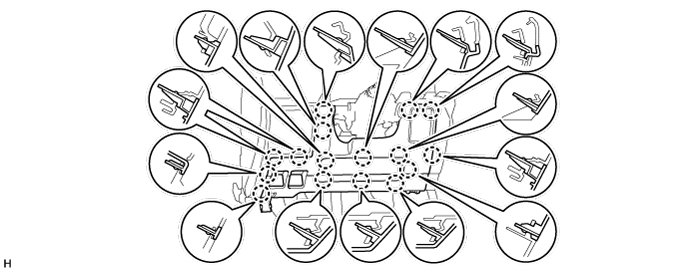
w/o Driver Side Knee Airbag:
Attach the 9 claws to install the lower No. 1 instrument panel finish panel.
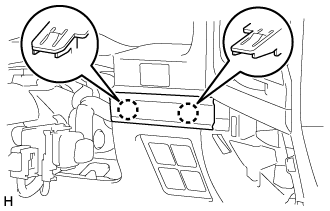
Install the 2 bolts <B>.
Text in Illustration *a Bolt <B>
 |
Attach the 2 claws to close the hole cover.
 |
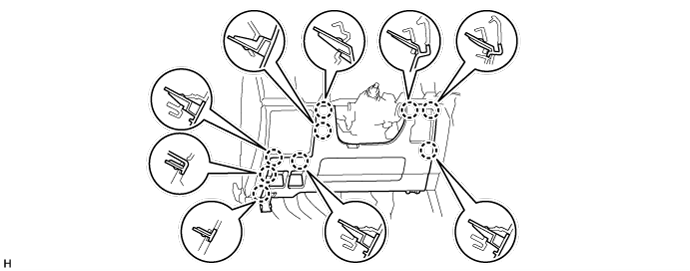
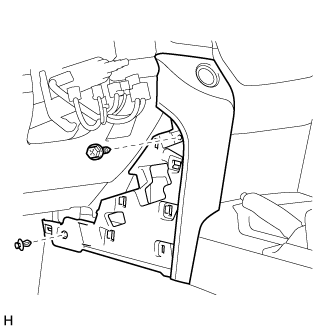
| 3. INSTALL LOWER INSTRUMENT PANEL PAD SUB-ASSEMBLY LH (for Manual Transmission) |
for Type A:
Connect the connectors and clamps.
Attach the 11 claws and guide to install the lower instrument panel pad sub-assembly LH.
Install the screw and clip.
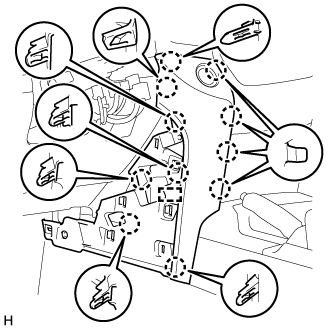
for Type B:
Connect the connectors and clamps.
Attach the 8 claws and 2 guides to install the lower instrument panel pad sub-assembly LH.
Install the screw and clip.

| 4. INSTALL NO. 2 INSTRUMENT PANEL FINISH PANEL CUSHION (for Manual Transmission) |
for Type A:
Attach the 4 claws and 3 clips to install the No. 2 instrument panel finish panel cushion.

for Type B:
Attach the 7 claws to install the No. 2 instrument panel finish panel cushion.
| 5. INSTALL NO. 2 INSTRUMENT CLUSTER FINISH PANEL GARNISH (for Manual Transmission) |
 |
Attach the 2 claws to install the No. 2 instrument cluster finish panel garnish.
| 6. INSTALL NO. 1 INSTRUMENT CLUSTER FINISH PANEL GARNISH (for Manual Transmission) |
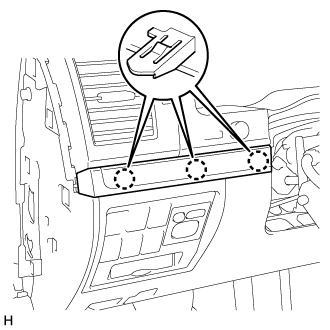 |
Attach the 3 claws to install the No. 1 instrument cluster finish panel garnish.
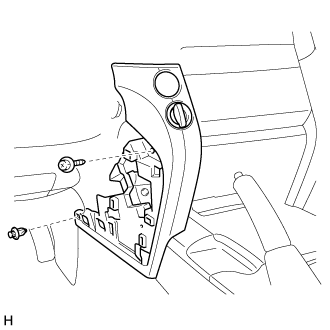
| 7. INSTALL INSTRUMENT SIDE PANEL LH (for Manual Transmission) |
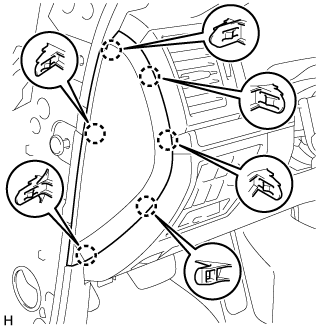 |
Attach the 6 claws to install the instrument side panel LH.
| 8. INSTALL INTEGRATION CONTROL AND PANEL ASSEMBLY (for Automatic Transmission) |
- for A750F: (Click here)
- for AB60F: (Click here)
- for AE80F: (Click here)