Radio Antenna Cord -- Installation |
| 1. INSTALL ANTENNA CORD SUB-ASSEMBLY (w/o Multi-display) |
for LHD:
Attach the 7 clamps to install the antenna cord.
for RHD:
Attach the 5 clamps to install the antenna cord.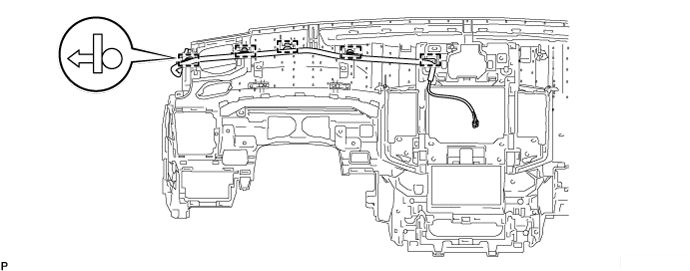
| 2. INSTALL ANTENNA CORD SUB-ASSEMBLY (w/ Multi-display) |
for LHD:
Attach the 8 clamps to install the antenna cord.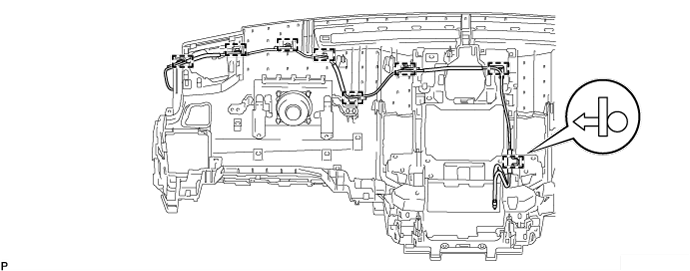
for RHD:
Attach the 6 clamps to install the antenna cord.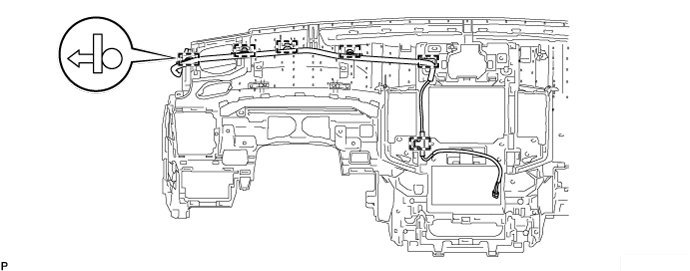
| 3. INSTALL INSTRUMENT PANEL SAFETY PAD ASSEMBLY |
Install the instrument panel safety pad (Click here).
| 4. INSTALL ANTENNA CORD SUB-ASSEMBLY |
w/o Sliding Roof:
Apply new double-sided tape as shown in the illustration.
- HINT:
- Attach double-sided tape to the hatched areas shown in the illustration below.

Align the red tape wound around the antenna cord with the V markings on the roof headlining and the notch at the rear of the headlining, and attach the antenna cord to the double-sided tape.
Attach the 2 clamps and fit the antenna into the notch.
w/ Sliding Roof:
Apply new double-sided tape as shown in the illustration.
- HINT:
- Attach double-sided tape to the hatched areas shown in the illustration below.
Align the red tape wound around the antenna cord with the V markings on the roof headlining and the notch at the rear of the headlining, and attach the antenna cord to the double-sided tape.
Attach the 4 clamps and fit the antenna into the notch.

| 5. INSTALL ROOF HEADLINING ASSEMBLY |
w/o Sliding Roof:
Install the roof headlining (Click here).
w/ Sliding Roof:
Install the roof headlining (Click here).
| 6. CONNECT CABLE TO NEGATIVE BATTERY TERMINAL |
- NOTICE:
- When disconnecting the cable, some systems need to be initialized after the cable is reconnected (Click here).
| 7. CHECK SRS WARNING LIGHT |
Check the SRS warning light (Click here).