INSTALL LOWER CENTER INSTRUMENT CLUSTER FINISH PANEL SUB-ASSEMBLY
INSPECT CLIMATE CONTROL SEAT SYSTEM (w/ Climate Control Seat System)
Climate Control Seat Switch -- Installation |
- HINT:
- Use the same procedure for RHD and LHD vehicles.
- The procedure listed below is for LHD vehicles.
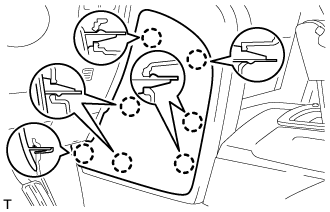
| 1. INSTALL SEAT HEATER SWITCH |
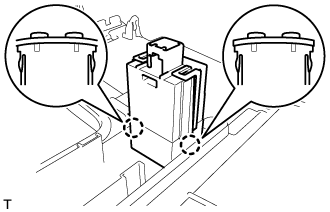 |
Attach the 2 claws to install the seat heater switch.
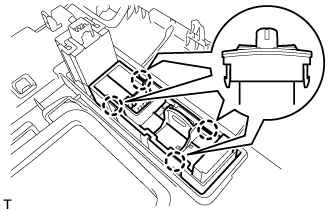
| 2. INSTALL SUSPENSION CONTROL SWITCH |
Attach the 4 claws to install the suspension control switch.
 |
Connect the 2 connectors.
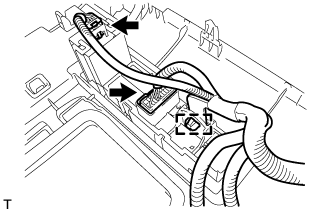 |
Attach the wire harness clamp.
| 3. INSTALL UPPER CONSOLE PANEL SUB-ASSEMBLY |
for Type A:
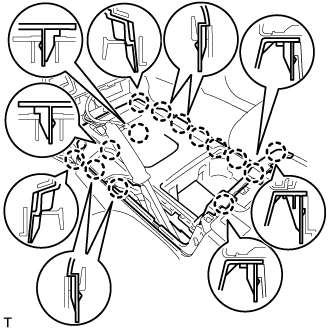
Attach the 8 claws and 4 clips to install the upper console panel sub-assembly.
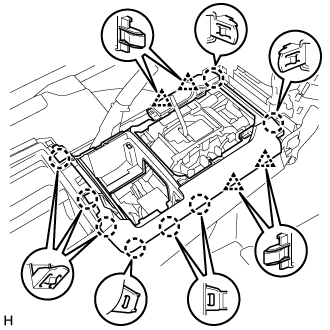
for Type B:
Connect the connectors.
Attach the 14 claws to install the console panel.
| 4. INSTALL CONSOLE CUP HOLDER BOX SUB-ASSEMBLY |
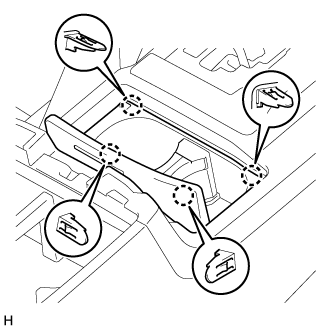 |
Attach the 4 claws to install the console cup holder box sub-assembly.
| 5. INSTALL REAR UPPER CONSOLE PANEL SUB-ASSEMBLY |
 |
Attach the 4 claws, clip and 3 guides to install the rear upper console panel sub-assembly.
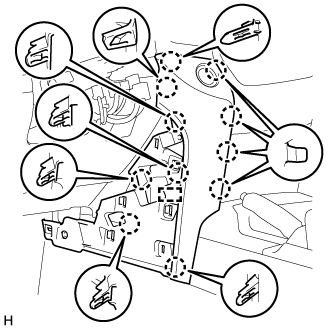
| 6. INSTALL LOWER CENTER INSTRUMENT CLUSTER FINISH PANEL SUB-ASSEMBLY |
for Type A:
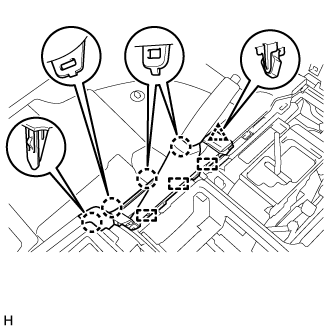
Attach the 6 claws to install the lower center instrument cluster finish panel sub-assembly.
for Type B:
Connect the connectors.
Attach the 7 claws to install the lower center instrument cluster finish panel sub-assembly.
| 7. INSTALL SHIFT LEVER KNOB SUB-ASSEMBLY |
for Type A, for Automatic Transmission:
Install the shift lever knob sub-assembly and twist it in the direction indicated by the arrow.

for Type A, for Manual Transmission:
Install the shift lever knob sub-assembly and twist it in the direction indicated by the arrow.

for Type B:
Install the shift lever knob sub-assembly and twist it in the direction indicated by the arrow.

Text in Illustration *A for Automatic Transmission *B for Manual Transmission
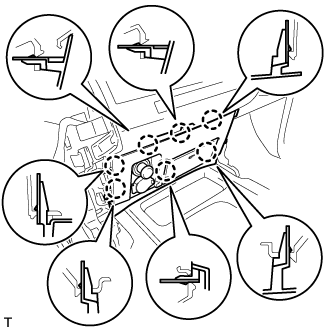
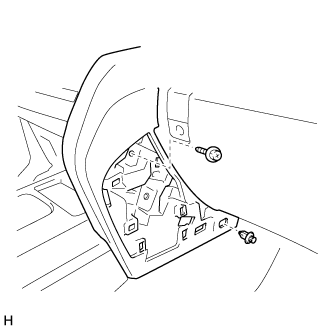
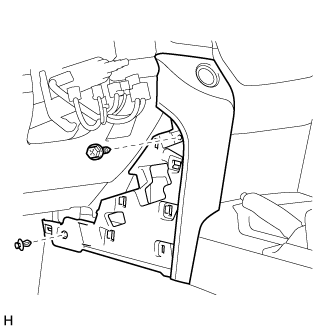
| 8. INSTALL LOWER INSTRUMENT PANEL PAD SUB-ASSEMBLY RH |
for Type A:
Attach the 11 claws and guide to install the lower instrument panel pad sub-assembly RH.
Install the screw and clip.
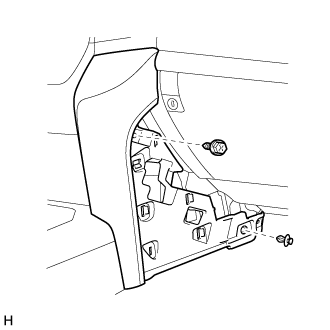
for Type B:
Attach the 7 claws to install the lower instrument panel pad sub-assembly RH.
Install the screw and clip.
| 9. INSTALL NO. 1 INSTRUMENT PANEL FINISH CUSHION |
for Type A:
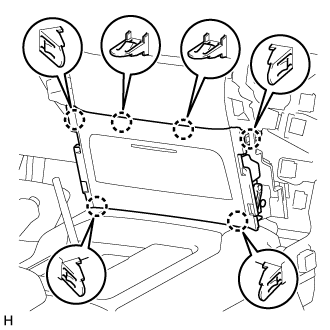
Attach the 4 claws and 3 clips to install the No. 1 instrument panel finish panel cushion.

for Type B:
Attach the 7 claws to install the panel No. 1 instrument panel finish panel cushion.

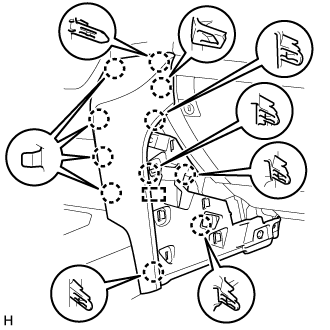
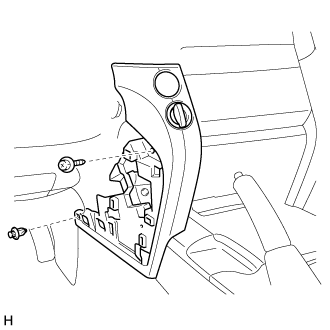
| 10. INSTALL LOWER INSTRUMENT PANEL PAD SUB-ASSEMBLY LH |
for Type A:
Connect the connectors and clamps.
Attach the 11 claws and guide to install the lower instrument panel pad sub-assembly LH.
Install the screw and clip.
for Type B:
Connect the connectors and clamps.
Attach the 8 claws and 2 guides to install the lower instrument panel pad sub-assembly LH.
Install the screw and clip.

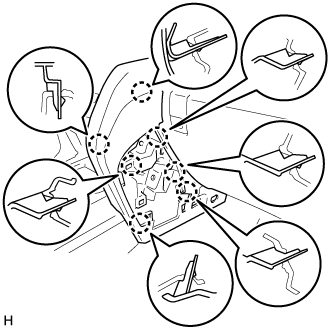
| 11. INSTALL NO. 2 INSTRUMENT PANEL FINISH PANEL CUSHION |
for Type A:
Attach the 4 claws and 3 clips to install the No. 2 instrument panel finish panel cushion.

for Type B:
Attach the 7 claws to install the No. 2 instrument panel finish panel cushion.
| 12. INSPECT SEAT HEATER SYSTEM |
Check the seat heater operation.
Turn the ignition switch on (IG).
Turn the seat heater switch on.
Wait 5 minutes or more and confirm that the seat surface becomes warm.
| 13. INSPECT CLIMATE CONTROL SEAT SYSTEM (w/ Climate Control Seat System) |
Check the climate control seat operation.
When the climate control seat switch is turned on, check that the seat heater and blower operate based on the seat temperature.
If the seat temperature increases as a result of the seat heater operation, check that the seat heater operation stops and the blower operation continues.
- HINT:
- Based on the cabin temperature, seat temperature, etc., the seat heater operation time varies.