INSTALL NO. 1 CENTER INSTRUMENT CLUSTER FINISH PANEL (w/o Radio Receiver)
INSTALL RADIO AND DISPLAY RECEIVER ASSEMBLY (for Radio and Display Type)
Clock -- Installation |
- HINT:
- Use the same procedure for RHD and LHD vehicles.
- The procedure listed below is for LHD vehicles.
| 1. INSTALL CLOCK ASSEMBLY |
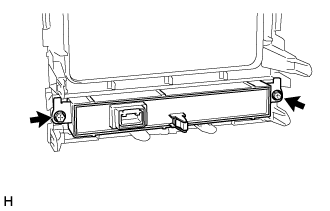
for Type A:
Install the clock assembly with the 2 screws.
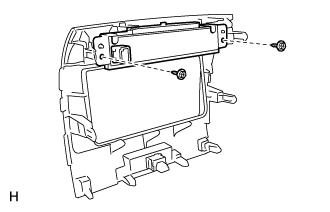
for Type B:
Install the clock assembly with the 2 screws.
| 2. INSTALL NO. 1 CENTER INSTRUMENT CLUSTER FINISH PANEL (w/o Radio Receiver) |
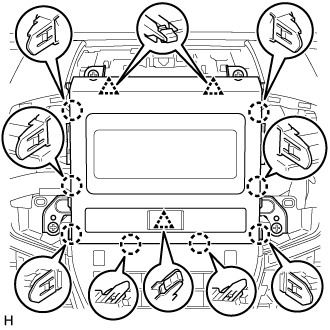 |
for Type A:
Connect the connector.
Attach the 8 claws and 3 clips to install the No. 1 center instrument cluster finish panel.
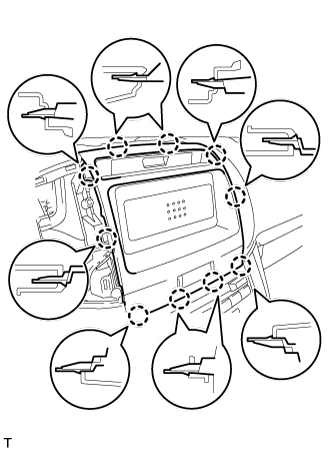
for Type B:
Connect the connector.
Attach the 10 claws to install the No. 1 center instrument cluster finish panel.
| 3. INSTALL RADIO AND DISPLAY RECEIVER ASSEMBLY (for Radio and Display Type) |
Connect the connectors.
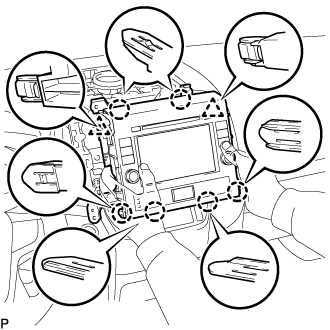
Insert the radio and display receiver assembly with bracket to attach the 6 claws and 2 clips on its backside.
- NOTICE:
- When inserting the radio and display receiver assembly with bracket, do not press the knobs on it.
 |
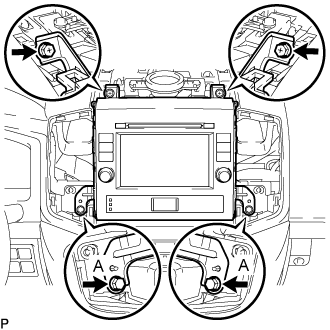
Install the radio and display receiver assembly with bracket with the 2 screws and 2 bolts.
- Torque:
- Bolt:
- 8.5 N*m{87 kgf*cm, 75 in.*lbf}
 |
| 4. INSTALL NO. 4 INSTRUMENT PANEL REGISTER ASSEMBLY |
for Type A:
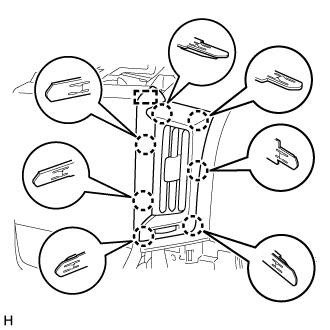
Attach the guide and 7 claws to install the No. 4 instrument panel register assembly.
for Type B:
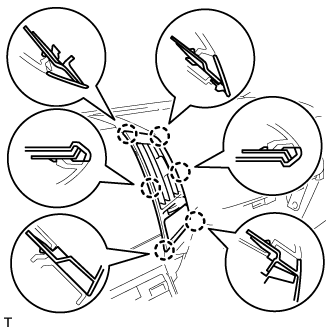
Attach the 6 claws to install the No. 4 instrument panel register assembly.
| 5. INSTALL NO. 3 INSTRUMENT PANEL REGISTER ASSEMBLY |
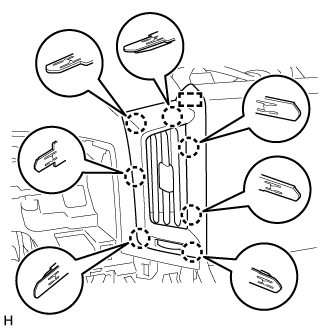
for Type A:
Attach the guide and 7 claws to install the No. 3 instrument panel register assembly.
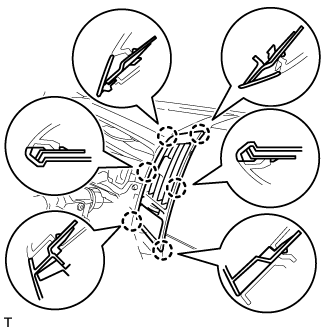
for Type B:
Attach the 6 claws to install the No. 3 instrument panel register assembly.
| 6. INSTALL NO. 1 SPEAKER OPENING COVER ASSEMBLY |
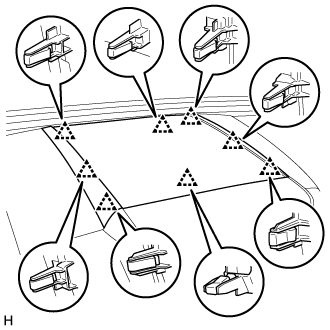 |
Attach the 8 clips to install the No. 1 speaker opening cover assembly.