Name Plate (W/ Tire Carrier) -- Installation |
- HINT:
- When installing the emblem, rear body name plate, back door name plate and rear license light cover, heat the vehicle body, emblem, rear body name plate, back door name plate and rear license light cover using a heat light.
- Standard Heating Temperature:
Item Temperature Vehicle Body 40 to 60°C (104 to 140°F) Emblem 20 to 30°C (68 to 86°F) Rear Body Name Plate 20 to 30°C (68 to 86°F) Back Door Name Plate 20 to 30°C (68 to 86°F) Rear License Light Cover 20 to 30°C (68 to 86°F)
- NOTICE:
- Do not heat the vehicle body, emblem, rear body name plate, back door name plat and rear license light cover excessively.
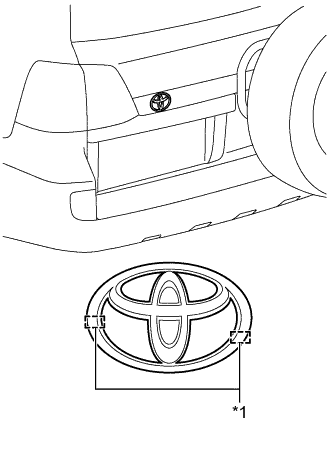
| 1. INSTALL SYMBOL EMBLEM |
Clean the vehicle body surface.
Text in Illustration *1 Boss Using a heat light, heat the vehicle body surface.
Remove the double-sided tape from the vehicle body.
Wipe off any tape adhesive residue with cleaner.
 |
Install a new emblem.
Using a heat light, heat the vehicle body and a new emblem.
Remove the peeling paper from the face of the emblem.
- HINT:
- After removing the peeling paper, keep the exposed adhesive free from foreign matter.
Align the boss positions and install the emblem.
- HINT:
- Press the emblem firmly to install it.
| 2. INSTALL REAR NO. 3 BODY NAME PLATE |
Clean the vehicle body surface.
Using a heat light, heat the vehicle body surface.
Remove the double-sided tape from the vehicle body.
Wipe off any tape adhesive residue with cleaner.
Install a new rear body name plate.
Using a heat light, heat the vehicle body and a new rear body name plate.
Remove the peeling paper from the face of the rear body name plate.
- HINT:
- After removing the peeling paper, keep the exposed adhesive free from foreign matter.
Install the rear body name plate in the position shown in the illustration.
- HINT:
- Press the rear body name plate firmly to install it.

Text in Illustration *A for Type A *B for Type B *a 222.5 mm (8.76 in.) *b 16 mm (0.630 in.) *c 224.5 mm (8.83 in.) *d 17 mm (0.669 in.)
| 3. INSTALL NO. 5 BACK DOOR NAME PLATE |
Clean the vehicle body surface.
Using a heat light, heat the vehicle body surface.
Remove the double-sided tape from the vehicle body.
Wipe off any tape adhesive residue with cleaner.
Install a new back door name plate.
Using a heat light, heat the vehicle body and a new back door name plate.
Remove the peeling paper from the face of the back door name plate.
- HINT:
- After removing the peeling paper, keep the exposed adhesive free from foreign matter.
Install the back door name plate in the position shown in the illustration.
- HINT:
- Press the back door name plate firmly to install it.

Text in Illustration *A for Type A - - *a 221 mm (8.70 in.) *b 159 mm (6.26 in.) *c 177.9 mm (7.00 in.) *d 222.7 mm (8.76 in.) *e 386.4 mm (15.2 in.) *f 220 mm (8.66 in.) *g 219.5 mm (8.64 in.) *h 228.4 mm (8.99 in.) *i 223.6 mm (8.80 in.) - 436.9 mm (17.2 in.) 
Text in Illustration *A for Type B - - *a 221 mm (8.70 in.) *b 159 mm (6.26 in.) *c 220 mm (8.66 in.) *d 219.5 mm (8.64 in.)
| 4. INSTALL REAR LICENSE LIGHT COVER |
Clean the vehicle body surface.
Using a heat light, heat the vehicle body surface.
Remove the double-sided tape from the vehicle body.
Wipe off any tape adhesive residue with cleaner.
Install a new rear license light cover.
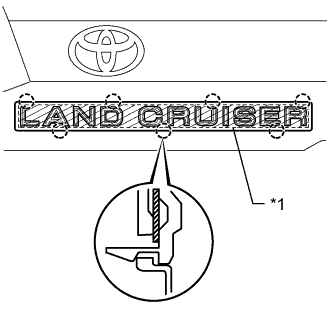
Text in Illustration *1 Double-sided Tape Using a heat light, heat the vehicle body and a new rear license light cover.
Remove the peeling paper from the face of the emblem.
- HINT:
- After removing the peeling paper, keep the exposed adhesive free from foreign matter.
Attach the 7 claws to install the rear license light cover.
- HINT:
- Press the rear license light cover firmly to install it.
 |