REMOVE SHROUD BLOWER ASSEMBLY (w/ Rear Air Conditioning System)
REMOVE TRANSMISSION OIL COOLER AIR DUCT (w/ Air Cooled Transmission Oil Cooler)
REMOVE OIL COOLER ASSEMBLY (w/ Air Cooled Transmission Oil Cooler)
Condenser -- Removal |
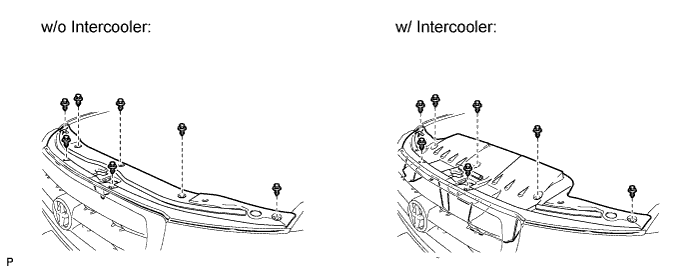
| 1. REMOVE UPPER RADIATOR SUPPORT SEAL |
Remove the 7 clips and radiator support seal.
| 2. RECOVER REFRIGERANT FROM REFRIGERATION SYSTEM |
Start the engine.
Turn the A/C switch on.
Operate the cooler compressor while the engine speed is approximately 1000 rpm for 5 to 6 minutes to circulate the refrigerant and collect the compressor oil remaining in each component into the cooler compressor.
Stop the engine.
Recover the refrigerant from the A/C system using a refrigerant recovery unit.
| 3. PRECAUTION |
- NOTICE:
- After turning the ignition switch off, waiting time may be required before disconnecting the cable from the battery terminal. Therefore, make sure to read the disconnecting the cable from the battery terminal notice before proceeding with work (Click here).
| 4. DISCONNECT CABLE FROM NEGATIVE BATTERY TERMINAL |
- NOTICE:
- When disconnecting the cable, some systems need to be initialized after the cable is reconnected (Click here).
| 5. REMOVE FRONT BUMPER COVER |
for Standard:
(Click here)
w/ Winch:
(Click here)
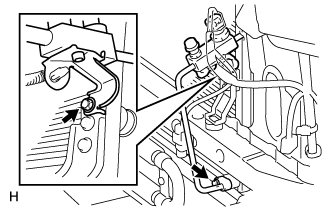
| 6. DISCONNECT NO. 1 COOLER REFRIGERANT DISCHARGE HOSE |
 |
Remove the bolt and disconnect the discharge hose from the cooler condenser.
- NOTICE:
- When removing the bolt, do not allow any tools to contact the pipe.
- When removing the bolt, hold a part of the pipe near the connector.
Remove O-ring from the discharge hose.
- NOTICE:
- Seal the openings of the disconnected parts using vinyl tape to prevent moisture and foreign matter from entering them.
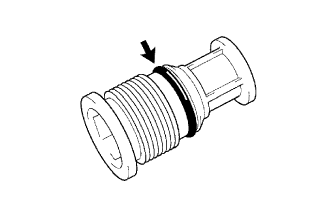
| 7. DISCONNECT COOLER REFRIGERANT LIQUID PIPE A |
 |
Remove the 2 bolts and disconnect the liquid pipe A from the cooler condenser.
- NOTICE:
- When removing the bolt, do not allow any tools to contact the pipe.
- When removing the bolt, hold a part of the pipe near the connector.
Remove O-ring from the liquid pipe A.
- NOTICE:
- Seal the openings of the disconnected parts using vinyl tape to prevent moisture and foreign matter from entering them.
| 8. REMOVE HIGH PITCHED HORN ASSEMBLY |
Remove the bolt and horn.
Disconnect the horn connector.
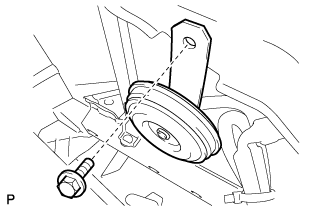 |
| 9. REMOVE LOW PITCHED HORN ASSEMBLY |
Remove the bolt and horn.
Disconnect the horn connector.
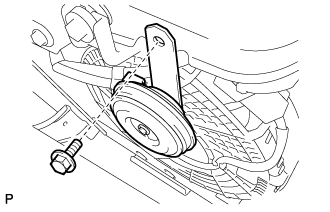 |
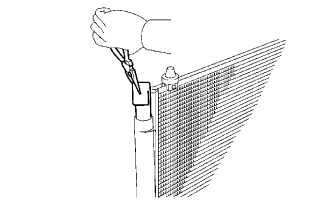
| 10. REMOVE SHROUD BLOWER ASSEMBLY (w/ Rear Air Conditioning System) |
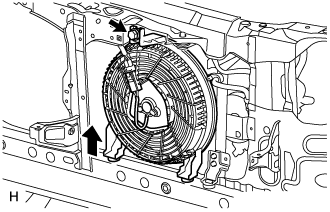 |
Disconnect the connector.
Remove the bolt and shroud blower as shown in the illustration.
| 11. REMOVE TRANSMISSION OIL COOLER AIR DUCT (w/ Air Cooled Transmission Oil Cooler) |
 |
Remove the 4 bolts and transmission oil cooler air duct.
| 12. REMOVE OIL COOLER ASSEMBLY (w/ Air Cooled Transmission Oil Cooler) |
 |
Remove the 4 bolts and oil cooler.
| 13. REMOVE HOOD LOCK SUPPORT BRACE SUB-ASSEMBLY |
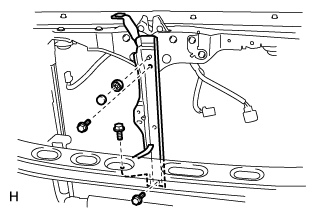 |
Remove the hood lock nut cap.
Remove the 3 bolts, nut and brace.
| 14. REMOVE HOOD LOCK CONTROL CABLE COVER |
Remove the 3 screws.
 |
Detach the claw and remove the cable cover.
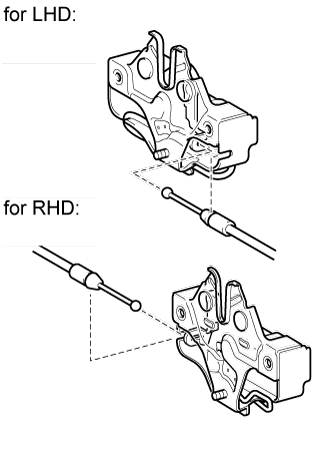
| 15. REMOVE HOOD LOCK ASSEMBLY |
Remove the 2 bolts and nut.
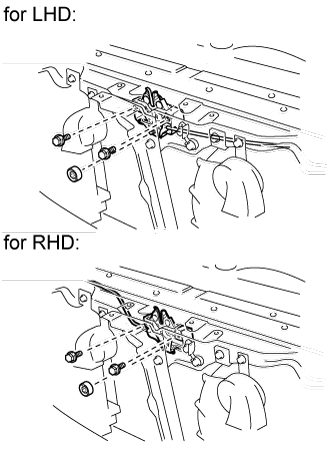 |
Remove the hood lock.
Disconnect the connector.
Disconnect the hood lock control cable.
 |
| 16. REMOVE RADIATOR SUPPORT SUB-ASSEMBLY |
 |
Remove the 8 bolts and radiator support.
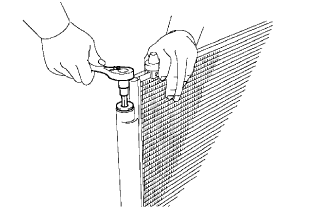
| 17. REMOVE COOLER CONDENSER ASSEMBLY |
Remove the cooler condenser as shown in the illustration.
 |
| 18. REMOVE COOLER DRYER |
Using a 14 mm socket hexagon wrench, remove the cap from the modulator.
 |
Remove O-ring from the cap.
 |
Using pliers, remove the cooler dryer.
 |