Outer Rear View Mirror Installation
INSTALL OUTER REAR VIEW MIRROR ASSEMBLY
INSTALL FRONT INNER DOOR GLASS WEATHERSTRIP LH
INSTALL FRONT DOOR TRIM BOARD SUB-ASSEMBLY LH
INSTALL DOOR ASSIST GRIP COVER LH
INSTALL FRONT UPPER ARMREST BASE PANEL LH
INSTALL FRONT DOOR INSIDE HANDLE BEZEL LH
INSTALL FRONT DOOR LOWER FRAME BRACKET GARNISH LH
ADJUST SIDE TELEVISION CAMERA ASSEMBLY
Outer Rear View Mirror -- Installation |
- HINT:
- Use the same procedure for RHD and LHD vehicles.
- The procedure listed below is for LHD vehicles.
- Use the same procedure for the RH and LH sides.
- The procedure listed below is for the LH side.
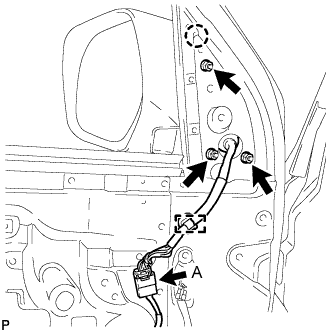
| 1. INSTALL OUTER REAR VIEW MIRROR ASSEMBLY |
Attach the claw and Install the mirror with the 3 nuts.
- Torque:
- 8.0 N*m{82 kgf*cm, 71 in.*lbf}
w/ Power Mirror Control System:
Attach the clamp.
Connect the connector labeled A.
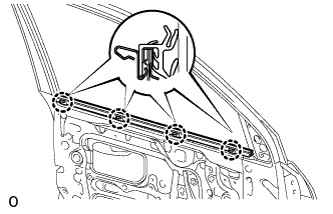
| 2. INSTALL FRONT INNER DOOR GLASS WEATHERSTRIP LH |
Attach the 4 claws to install the front inner door glass weatherstrip LH.
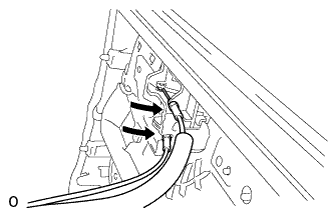
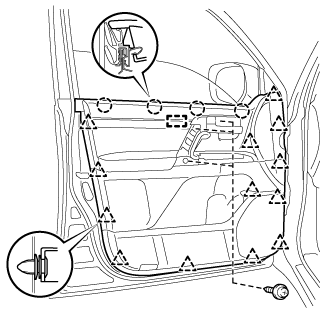
| 3. INSTALL FRONT DOOR TRIM BOARD SUB-ASSEMBLY LH |
Connect the connector.
Connect the front door lock remote control cable assembly LH and front door inside locking cable assembly LH to the front door inside handle sub-assembly LH.
Attach the 4 claws and 13 clips to install the front door trim board sub-assembly LH.
Install the 3 screws.
| 4. INSTALL DOOR ASSIST GRIP COVER LH |
Attach the 8 claws to install the door assist grip cover LH to the front door trim board sub-assembly LH.
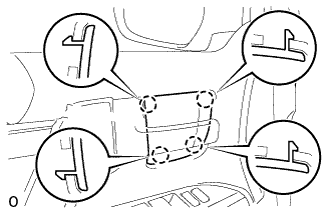
| 5. INSTALL FRONT UPPER ARMREST BASE PANEL LH |
Connect the connector.
Attach the 5 claws to install the armrest base panel.
| 6. INSTALL FRONT DOOR INSIDE HANDLE BEZEL LH |
Attach the 4 claws to install the front door inside handle bezel LH.
| 7. INSTALL FRONT DOOR LOWER FRAME BRACKET GARNISH LH |
Attach the clip and claw, and install the front door lower frame bracket garnish LH.
| 8. ADJUST SIDE TELEVISION CAMERA ASSEMBLY |
- NOTICE:
- When disconnecting the cable, some systems need to be initialized after the cable is reconnected (Click here).