Skid Control Sensor (For 2Wd) Removal
Brake. Toyota Rav4. Aca30, 33, 38 Gsa33 Zsa30, 35
DISCONNECT CABLE FROM NEGATIVE BATTERY TERMINAL
REMOVE REAR WHEEL
REMOVE DECK TRIM SIDE PANEL ASSEMBLY LH
REMOVE SKID CONTROL SENSOR WIRE
REMOVE REAR DISC BRAKE CYLINDER MOUNTING LH
REMOVE REAR DISC
REMOVE REAR AXLE HUB AND BEARING ASSEMBLY LH (SKID CONTROL SENSOR)
Skid Control Sensor (For 2Wd) -- Removal |
- HINT:
- Use the same procedure for the RH and LH sides.
- The procedures listed below are for the LH side.
| 1. DISCONNECT CABLE FROM NEGATIVE BATTERY TERMINAL |
- CAUTION:
- Wait at least 90 seconds after disconnecting the cable from the negative (-) battery terminal to disable the SRS system.
| 3. REMOVE DECK TRIM SIDE PANEL ASSEMBLY LH |
Remove the deck trim side panel LH (RAV4_ACA30 RM000001XUZ002X.html).
- HINT:
- Refer to the procedures from the removal of the rear door scuff plate LH up until the removal of the deck trim side panel LH.
| 4. REMOVE SKID CONTROL SENSOR WIRE |
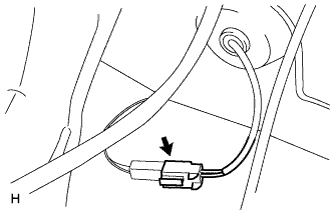
Disconnect the skid control sensor wire connector.
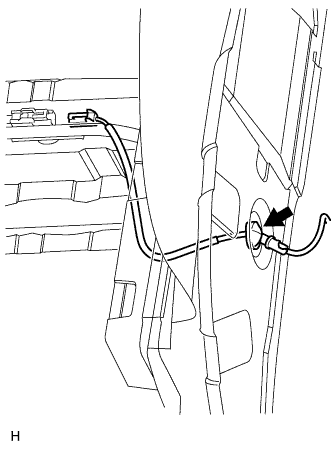
Disconnect the grommet of the skid control sensor wire from the hole of the wheel house.
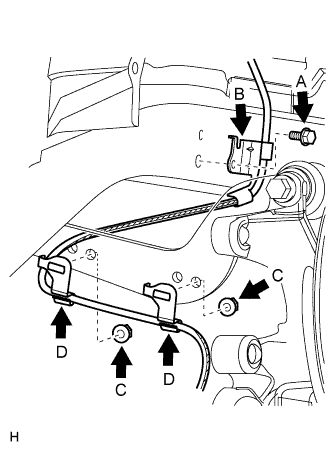
Remove the bolt (labeled A) and sensor clamp (labeled B) from the side member.
Remove the 2 nuts (labeled C) and 2 sensor clamps (labeled D) from the upper arm.
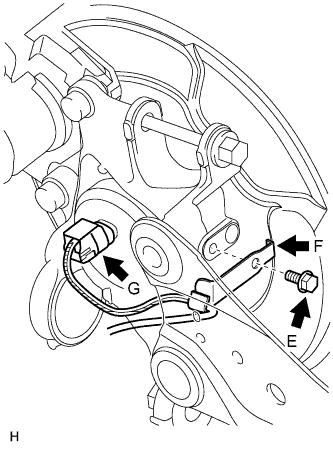
Remove the bolt (labeled E) and sensor clamp (labeled F) from the carrier.
Disconnect the skid control sensor wire connector (labeled G) from the skid control sensor.
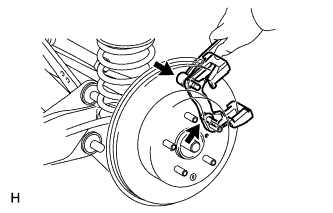
| 5. REMOVE REAR DISC BRAKE CYLINDER MOUNTING LH |
Remove the 2 bolts and cylinder mounting.
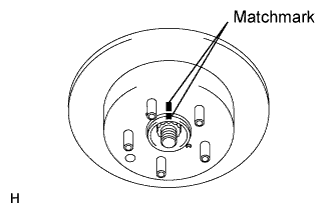
Put matchmarks on the disc and axle hub.
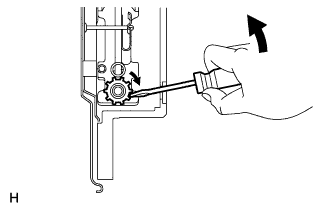
Release the parking brake.
Turn the shoe adjuster until the disc turns freely, and then remove the disc.
Install the shoe adjusting hole plug to the rear disc.
| 7. REMOVE REAR AXLE HUB AND BEARING ASSEMBLY LH (SKID CONTROL SENSOR) |
Remove the rear axle hub and bearing LH (RAV4_ACA30 RM00000227S005X.html).